Quantcast
Channel: Kaluhi's Kitchen
Viewing all 286 articles
Browse latest View live

Garlic Chicken Suya

$
0
0

I look forward to the day we shall truly live as a borderless world. Where we shall celebrate what makes us different instead is making it divide us. If it shall happen in my lifetime, that would be really dope! I love discovering new cultures, it opens up your mind to so much more and I get to actually realize we have a lot more in common than that we have otherwise. That is what African culture is all about in particular. We have so much in common. And when it comes to food, this becomes even more glaring. Sometimes, a certain food we think belongs to just one country may also be popular in another, just prepared in a different way. And that is what I discovered about chicken suya. It is a dish that is thought to be primarily Nigerian, but also quite popular in northern Cameroon. This is the final of my fusion recipes, with this one having a mix of Cameroon, Senegal (a largely Islamic country that does not eat pork hence I chose chicken for this recipe), Congo and Ivory coast.

I gave this my own twist and I have to say, this is one of my favorite chicken dishes this year and one I hope to have more of. I gave you a sneak peak in my Instastory on Sunday, and I am not exaggerating when I say this is the best suya recipe you will ever have.

garlic-chicken-suya_suya-recipes_chicken-recipes_west-african-food_african-food_african-food-bloggers_best-african-blogs_kaluhiskitchen-com

PREP TIME; 10 MIN     COOK TIME 10 MIN     MAKES:4

Ingredients

chicken-suya-ingredients_how-to-kame-chicken-suya_best-suya-recipes_kaluhiskitchen-com_african-food-bloggers_kaluhiskitchen-com

200 g chicken breast

1/2 a teaspoon of curry powder

1/2 a teaspoon of turmeric

1 birds eye chili

1 tablespoon of fresh rosemary

1/2 a teaspoon of dried thyme

1/2 a lemon

4 cloves of garlic

1/4 cup of plain yoghurt

2 maggi cubes


Method

Cube your chicken and place them in a container. To this, add your turmeric, curry, maggi cubes, garlic, and finely chopped chillies,rosemary, thyme and rosemary. Add the plain yoghurt and a splash of fresh lemon juice. Mix this all together and let it marinate for about two hours. If you shall be making whole chicken pieces (wings/drumsticks), the marination should take longer so that all the flavors can sink in. So 24 hours or more should be ideal. But for skewers, since the meat is in pieces and plenty of the surface area is exposed, 2 hours is adequate.

The maggi cubes have salt in them already, so if you have to add some salt, go easy. For me, I did not add any more as I felt it was adequate.

the-spices-used-for-chicken-suya-are-pepper-fresh-chili-garlic-and-rosemary-dried-thyme-maggi-cubes-and-some-salt_chicken-suya-recipes_kaluhiskitchen-com

marinte-the-chicken-in-some-plain-yoghurt-pepper-maggi-cubes-red-chillies-thyme-rosemary-and-garlic_kaluhiskitchen-com

After the marination time has lapsed, skewer the chicken cubes on your skewers alternating this with red onion slices. You can add tomatoes of you please. I got my metal skewers form Carre Four but normally I use wooden skeweres which are in Nakumatt’s party/outdoor section. If you use wooden skewers, be sure to soak them in some water before grilling so that they do not catch fire while cooking.

skewer-the-chicken-with-the-red-onion-for-extra-flavor_kaluhiskitchen-com

The chicken suya skewers look exactly like East African Mshikaki; only difference being suya is better seasoned and quite spicy, which I really love! I love how West African countries do not shy away from their spices. Let this cook on your grill for about 10 minutes 3 minutes on each side then remove from the heat.

grill-the-chicken-for-about-5-to-8-minutes-until-completely-cooked-through-and-slightly-charred_chicken-suya_kaluhiskitchen-com_african-food

Serve with your favorite side or just indulge and have this on your own. When I say I ate these all by myself , I was not joking. That’s what good food does to you; it turn you into a complete hog :DD

chicken-suya-1_best-suya-recipes_how-to-make-chicken-suya_african-food_kaluhiskitchen-com_best-african-food-blogs_best-kenyan-food

This garlic chicken suya would make a perfect dish to be prepared during your outdoor grilling parties. The chicken suya will be the star meal of your day, and compliments will not stop flowing in. And when guys ask you where you got the recipe from, be sure to lead them my way 😉

kenyan-food-bloggers_kenyan-food-blogs_kaluhis-recipes_kenyan-blogs_kaluhis-kitchen-recipes_garlic-chicken-suya

The plain yoghurt and the lemon tenderized the chicken perfectly. The garlic, rosemary and thyme come through very assertively and are complimented really well with the taste of the fresh chili, curry, red onion and pepper. Simply outstanding!

Now that the sun is out, get your grills ready, gather your friends and whip up some garlic chicken suya!

Happy Wednesday!

-K


Get your downloadable recipe here :))

download best african recipes_ Kaluhiskitchen.com recipes_kenyan food recipes


All content and images are copyright protected by
DMCA.com Protection Status
Do not copy in part or whole without giving due credit.

The post Garlic Chicken Suya appeared first on Kaluhi's Kitchen.


Sweet potatoes in Cardamom Coconut Cream Sauce

$
0
0

Him: Potatoes are not meant to be sweet

Me: Yes they aren’t. But they are not potatoes, but sweet potatoes.

Him: Exactly! SWEET potatoes. I don’t think that should even exist in nature. Nduma any day.

Me: Nduma is delicious,totally agree, but so are sweet potatoes. If I was a sweet potato would you still like me?

Him: I would. You would be a delicious one too! In fact, I would change into a sweet potato too, just to live with my sweet potato girl.

Me: And we’d make beautiful sweet potato spawn (laughs). So that means you like sweet potatoes?

Him: No, I like you. Even if you turned into a sweet potato, i’d still like you.

My boyfriend finds it fascinating that I remember the tiniest of moments and conversations between us. The above was one of our sweet potato arguments, which I always remember when I make sweet potatoes. Today’s recipe plays up the beautiful sweetness of this root vegetable and I hope you will like is as well :))

sweet-potatoes-in-cardamom-and-coconut-cream-sauce_how-to-use-coconut-cream-in-cooking_easy-recipes_kaluhi_kaluhiskitchen-com

PREP TIME: 10 MIN          COOK TIME:  25 MIN                  SERVES:     2

Ingredients:

ingredeints-for-my-sweet-potato-in-cardamom-and-coconut-cream-sauce_how-to-cook-sweet-potatatoes

2 sweet potatoes

4 cardamom seeds

1/2 a teaspoon of ginger

1/2 a cup of coconut cream

2 passion fruit

1 tablespoon of orange zest


Method

Peel your sweet potatoes and put them to boil. Slice them into pieces that are 1/2 an inch thick and set them aside.

IN  a pan, add your coconut cream and let it simmer on low heat. Add the freshly crushed cardamom, orange zest and the ginger  and mix them in.

allow-the-coconut-cream-to-simmer-down-together-with-some-cardamom-nad-orange-zest_kaluhiskitchen-com

Add the thinly sliced sweet potatoes and let this simmer for about 5-10 minutes on low heat.

add-the-sweet-potatoes-to-the-cream-and-allow-them-to-simmer-for-about-5-to-10-minutes-so-that-all-the-flavors-come-together-and-they-mald-well_kaluhi-recipes_kaluhiskitchen-com

Drizzle your passion fruit over it then  serve.

This is one of my healthy guilty pleasures nowadays. The sweet potato’s inherent sweetness is beautifully brought out by the coconut cream and complimented by the ginger. The passion fruit’s acidity balances everything out and also adds a pleasant crunch to it all.

best-food-blogs-in-the-world_best-food-bloggers-in-the-world_top-african-food-blogs_kenyan-food-blogs_top-kenyan-food-blog_kaluhiskitchen-com

Maybe this is one recipe that will make my beau cross over to sweet potato goodness. Maybe :DD. I will make this for him soon and tell you guys about it, and I have a feeling this will finally win him over :DD

how-to-make-sweet-potatoes-in-cardamom-coconut-cream-sauce_best-food-blogs-in-the-world_best-food-bloggers-in-the-world_kaluhiskitchen-com

Be it for fussy children or picky adults, this is one recipe that will always be a star at you breakfast table or brunch banquet. Do give it a try!

kenyan-food_kenyan-food-bloggers_kenyan-bloggers_african-food-bloggers_best-african-blogs_kaluhi_kaluhiskitchen-com

To great food!

-K


Get your downloadable recipe here :))

download best african recipes_ Kaluhiskitchen.com recipes_kenyan food recipes


All content and images are copyright protected by
DMCA.com Protection Status
Do not copy in part or whole without giving due credit.

The post Sweet potatoes in Cardamom Coconut Cream Sauce appeared first on Kaluhi's Kitchen.

Mango & Cardamom Lassi

$
0
0

One of the things I will eternally love about December is that it marks the commencement of my favorite fruit season: mango season. And by this poll, Mango season is definitely your favorite fruit season too! I think if there is one fruit I can live on for the rest of my life, it would be mango. I love this fruit, not only because of its ability to take up other flavors so well, but also because of it’s versatility. My sisters call me ‘mama maembe’ (mother of mangoes) because of my absolute love for this fruit. And quite frankly, I do not mind that moniker :DD

To kick off the  mango season this time round, I have made an absolutely luxurious mango lassi with warmth of whole cardamom and a hint of sweet malt. As fully get into hot afternoons, clear skies and sunglasses weather, my mango and cardamom lassi is just perfect for every occasion and every mood!

mango-and-cardamom-lassi_how-to-make-a-lassi_mango-lassi_kaluhiskitchen-com

PREP TIME: 5 MIN       MAKE TIME: 20 MIN       SERVES:2

Ingredients

mango-lassi-ingredients__how-to-make-a-lassi-_lassi-laced-with-guinness-stout_kaluhiskitchen-com


1 large apple-mango

250 ml of plain yogurt

2 tablespoons of honey

1 teaspoon of whole cardamom

1 teaspoon of freshly grated ginger

1 tablespoon of finely chopped mint

Mint leaves for garnish

3 tablespoons of Guinness stout

Method

Wash your mango and peel it Slice it into small pieces. Set aside. Finely chop your must, grate your ginger and set all those aside too. Crush the cardamom pod and grind the black seed into a powder using a pestle and mortar.

In a blender, add the plain yogurt, followed by the mango, and the rest of the other ingredients.

how-to-make-a-mango-cardamom-lassi-with-fresh-mint-mangoes-ginger-cardamom-and-ginger_how-to-make-a-lassi_best-african-recipes

For this lassi, we want a HINT of booziness (clear emphasis on hint). It is for that reason that we added 3 tablespoons of Guinness stout. Remember, with beer, depending on the other ingredients used in the recipe, it could either bring out it’s sweetness or it’s bitterness. For this sweet drink, the sweetness of the malt was really brought out. Do not add too much beer as it will overpower the taste of the other ingredients and greatly change the consistency. A few tablespoons is enough.

add-some-guinness-into-a-blender-with-the-rest-of-the-ingredients-to-add-a-hint-of-booziness_mango-cardamom-lassi_kaluhiskitchen-com

Blend until they are all combined. Do not blend it for too long since it will become much lighter. Just blend until they are just combined. Ensure you slice your mango as small as possible so that it does not blitz for too long.

blend-all-the-ingredietns-until-all-are-combined-and-mixed-in-well_kaluhiskitchen-con_mango-and-cardamom-lassi_kenyan-food

Ladle this into your goblet and enjoy. The aroma that emanated from my blender was just so inviting and out of this world!!

laddle-the-lassi-into-a-goblet-and-garnish-with-some-mint-and-enjoy_kaluhiskitchen-com_best-kenyan-food-blogs

When people talk about edible sunshine, this is definitely it! A truly mellow drink perfect for an outdoor picnic with friends, or a cozy indoor brunch. You can also have this together with your meals if you are looking to feeling really full. We are in the holidays so that should be the agenda anyway :DD. I would have my mango and cardamom lassi with my meatball tikka masala and chapati, since the sweetness of the lassi would temper the heat of the meatballs.

how-to-make-a-lassi_best-lassi-recipes_-mango-and-cardamom-lassi_guinness-recipes_top-guinness-recipes_kaluhiskitchen-com

Mango and ginger are always a beautiful match. Always! The sweetness of Guinness stout is brought out in this lassi because of the fruit and the honey. The mint balances the sweetness out and the cardamom provides a pleasant aroma and  gives it more character and depth. This is one drink you must have as often as possible this holiday season because it is simply worth it!

top-kenyan-food-bloggers_top-food-bloggers-in-the-world_kaluhiskitchen-com_how-to-make-a-lassi_indian-dessert-recipes_kaluhi-adagala

TGIF and Cheers to the weekend!

-K


Get your downloadable recipe here :))

download best african recipes_ Kaluhiskitchen.com recipes_kenyan food recipes


All content and images are copyright protected by
DMCA.com Protection Status
Do not copy in part or whole without giving due credit.

The post Mango & Cardamom Lassi appeared first on Kaluhi's Kitchen.

Lessons & Musings IV

$
0
0

Another beautiful year down and I cannot be more thankful for the glorious 365 days that are now history. Thank you for all the memories made, new friendships formed, goals achieved and fun had. This is my final post of the year and I would like to give you lessons and musings I have had this year. I would also like to know what you guys have learnt this year in the comment section. But first, read through mine :))

Know your *expletive* worth

I am one of those people who gets soooo motivated when people tell me I cannot do something/achieve something. Instead of letting negative comments bog me down, I use them as fuel to power me to even greater heights. Earlier this year, I was in a meeting where the person chairing the meeting literally told us we would never amount to anything without completely tying our individual brands to his. I thought about that statement on my way home, and I decided to cut ties with them. Why would I want to work with someone who does not believe in my potential? One who only wants to use me and not grow me? People will gas light you into thinking you are nothing without them, and if you do not know your potential, you will believe them and be at their mercy. I knew then my work was amazing, and my potential limitless and I refused to let anyone make me believe otherwise. When you want to work with someone  coz of the brilliant expression of their gift, gas lighting them to get them to work with you is the wrong way to go about it.

Here is what I learnt:

  1. You have no business working with and for someone who does not believe you will amount to anything. Do not surround yourself with negative people. It rubs off on you. Cut ties and go your way, you will be fine! If not, enormously better!
  2. Do not let anyone manipulate you into thinking they are the ones who put fire to your God given gift. You had that gift before them and you will still have it after them.
  3. Do not be too dependent on anyone as you grow in your career. Granted, we all benefit from knowing someone who knows someone, but also, make sure you can stand on your own two feet and grow your brand/business/career by your own hard work and not just waiting for hand outs from connected people. It refines your work ethic.
  4. Not everyone will be happy to see you win, unless they are direct beneficiaries of your victories. It is just how this world works. Surround yourself with those who clap when you win, and if you don’t have those people around , honey celebrate your own victories! Pop that champagne when you achieve your goals. It is not stuck up, it is just giving yourself a beautiful pat on the back for your hard work!
  5. Take risks. Remove the training wheels. Cut the cord. Dive in the deep end all on your own. More often than not, the risk leads to more and more victories. As I always say, If God placed that dream in your heart, He has also given you the ability to bring it to life. Do not worry, utakuwa sawa!
  6. As a creative especially,do not allow anyone to exploit you. Know your worth. Pray for wisdom to know what to do pro bono and what you deserve to be paid for. Know your worth!!!

Beauty of Solitude

I love being around people. I love meeting new people. But I also find it draining at times and after all that, I like retreating into my space and just being alone. To recharge. Being an ambivert, time with other people is just as important as time alone. I have come to really really reaaalllyyyy love solitude. Solitude is not loneliness. The former is calming and the latter is unnerving and negative. Solitude is being able to enjoy your own company. Solitude is  being able to have as much fun on your own as you would in the company of others. Solitude is golden. It allows me to listen to myself, center my plans, take stock of myself and turn on my weird unapologetically. I am looking forward to more dates by myself, being my own wing woman, conversations with myself, cracking myself up, shopping alone, actually shutting the world out (which is actually hard nowadays) and being one with myself.

#KupikaNaKaluhi

I would like to thank everyone who tried out my recipes and took pics as they cooked. Most importantly I am soooooo happy you and your families enjoy great food and that your mealtimes have become an experience and not just something you need to do. I shared some of your masterpieces on twitter using the hash tag #KupikaNaKaluhi, which is swahili for cooking with Kaluhi. Do log onto twitter and check out what everyone has been up to in the kitchen via that hashtag. In case I forgot to share your picture (sorry!!), you can just tweet the same and use the hashtag #KupikaNaKaluhi so that we can all see your dopeness! Thank you so so much for your support through my 2 and a half years of blogging! I couldn’t ask for a better readership <3

Also, when you see an ingredient you may not be familiar with in my recipes, I am always a tweet /a DM away. Instead of letting a new ingredient intimidate you into not trying a recipe, just ask what it is and where you can find it. I don’t bite :))

Taking stock

I know I stopped doing taking stock posts since I found them too truncated for someone like me who writes a lot. But let me throw in some of the key points just because :))

Taking: myself a lot less seriously especially as a brand on social media. I want to tweet and post as me and not as rigid as a business would. I want people to talk to me, and not to the brand. I want to be silly, to be strange, to be me, because I am a person before I am a brand and even after my brand is long gone.

Wondering: how on earth people on twitter think I am a kitchen LOL LOL LOL! To those who think kitchens have names, can type and can cook, please reassess your state of mind. lol! Just to be clear, I am a person.

Loving: My boyfriend so much right now. The longer you stay with someone, the more you know them and the more apparent their faults become. And that’s when it gets hard. But is is also a time where you see how your short comings are complimented by their strengths and how each day is work towards making each other the best version of themselves. It is hard. Relationships are not easy, and ours, like any other is not perfect, but after we overcome each trial, I know I cant really be with anyone else but him.

Knowing: the grade one gets in just one exam does not determine in finality the direction their life will take or who they will end up being. This is in light of the freshly released KCSE results and the Kenyan obsession with grades. One exam does not determine your future, and trust me, in two years, no one will care about or remember those grades LOL.

Smelling: a tester of my current favorite scent ‘Si’ by Giorgio Armani!! I hope to finally get a full bottle early next year because new year, new scent. I am finally (slowly) outgrowing Midnight Fantasy, but I am so stoked that the scent I am going for is still very feminine and delicate but mature compared to my other scent (which I still won’t completely let go of HA!)

Wearing: Lots of off shoulder tops and dresses. I love the romantic,girly  feel of anything off shoulder!

Obsessed: With the McClure twins!!! Like OBSESSED!!!!! My uterus has been whispering things into my ears ever since I started watching their cuteness <3

Wishing: I could wear my big girl pants already and just get over my fear of deep water. I can’t swim guys *hides face in shame* On a serious note, this hot season (we don’t have summers in Kenya, just hot cool and rainy seasons but our weather is pleasantly warm all year round) I must learn. So I have about three months to go. Who wants to help me? *sobs*

Feeling: Lazy. Sluggish. Like taking a 12 month holiday So relaxed that I want the holidays to extend a bit longer

My 2016 highlights

For me, 2016 has been one brilliant year! I have seen the hand of God in everything I touched and embarked upon. For me, it has been a year of great leaps and I couldn’t have asked for a more beautiful year . Each month this past year, I was recording the moments that I truly loved and how they made me feel. This list made me feel better, even motivated, during those times when I felt I had nothing going on. I will share some of my favorite 2016 moments with you :))

1. Winning best food blog in Kenya for 2016. Thankful to everyone who has been part of my journey since the inception of my blog in 2014 and believed in me. Cheers to many more victories to come :))

2. My trip to Liverpool, United Kingdom. I watched my first live match, Liverpool vs Manchester United. I must admit, I know very little about football *bows head in shame*, but it was a once in a life time, exhilarating experience that I will live to remember!


3. And Dublin, Ireland; which is now one of my favorite cities in the world <3. Our visit to the Guinness Storehouse was mad fun and very insightful. Have you tried out any of my Guinness recipes? If not, you can try out my Triple D Drumsticks, which also happened to be the most popular #Krecipe of the year 2016!

4. And my favorite one yet, Johannesburg with Google.

5. Being featured on CNN International, I mean…. !!!! And I also recently took over the Instagram account of CNN Africa!

6. That moment when Ted Allen, host of Food Network’s Chopped, personally answered MY question. I was literally screaming when I saw this video on Instagram. So dope!

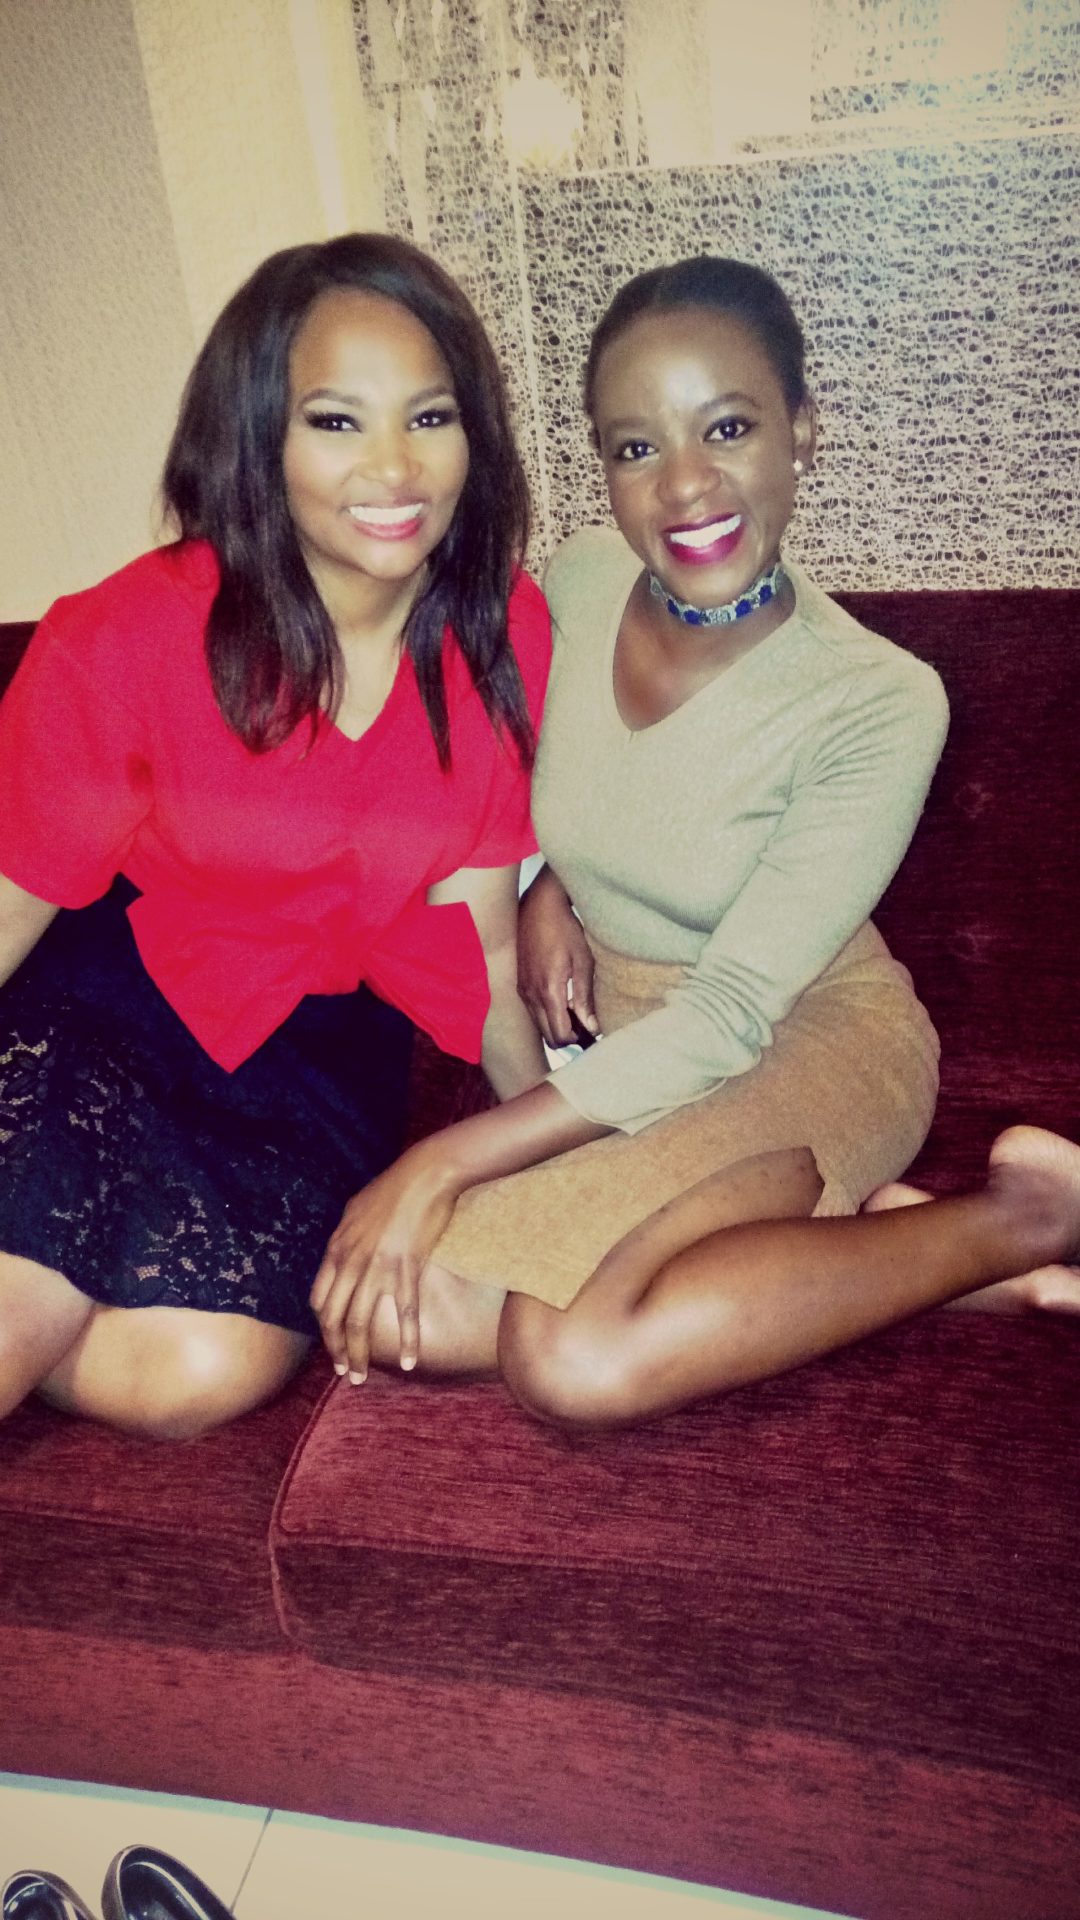
7. Omg guys!!!! The day I met SIBAAAAAAAAA! I will never ever ever forget. If you know me personally, you know just how much I am obsessed with Siba Mtongana! This was a dream come true to meet my ULTIMATE role model here in Nairobi and have a one on one interview with her! She is such a trail blazer! You can read about my interview with her here.

Best African Food Blogger with African Celebrity food personality Siba Mtongana_ of Food Network's Siba's Table

Kaluhi Adagala and Siba Mtongana at her exclusive interview at Radisson blu Nairobi_

8. My eBook launch. My little baby, which I am very very proud of. It is not a joke making an eBook, let alone a physical one. But this happened and I am continually humbled and grateful of the support you have shown, especially my international readers! Asanteni sana! Details about how you can get a copy can be found  HERE

IN MY KITCHEN by kaluhi adagala_KENYAN COOK BOOKS_AFRICAN COOK BOOKS_BEST KENYAN FOOD BLOGS

9. Attending my first ever Lamu food festival. I cannot wait to go back to Lamu, but this time without the pressure of work. I just want to soak in the beauty of the island paradise and do things at the pace of the island.

Kenyan culture_henna_kinu_pestle and mortar_Lamu food Festival_kaluhiskitchen.com_faluda

kiwandani house_affordable housing at the kenyan coast_bed and breakfast at the coast_kaluhiskitchen.com

beef mshikaki roasted over embers of charcoal

beef mshikaki roasted over embers of charcoal

My plans for 2017

Just two:

1. To be a better human, who contributes to society and to individual lives in a positive way. To be a better sister, daughter, girlfriend, a better friend and acquaintance.

2. Professionally, I am going for GLOBAL DOMINATION. I am not saying that for the sake of saying, I am actually going to take over the world. Here is to more risks, casting my nets wider, doing things that terrify me but deep down exhilarate me and pushing boundaries. After all, success does not follow the timid :)).

Cheers to greatness and to 2017!!

-K


The post Lessons & Musings IV appeared first on Kaluhi's Kitchen.

Dirty Diana Cocktail

$
0
0

I did a post on 30 random things about me just over a year ago. One of the things I revealed about myself that very few of you may know is that my first name is Diana. Yes, Kaluhi is my (middle) name too, and the one my readers know me by since I wanted my brand to strongly identify as African from the very beginning. It was just a matter of time before I named one of my recipes after myself; and this cocktail was just too good to name it after it’s ingredients. Dirty Diana. Sounds a bit risque to some, yet peaks one’s interest a little bit. Mystery. Assertion. Power. Does it have anything to do with me? I don’t know 🙂 Let those who know me well decide that *evil grin*

I was home with my youngest sister chatting away about the things we just cannot wait to accomplish this year. And the perfect conversation starter was my Dirty Diana cocktail.  Food is simply a lot more delicious when you can share it with people you love, is it not? Today, I give you this recipe, which I hope to bring you just as much joy and keep you cool as we get into sweltering January. My Dirty Diana Cocktail will take you to the moon and back!

PREP TIME: 20 MIN   MAKE TIME: 30 MIN    SERVES:2

Ingredients:

1 cup of strawberries

1 cup of pineapples

1 tablespoon of honey

1/4 cup of whiskey

3 tablespoons of finely chopped mint leaves

2 whole cloves

2 cardamom seeds

Soda water


METHOD

Puree your strawberries and pineapple. You can blend them together into a puree or separately, whichever way, you will still reach intended destination. Put these in a sufuria together with 1/2 a cup of water, the honey, the cloves, cardamom and the finely chopped mint leaves. Allow this to simmer on low heat for about 20 minutes. It should thicken and all the flavors should come together.

Once done, remove from the heat and strain the mixture. Allow ti to cool down to room temperature.

Once cool, mix the fruit syrup with the whiskey until completely combined. Fill your glass with some ice and scatter some fresh mint leaves.

Pour the whiskey fruit mixture in your glasses and top with some soda water.

Enjoy!

For me, what makes a drink phenomenal, is how each note unfolds as you sip and the general complexity of the flavor. My dirty Diana cocktail fulfills both! You can taste the sweetness of the honey and the strawberry then this opens up to the warmth of the clove and cardamon and finally the coolness of the mint. Each sip is like an exotic ride through sun bathed East African plains!

My dirty Diana cocktail is so easy to make at home and perfect for outdoor meals. Now that it is brilliantly sunny and hot in most parts of our continent, enjoy every single one of these days while downing a drink you will son get addicted to. You can add your own twist to this; try a different herb, a different berry/succulent fruit, a different spice. If you are not sure about a combination you want to go for, tweet me and we will make something bomb, and heck, you can even name it after yourself too!

In the mean time, look at the picture below, and imagine yourself reaching our for a glass, taking a huge gulp and the perfectly chilled, uniquely flavored cocktail trickling down your throat.

Have a spectacular Tuesday and a glorious year ahead!

-K


Get your downloadable recipe here :))

download best african recipes_ Kaluhiskitchen.com recipes_kenyan food recipes


All content and images are copyright protected by
DMCA.com Protection Status
Do not copy without expressly asking for permission or giving due credit

The post Dirty Diana Cocktail appeared first on Kaluhi's Kitchen.

Goat Meat Garlic Penne Pasta

$
0
0

One of the things I love about Christmas period besides precious family time is the food (duh!!). In my family, we all love to cook, and when we come together, it is one hell of a feast! During the past Christmas, my uncle Odemu brought over some goat meat to roast specifically for dinner. Since we were the hosts, we prepared the lunch banquet, but for the goat meat choma dinner, Uncle Odemu wanted to handle it himself. And we  were not complaining, because we knew he could throw down one hell of a choma! As the sun set, the charcoal grill was lit and soon the delicious sizzle of tender meat filled the air. As my sisters and I prepared the kachumbari, my aunt made some ugali and my cousin and namesake basted the done nyama choma as it came hot off the grill in a sweet chili garlic jerk sauce. After everything was ready, we all sat outside, enjoying the warm December night and hearty conversations. I ate like a pig LOL! The meat that was left over was frozen to be eaten at later dates and those who could carried some home with them. For the final piece of meat that we had, I decided to revamp it and incorporate it into my delicious pasta dish: my goat meat garlic penne pasta. Leftovers are never boring afterall!

PREP TIME: 10 MIN        COOK TIME: 20 MIN        SERVES:4

Ingredients

400g penne pasta

1 red onion, finely diced

1 tablespoon of pilau masala

1 1/2 cup of chopped goat meat

2 carrots, thinly chopped

5 cloves of garlic, minced

Fresh coriander, garnish

Salt to taste

Vegetable oil for frying

Method

In a sufuria with boiling water, add your penne pasta to cook. Once done, drain the excess liquid into a cup and set aside. Run the pasta through cold water so that they do not clump together while you prepare your meat.

The pasta water is an important component while making any saucy pasta dish because it is very starchy. It aids in the thickening of the meat we are going to prepare and any sauce that you may wish prepare.

For your meat, add your thinly chopped red onion. Let them stay on the heat until softened. Add your carrots, and after two minutes, add the meat. Add the pilau masala and the garlic and 1/2 a cup of the pasta water and allow all this to simmer down for about 5 minutes.

Yes, you can use pilau masala in several other dishes besides just pilau :)). I used just one spice for this dish since the meat I was using was already seasoned and basted so it was already packed with flavor and I did not want to overdo it. If your left over nyama choma is not seasoned before hand, you can add any spice(s) of your choice to give it a kick.

Once your masala is mixed in, add the pasta water bit by bit and let this simmer for about 5 minutes. Because the water is very starchy, thickening of the sauce will not take too much time.

Add the penne pasta to it and toss it all together. I chose penne pasta since they tend not to be as chewy in comparison to other shaped pasta. However, you can experiment with any other pasta shape and let me know how it all goes ;))

After a minute, remove form the heat and garnish with fresh coriander. Who says leftovers are boring???!

This was beautifully meaty, and the contrast between the slight crunch of the carrots and the tenderness of the pasta made the eating experience even better. Simple flavors yet quite complex ones and to think that this was developed in such a short period of time makes it even better.

If you have left over rice, why not make my raisin and carrot fried rice. If you have some left over chicken, maybe you should make my grilled chicken sandwich. Left over minced beef? Then this dish is for you! How do you guys revamp your left overs? Which is your favorite left over to upgrade? Let me know in the comments below or join the #Konversation on twitter. I would love to learn a thing or two from you :))

Cheers!

-K


Get your downloadable recipe here :))

download best african recipes_ Kaluhiskitchen.com recipes_kenyan food recipes


All content and images are copyright protected by
DMCA.com Protection Status
Do not copy in part or whole without giving due credit.

The post Goat Meat Garlic Penne Pasta appeared first on Kaluhi's Kitchen.

Rosemary and Egg Plant Fried Rice

$
0
0

You know, I do not believe in the concept of ‘Njaanuary‘. Njaanuary is a Kenyan term (that directly translates to ‘Hunger January) used to describe apparent financial strain and destitute brokenness that people seem to undergo every January, and funny enough, will experience it every first month of every year as long as they live . For me, if you spend frugally in December, you just can’t be dead broke and struggling in January. Yes, you can enjoy your December holidays, but with prudence, good planning and with the future in mind. Please dear readers, don’t make finishing all your money in December a habit, pretty please <3.  One thing I agree however, is after the holidays, our fridges are packed with left overs from the festivities. I shared one left over recipe with you last week that you can check out here. Left overs too do not indicate brokenness nor are they bad to have, but just encourage a culture that is not one of wastefulness. I love the prospect of revamping left overs since you can literally make anything! And the aspect of developing a new dish from one that was already complete is pretty exciting! I made this rosemary and eggplant fried rice a couple of weeks ago for my younger sisters before they reported back to college life. They loved it! It was soooo easy to make, very light and delicious too. Have some left over rice in your fridge? Let’s go on a kitchen adventure :))

PREP TIME: 10 MIN      MAKE TIME: 30 MIN     SERVES: 4

Ingredients:

2 cups of left over rice

1 courgette

1 small egg plant

3/4 tablespoon of black pepper

1/2 a teaspoon of turmeric

1/4 teaspoon of cayenne pepper

1 tablespoon of fresh rosemary

2 tablespoons of coriander stalks

1 red onion, finely chopped

1 tablespoon of soy sauce

Fresh coriander for garnish


Method.

In a pan, add your red onion, minced garlic, minced ginger rosemary and coriander stalks. Coriander stalks have a ton of flavor and I love including them in my fried rice, samosa fillings and sometimes githeri too! The flavor is more concentrated in the stalks and elevates the flavors to a great extent. Don’t throw the stalks and always save them for some magic! Let this simmer for about a minute then add all the spices. Allow these to cook down for about 4-5 minutes  or until the onions have softened. The spices need to totally cook down before adding anything else so that they are not grainy.

Add your courgette and egg plant and toss these with the other veggies on high heat until they are just cooked. Ain’t no body got time for soggy lifeless vegetables. Cook them until they are *just* cooked. This will take about two to three minutes. Do not let them get soggy and chewy please please, i beg! Also, chopping them smaller will make them spend less time on the heat and look much appealing overall. So always opt for the smaller, thinner pieces.

Add your left over rice and toss it along with your sautee vegetables. Add the soy sauce and toss this until combined. Allow this to stay on the heat for about two minutes, there after, garnish with fresh coriander leaves and serve.

This was so easy to prepare and is perfect for a week night; when you want something delicious to have, but one that will not take an eternity to put together. It is also a really fun way to get your children to eat vegetables they would on other days literally run away from LOL!

You can also check out my sweet corn fried rice and my raisin and carrot fried rice . Try out all three ;)), and let me know which one you and your fam like best. <3

This would be absolutely splendid with my goat dry fry or meatball tikka masala or kuku kienyeji and a side of deliciously chilled coleslaw. Do not let your left over rice sulk in the fridge. Revamp it and you’ll see good food is not beyond your reach!

Much love!

-K


Get your downloadable recipe here :))

download best african recipes_ Kaluhiskitchen.com recipes_kenyan food recipes


All content and images are copyright protected by
DMCA.com Protection Status
Do not copy without expressly asking for permission or giving due credit

The post Rosemary and Egg Plant Fried Rice appeared first on Kaluhi's Kitchen.

Honey Whiskey Masala Fries

$
0
0

If you love potatoes, you know very well when that craving (or should I say Kraving;))) kicks in, you just cannot shut it down! It is like that itch that you just cannot ignore, or satisfy by scratching indirectly. You have to go all in and satisfy it. When I had one of such kravings a few weeks ago, I decided to make fries. I rarely eat fries, but when I do, especially at home, I like to make it worth while and usually, that involves making masala fries. I made this first masala fries recipe in 2015 (check it out if you have not and please forgive my photography skills back then :DD) and today’s recipe takes it all to a stratospheric level!! No mediocre! Because as you know you know, with K, things are always FIRE!!

Today we have the most perfect Friday/ weekend recipe: Honey Whiskey Masala Fries

PREP TIME: 10 MIN MAKE TIME:25 MIN SERVES: 1

Ingredients

4 potatoes, peeled and chopped

1/4 cup of whiskey

1/2 a red onion, finely chopped

2 tablespoons of freshly squeezed lemon juice

1 tomato, grated

1 tablespoon of tomato paste

1 tablespoon of honey

4 cloves of garlic, minced

1/4 of green bell pepper (or coriander), finely chopped for garnish

1/2 a 1/2 a teaspoon of black pepper

1/4 teaspoon of turmeric

1/4 teaspoon of paprika

Vegetable oil for frying

Salt to taste

Method
In a pan, add your vegetable oil and heat it. Add your peeled and chopped potatoes and allow them to cook until done. Once that is done, remove your fries from the heat, drain any excess oil and add them to a bowl. After that is done, begin working on your sauce.

In a sufuria, add your red onion, garlic, the spices and allow this to cook down until the onions have softened and the garlic is fragrant.

Add your tomatoes,finely chopped chillies, lemon juice and the tomato paste and honey. Add the honey a table spoon at a time. Taste your tomatoes and if need be add more. If you add too much at a time, this will throw off the taste of everything. Be very careful at this stage; you want mildly sweet spicy fries, not honey fries.

Let this simmer down for about 5 minutes. Add your whiskey and allow this to simmer for 5-9 minutes for all the alcohol to cook off. Remember, we only need 1/4 cup for the quantities I have used. The sauce needs to have **a hint** of booziness, not taste like a shot. A little goes a long way.

Besides whiskey, I would recommend brandy, a dry white wine or rum. If you choose not to use any alcohol for one reason or another, feel free to leave it out, but your fries will not have the (amazing!!!) boozy kick as a result.

I know one of you is thinking: “So, will I get drunk when I cook with Whiskey (or any alcoholic drink)? “

The answer: NO

Cooking is very much a science as it is an art. Do you guys remember when we were learning about various liquid boiling points during Chemistry class in high school? We learnt that alcohol has a very low boiling point. Meaning, it evaporates very fast when heat is applied. Now, when you cook with an alcoholic beverage, the alcohol evaporates in the very early stages of cooking. It is cooked off. What is left behind is the other ingredients and flavors that were used to make the alcoholic beverage; and that is EXACTLY what we are after. We cook with alcohol not to get high (which doesn’t even happen), but to get to the other layered flavors there in. Please please remember this! When someone tells you they got high after eating food cooked with alcohol, just know they are lying because you know and understand the science behind what happens when you cook with alcohol.

After about 10 more minutes, the sauce will have thickened and the flavors completely melded, remove the sauce from the heat and pour it onto the fries.

Toss them until completely coated. The sauce needs to be thick so that it coats the fries well. You want juicy looking fries, not fries that look like they have been soaked in watery stew.

Once done, sit on the kitchen floor, eat from the damn bowl like a hungry demon and lick it clean serve. Garnish with your bell pepper (or coriander) then serve!

I think I do not need to go deep into convincing you how delicious my honey whiskey masala fries are! I gave you a teaser on twitter and you guys said thought end of January was too far to have the recipe. Thank God, the wait is over!! This is simply a MUST TRY recipe for all.

Enjoy this with something meaty like my thyme and garlic goat meat dry fry along with a light kachumbari or a fruity salad for balance. Or if you please, have it on their own, with a tall glass of your fave juice.

The beauty about these masala fries is of course the hint of booziness. Make sure your sauce it thick so that it coats the fries well. The fries are still dominantly hot, but the sweetness of the honey peeks through balancing everything out. These were so delicious I had to  hold myself back as I was about to fix myself another plate.

Can we please make 2017 the year that food pics become downloadable onto your table, hot and ready!? But as we wait for that, give this recipe a try :))

To fantastic food!

-K


Get your downloadable recipe here :))

download best african recipes_ Kaluhiskitchen.com recipes_kenyan food recipes


All content and images are copyright protected by
DMCA.com Protection Status
Do not copy in part or whole without giving due credit.

The post Honey Whiskey Masala Fries appeared first on Kaluhi's Kitchen.


Ukwaju (Tamarind) Marinated Spicy Chicken Thighs

$
0
0

” Lazima tumake hii tena on Saturday!!!” (We must make this again this Saturday!!!) My youngest sister said after she saw the  sneak peak I shared of this recipe on my Instagram Story on Monday. You guys were equally as excited and looked forward to having this recipe on the blog. I revealed that I had added a little twist to my usual chicken marinade ingredients that my mom taught me and the results were explosively delicious. Since I had some Ukwaju (tamarind) sitting pretty in the fridge, I decided to incorporate it into the marinade; and that has been one of the best cooking decisions I have made in a long time! Supper this past Monday was spectacular!!! And for the sake of my youngest sister, I shall make this once again this coming weekend and have her enjoy the same deliciousness! You should too ;))

For my first recipe this glorious month, I bring you my ukwaju marinated spicy chicken thighs.

PREP TIME: 15 MIN      COOK TIME:45 MIN        SERVES:4

Ingredients:

4 chicken thighs

5 cloves of garlic

1 tablespoon of fresh rosemary

5 tablespoons of balsamic (or apple cider) vinegar

1 teaspoon of paprika

1/2 a teaspoon of turmeric

1 teaspoon of black pepper

1/4 teaspoon of chilli flakes

Shalimar chicken tikka spice blend

Slat to taste

Vegetable oil for frying


Method

Remove your ukwaju from the pod if you purchase them unpeeled. Mine came already peeled.

In Nairobi, you can get Ukwaju from Zucchini, Food Plus, Ngara food market and the vegetable vendors at City Market. Place them in a pan with some water and let this simmer on low heat. After about 10 minutes, turn down the heat and let the ukwaju soak for another 10 minutes. They will swell up and make it easier to separate the pulp from the seeds. I learnt this from Pendo La Mama (check out this post where she makes tamarind paste too <3). You can do the extraction overnight too, but if you are in a rush, this method works.

Remove the pulp and then discard the fibers and the seeds.

Place your chicken in a bowl. Add the vinegar, rosemary, garlic and ukwaju. Mix it lightly then add all the spiced and mix well until completely combined. I usually use apple cider vinegar for my chicken marination, however lately I have been enjoying the flavor that balsamic vinegar has to offer. You can alternate between both vinegars and settle on the one you feel works best. Both kinds are sold in our local supermarkets at about 200 bob a bottle.

Once ingredients are fully combined, cover with a lid and let this marinate refrigerated for 8 hours or up to 3 days. Remember, the longer it marinated, the more intense the flavors shall be.

After the marination is done, some fluid will have collected in the bowl. Pour all this into a sufuria and boil your chicken. I boil my chicken with all the marinade contents before seasoning because I feel it intensifies the flavor. You have to boil it until all the liquid dries up; that will intensify the flavor by concentrating it as opposed to having it watery and less concentrated. If you prefer not to boil before seasoning, you can skip this step.

Once  done, dip it in  a paste of shalimar + black pepper; the same thing we did here. I bought my shalimar from Nakumatt at 100 bob a pack. Make sure to ALWAYS season your chicken before frying!!!

Once coated in your seasoning paste, we are ready to fry. This thighs look so delicious even before we are done cooking!!

Shallow fry the chicken until completely done and crispy. You will only need to flash fry so make sure your oil is hot enough so that your skin becomes crispy. Using cold oil will make the chicken soggy as it will soak up too much of it.

Remove from heat and serve. My ukwaju marinated spicy chicken thighs are the best thing you will ever sink your teeth into without doubt!

The spicy tikka-peppery seasoning beautifully compliments the tender marinated chicken flesh; which has the warm flavors of the garlic, herby taste of the rosemary and the bold flavor of our ukwaju. Layer after layer of absolute taste bud euphoria!!!

Whether with fries, potato wedges or ugali, my ukwaju marinated spicy chicken thighs will be a major hit on your dinner table! So for this new month, step out of what you are used to and try out some big, bold flavors!

To fantastic food,

-K


Get your downloadable recipe here :))

download best african recipes_ Kaluhiskitchen.com recipes_kenyan food recipes


All content and images are copyright protected by
DMCA.com Protection Status
Do not copy in part or whole without giving due credit.

The post Ukwaju (Tamarind) Marinated Spicy Chicken Thighs appeared first on Kaluhi's Kitchen.

Lime Zest and Cardamom Maandazi

$
0
0

There are two kinds of people in this world. Those that douse their fries in ketchup, and those that dip their fries in ketchup. Those who like cold milk with their cereal, and those who like theirs with warm milk. Those that believe pineapples do not belong on pizza, and those that could have 6 extra whole warm pineapples on their pizza if they could have it their way. There are tea people, and there are coffee people. There are those people who love their eggs runny, and those who love theirs doooooooonneeee! There are people who are sworn to #TeamBatman and others to #TeamSuperman. (My beau is team Batman and I am team Superman LOL, opposites attract :DD) You know, to-MAH-to, to-MAY-to. We always have our very own personal likes and preferences and it is what makes life interesting. There is no right/wrong, its just comes down to what someone likes. And for maandazi, there are those who like theirs meaty and dense, and those who like theirs hollow and airy. Whichever side of the spectrum you are rooting for, a good recipe will always guarantee a fantastic feast!

For today, regardless of how you like your maandazi, my lime zest and cardamom maandazi will rock your boat.

PREP TIME: 20 MIN            MAKE TIME: 20 MIN        SERVES:5

Ingredients

1 cup of self raising flour

1 tablespoon of lime zest

5 tablespoons of sugar

1/2 a tablespoon of crushed cardamom

1/2 a cup of hot water

3/4 cup of plain yogurt

1 tablespoon of butter


Method

Take your cardamom seeds, split them and add them to an unbuttered pan. On medium low heat, toast them until they are just becoming fragrant. This step is not mandatory, but elevates the flavor profile of your maandazi since it intensifies the cardamom flavor. It is a simple step, but a very key one. After the cardamom has been toasted, you place them in a kinu (pestle and mortar) and grind them. I like mine with a coarse texture as opposed to being very fine.

I bought my whole cardamom seeds form Tuskys Kenyatta Avenue but I am sure you can find them pretty much anywhere else. The cost just ksh.60 a pack, which lasts a long time.

In a large bowl, add the hot water and mix in the sugar and the cardamom. Once dissolved (the sugar that is) add the flour and mix it in. Bit by bit, add the plain yoghurt and knead the dough.

Add the lime zest and fold it in.  By zest I simply mean the grated rind of your lime. Be sure to only grate the colored part since if you include the white part, your maandazi will have a bitter after taste. You can use lemons, oranges, tangerines or any other citrus fruit, but I used lime this time round because that is what I had at hand.

Create a bore in the dough and add the melted butter. This further makes the dough softer and lighter. Knead the dough until it no longer sticks to your hands or the bowl. That is when you know your dough is ready for the next step.

Roll out the dough and with a cookie cutter or a round cup, shape your maandazi. I love my maandazi hollow and airy so to get my desired outcome, I roll out my dough really thin, about 3-4 cm thick. And , of course if you prefer your maandazi meaty, roll out your dough thicker.

The thicker you roll out your dough, the thicker and meatier your maandazi will be. The thinner you roll out your dough, the hollower and airier your maandazi will be.

Heat your oil and fry the maandazi until they are golden brown on each side. Make sure your oil is hot so that the maandazi does not soak up too much of it hence making them soggy.

Prepare your tea/coffee and enjoy your delicious breakfast!

I am abit obsessed with cardamom these days and roasting it before cooking it just magnified its splendor. Because my cardamom was not crushed too finely, You could get those pleasant bursts of cardamom  and feel the warm zing of the lime zest as you eat. Try this out and you will know what I mean ;)).

And maybe, try a different zest from a citrus fruit of your choice and tell me how it all goes down! And just in case you are wondering, I am #TeamHollowMaandazi!

To fantastic Kenyan Food!!!

-K


Get your downloadable recipe here :))

download best african recipes_ Kaluhiskitchen.com recipes_kenyan food recipes


All content and images are copyright protected by
DMCA.com Protection Status
Do not copy without expressly asking for permission or giving due credit

The post Lime Zest and Cardamom Maandazi appeared first on Kaluhi's Kitchen.

Mango Ginger Pancakes

$
0
0

I love making pancakes, not because they are easy to make (but that’s def part of the reason ;)), but because they take up flavors so well and leave plenty of room for experimentation. For these pancakes, I made them with the flavors I enjoy most in my cocktails: mango, cardamom and a hint of ginger. I did not foresee the warmth and explosiveness that I experienced, and for sure I must try this out soon once again. Nothing makes my breakfast more thrilling than knowing what I am going to eat has a combination of my three favorite flavors: sweetness of mango, very subtle warmth of ginger and spiciness of freshly crushed cardamom. Bite after warm flavorful bite and an empty plate later, my pancakes fit tightly but happily in my tummy. I gave one more thanks to the Lord above for a beautiful breakfast and gratefulness for a high metabolism. The best way to start your day is with some good food right? Make sure it my mango ginger pancakes!

PREP TIME: 15 MIN       COOK TIME: 20 MIN             SERVES:2

Ingredients

1 cup or flour (self raising)

3/4 cup of mala (or buttermilk)

4 tablespoons of sugar

1 tablespoon butter

1 egg

1/4 teaspoon of ginger spice

1/2 a teaspoon of ground cardamom

1/4 cup of mango pulp

Method

Beat the egg and the sugar for about 4-7 minutes or until it becomes frothy and becomes pale yellow.

Then in a separate bowl, mix all the dry ingredients (flour, ginger spice, cardamom) then add  the egg-sugar mix to this. Bit by bit, add the mala until thick, then followed by the melted butter.

Do not over mix, or try to smooth out the lumps. Make sure your batter is thick enough so that the pancakes are nice, light and fluffy. After that, add in your mango pulp. If you do not have a hand held blender to make this pulp, you can use a fork, albeit with more effort, but the result will be the same. Make sure there are no lumps and that the pulp is smooth but thick. We want a smooth pulpy mixture, not a mango juice, and not lumpy mango cubes.

This is the consistency we want:

Once combined, you can you can begin cooking.

Lightly grease your non stick pan, and ladle your batter on it once it is hot enough. Allow at least 2 minutes on each side, with your pan on medium high. This allows the inside to cook and the outside to have an appetizing golden brown color.

After your pancakes are done, remove them from the heat, stack then up, garnish with some fresh mango and serve!

Filling and delicious and with beautiful layered flavors that will set your taste buds alight! Pancakes with a fruity taste are always delicious, and using my favorite fruit made them even more unforgettable!

To many more!

-K


Get your downloadable recipe here :))

download best african recipes_ Kaluhiskitchen.com recipes_kenyan food recipes


All content and images are copyright protected by
DMCA.com Protection Status
Do not copy in part or whole without giving due credit.

The post Mango Ginger Pancakes appeared first on Kaluhi's Kitchen.

Garlic Turmeric Fried Gizzard

$
0
0

I love talking to you guys!  From the absolutely random questions, to the slightly inappropriate hilarious ones, to those from readers who genuinely want to grow their cooking skills. I appreciate your feedback in all forms it comes and  appreciate the connection we have {insert cheesy romantic song in background}. One of my readers once asked me why I do not have a gizzard recipe. I wondered the same, and asked my self why I kept on postponing the recipe. I decided to do one, the first of many I will do, after being inspired by this gizzard recipe from Jay Take a Pic. Our flavors are different, but  both are delicious. So to usher in the weekend, here is my garlic turmeric fried gizzard.

PREP TIME: 24 HRS           COOK TIME:              SERVES:

Ingredients

1/2 kg of gizzard

2 tablespoons of fresh rosemary

8 cloves of garlic

2 tablespoons of balsamic vinegar

1 red onion, diced

1 tomato, pureed

1 green bell pepper, diced

1 tablespoon of tomato paste

1/2 a teaspoon of Cayenne pepper ( or use fresh chilli if you have some)

Turmeric (1/4 teaspoon of turmeric)

Paprika (1 teaspoon)

Black Pepper (1 teaspoon)

Salt to taste

Vegetable oil for frying

Method

Clean your gizzard by removing the white membrane covering them and any loose soil particles that may be present. You can ask your butcher to clean them for you too coz sometimes, we are just not in that mood :DD.

In a bowl, add your cleaned and chopped gizzard together with the rosemary, 5 cloves of minced garlic and balsamic vinegar. Allow this to marinate overnight. I have been loving balsamic vinegar with my chicken lately, and it is the same vinegar I used for this spicy chicken thigh recipe. I bought it from Tuskys Kenyatta Avenue.

After the marination time has lapsed, add some oil into a pan and add the marinated gizzard and let them cook through on high heat. They will produce lots of water during this process, and since we want a dry fry, you can drain this water. Once done, turn off the heat and set aside.

In a separate sufuria, add the red onions and 3 minced garlic. Let this sautee until fragrant. Add the tomatoes, tomato paste and the spices and allow this to cook for about 5 minutes.

Add the gizzard and half of your bell pepper, let this fry in the tomatoes for 5-10 minutes.

Add the remaining green bell pepper and serve shortly after. Garnish with some toasted sesame seeds and serve.

Is you ugali ready? Because this garlic turmeric fried gizzard needs to be in your tummy right now!

Meaty, lean and flavorful are part of the reasons I will always love this gizzard recipe! Like all chicken recipes, the garlic was beautifully brought out and the amazing spiciness complimented the inherent rich flavor of the gizzard.

Happy Friday!

-K


Get your downloadable recipe here :))

download best african recipes_ Kaluhiskitchen.com recipes_kenyan food recipes


All content and images are copyright protected by
DMCA.com Protection Status
Do not copy in part or whole without giving due credit.

The post Garlic Turmeric Fried Gizzard appeared first on Kaluhi's Kitchen.

Lessons and Musings – Blogging 101

$
0
0

One of the questions I receive most be it on email, or through direct messaging on my social media platforms is how to start and run a successful blog, more specifically a Food blog. While I do not consider myself a master of blogging, I do know I have learnt a lot along the way and the little I know can help you in one way or another. This blog post is for you, who may want to start a blog, needs a bit of direction and maybe wants to make it their full time job. I will try summarize all I have learnt, and hope to help in one way or another. So here we go!

” How can I start a [food] blog?”

Well, that is a very broad question that I get most of the time. In this day and age, you can literally get information on how to make anything on the internet. For example if you search ‘how to start a blog’, you will get millions of results on the same. Read extensively on what you can. Sift information and get out of it what you feel will work for you. The articles you read will give you direction, but they will not spell out for you what you word for word need to do. That will be up to you and the direction you want to take.

-Blog on a topic you are passionate about; is it food? is it religion? is it environment? is it politics?

-Decide which platform you want to use (wordpress? blogspot? tumblr?)

-Decide how you want it to look, you decide how you want it to feel. This should be unique to you, do not copy someone else’s blog because it will not be unique to you and you will not connect with it. As a result, you will not keep it up.

-Decide how often you want to churn out content. Decide how many words, if at all, you want your posts to be. Decide how you want your photography to be and it’s mood. There are no rules, you decide. Do you!

“But I do not have money :((, what can I do?”

Let me be real: blogging can be as cheap or as expensive as YOU make it. Start with what you have; start where you are and improve as you go along. Do not go broke without checking out cheaper or even free alternatives.

I did not have money to pay for a self hosted site at the beginning of my journey, so I started with a free wordpress theme and a hosted one. Later on I moved to self hosted. When I started out, I did not have a DSLR camera, but I had the small pocket camera we had as a family so that is what I used for my pictures. Later on I bought my camera. And nowadays, if you have a high end smart phone, you can take really decent pictures and you can start with that.  I did not have a laptop, so I used my sister’s laptop. She was doing her Masters at the time so I had to limit myself to 3 hours a day so that I do not inconvenience her. I had to make it work with what I had! Later on I bought my laptop. I could not afford a web developer then, so I learnt how to build my site all by myself. The internet teaches you a lot of things!!! I couldn’t afford a photographer then, I still cannot afford to work with a fulltime photographer now, so I learnt how to take my own pictures and developed my own style.

Start with what you have, and grow form there, do not make it an expensive affair. What you have is enough. Just start.

photo credit: sitemap

“I have a blog, but I do not know how to grow my audience :((“

From a personal perspective, my audience grew when I stopped focusing on numbers, and started focusing on the kind of content I put out. Do not obsess about numbers, but by all means, be OBSESSED about the kind of content you put out and by constantly improving yourself.  Your audience will grow when you focus on growing yourself and on giving them nothing but the best. By sharing your content, that is of excellent quality, your audience will grow. Also, being consistent will grow you. Maintain a consistent posting schedule in order to grow.

“Do you edit your pictures?”

Honey, even pictures in Vogue are edited :DD. But let me be clear, editing a picture does not mean it looks completely different from the original. Editing is there simply to enhance beauty of a picture not to change it into something completely different. For my pictures, I edit the sharpness and clarity. Everything else is usually stays the same. For food photography especially, I have learnt that natural light works best. Do not take food pictures with flash. Do not take food pictures under that orange or red bulb light. No child!! And for Christ-sake, DO NOT PUT FILTERS ON FOOD PICTURES!!!!!!!!!! I cannot stress that enough. You can use filters on an outfit post maybe if you are a fashion blogger, but honey, never ever try that on food pictures.

Below is an examples of a picture unedited (left) and edited (right). Slight difference, since the only thing I adjusted was saturation, clarity and sharpness then adding a watermark of my blog URL. Everything else remained the same.

For food, learn how to plate nicely and cook food that looks beautiful. Just be neat. For some, that comes naturally without much effort. If for you it doesn’t, you will need to work on that. Coz lets face it, ugly food that’s plated so poorly, no matter how delicious, will not draw anyone in. If your original image looks bad and picture composition is poor, even with the most expensive editing software or the most expensive camera, it will still look BAD in the end. We eat with our eyes first, so make that first impression a lasting one.

There are editing software that you can buy to edit your pictures like Lightroom and CaptureOne, but there are also equally good free online editing software like snapseed, picmonkey and picasa. It is up to you and the state of your pocket to decide which one you want to use. I use the free ones.

“How do you make money from food blogging?”

Another common question. There are many ways to monetize a blog. But before one gets to that stage, I will encourage you to focus on growing your brand in terms of excellent content and quality. It takes quite a long time before you make money from blogging that you can comfortably live on. But if you like what you are blogging about, you will just keep putting content out and some years or months down the line, then money will come to you. If you are getting into blogging for the money, I can guarantee you that you will stop doing it in under 6 months. Let the money be a result of what you do, and not a reason for doing it.

You can make money by selling advertisement space on your site. You can make money through brand collaboration when the time comes. You can make money by taking on other projects e.g. as a food blogger, you can have an eBook or physical book which you sell. As a fashion blogger, you can have your own fashion line.

Besides the common questions above, allow me to  give you other pointers that I have learnt and have helped me along the way:

  • Quality trumps Quantity any day!!! – You are better off putting out one brilliant post each week than putting out six mediocre posts in a week. Excellent quality of your work will speak volumes and take you to heights you never imagined. Churning out mediocre content on  a regular basis will not only burn you out, but will also not get you where you want to be or deserve to be.
  •  Be *expletive* original – Kenyans are particularly notorious for copying. People can literally lift content from your site and plaster it on theirs, and wonder why they are not growing SMH. Please, be original!!  This is hard, but worth it. If you have that gift of originality in you, you have it and it cannot be taken away from you. Do not build a brand with pictures lifted from the internet. Take your own. Yes, you can get inspired by someone, but do not copy them. Mutua Matheka, Nancie Mwai, Lyra Aoko and other Kenyan giants would not be who they are/where they are if they stole images/work from other people to build their brands. When you offer something different and unique borne out of your own mind, the world will notice. Trust me!! Put in the work.

  • Learn other skills that will grow your craft – To be successful in the long term, you will need to learn other skills that come in handy  for blogging. You will need to learn the basics of HTML, CSS and how to run your site. You will need to become a master marketer of your content and your brand. You will need to learn how to do your own photography and your videos, because you won’t always have your photographer with you if you are working with one. You will need to become a little bit of everything
  • Find what you want to contribute in the blogging scene and let that be what sets you apart- This is where to know where you fit in. What do you feel is missing in the food/fashion/tech/photography/political blogging scene? Can you fill that gap? If yes, get right in. You may also feel like the field you want to enter is flooded, but remember there is only one you in a sea of other individuals. What you can offer, no one else can. Get in and give it your best.
  • You will spend plenty of time on social media, plenty of it– A large part of being a creative is sharing your art. Thank God for social media which makes that easy.  Embrace social media. Of course you cannot be on everywhere (if you can, props!), so stick to the platforms that work for YOUR brand. If something doesn’t work for you or doesn’t feel right, simply focus on those what does. You will get a lot of ‘advice’ from people, most will mean well, but at the end of the day, you make the final decision for your brand. Trust your gut. I personally have never liked Snapchat, and stuck to what has worked for me. Some people do not like twitter, and it is ok. As long as you have at least two platforms where you can share your art, stick with them and grow your name from there. Make your presence felt. Engage genuinely with your audience.

  • It is not easy but very rewarding– Blogging is not like writing a text message or an email as some people believe. Yes, you love cooking. Yes, you can take pictures of your food. Yes, you have access to the internet. But to have a successful food blog takes a lot more than just that. It actually takes a lot of hard work, commitment and dedication to build a strong brand from the ground up. Do not give up.
  • Make mistakes, but learn from them – It is part of the journey. You will stumble. You will start out abit shakey. You will make bad business decisions at times, but let all that serve at lessons and stepping stones and not reason to wrap things up.
  • Know your strengths and weaknesses– In as much as I am all for learning how to do as much as you can by your self, you are not superwo(man) and you will need help where you fall short. If you are not good at writing, but shine on video, turn your focus on your strength. If you have a way with words but not so much with pictures, find a way to make that work in your favor.
  • Your quality standard should be global– Even if your audience is primarily Kenyan (or of your native country depending on where you are reading this from), because your work is on the internet, your are broadcasting to the entire world. Put your best foot forward. Your quality standards should be global, not local. Give it 100% or nothing. For me, it is either my work looks spectacular or I am not putting it out at all. Trust me, [big] people are watching! Ask your self, as a fashion blogger, if Vogue editors see your look book post, will they like it? As a food blogger, if Food Network producers see your blog, will they be won over? If you are a photographer if {insert dope photographer’s name} saw your work, will she get super inspired and want to work with you? Your quality should be that good.
  • Constantly improve– Do not get comfortable. Always improve. Always fine tune your craft. Your videos in February 2018 should look better than they did in February 2017. If your pictures have remained the same for 4 years with no growth or improvement, there is a problem… Allow your brand to evolve when the time comes. Aim to beat your previous best. Below is my photography growth; where the picture on the left was taken January 2016 and that on the right July 2016. It is embarrassing looking at my past photography, but the story is in the journey.  Growth is real LOL! Push yourself to improve always!

Lastly, dedicate all you do to God, commit all your plans to Him, let Him guide your journey, work VERY hard, and you will prosper!

Blogging will challenge you. It will stretch your creativity limits. It will be fun. It will be rewarding. It will be a pain in the butt at times. But if you  are passionate about what you are blogging about, every ebb and flow will be worth it!

In case I have left anything you are curious to know (I know I have left out pleeeeenty!), leave a comment below :))

Much love!

-K


All content and images are copyright protected by
DMCA.com Protection Status
Do not copy without expressly asking for permission or giving due credit


The post Lessons and Musings – Blogging 101 appeared first on Kaluhi's Kitchen.

Mango Melon Mocktail

$
0
0

Nairobi heat can make you question your entire existence. I love sunny weather that Jan-Feb-Mar brings, but once it turns torturous, I start questioning my own likes LOL. On the day I made this drink, I was having one of those unlucky-stuck-in-the-sun days. I had forgotten my hat at home, neither did I have an umbrella since I left it after I had switched bags that same morning. So that meant I had to do my errands in the sun. The matatu I boarded to get me home only had empty seats on the sun facing side. So after roasting in the CBD, I further baked away in the matatu. The stretch between my bus stage and home is 20 minutes apart, and much of the walk has no shade, so yes, I arrived home severely roasted and 60 shades darker. All I wanted was to shower and gulp down something refreshing and energizing. Because we had plenty of fruits home that day, I decided a mocktail was due. And boy didn’t I enjoy every eager gulp of this!!! As we enter the final weeks of mango season, please make and enjoy my mango melon mocktail. You deserve it!! <3

PREP TIME: 10 MIN      MAKE TIME: 20 MINUTES         SERVES:2

Ingredients


1 cheek of an apple mango

2 ups of cubed watermelon

1 apple, thinly sliced

1 tablespoon of honey

1 tablespoon of lime juice

Lime slithers for garnish


Method

Cube all your fruits and place them in a blender. With the apple, dice it up very thinly so that it blends easily.

For this mocktail, I used stoney soda to provide the element of sweetness and because it has tangawizi properties, this would automatically go really well with the mango flavor. Alternatively, you could use fresh ginger (a tiny bit of it), and add soda water for the fizz a and to top it up.

Blitz until smooth and add your honey and lime before removing from the  blender. Sieve if necessary, for me, my mocktail was smooth enough so I did not sieve. Mix in your stoney soda. Add ice cubes into your glass, add your lime slithers then pour your mocktail over them.

The limes will slowly infuse into the drink balancing out the sweetness by providing a mild tartness to the drink providing perfect balance. And also, mango goes well with limes, so having a combination of mango lime, ginger flavors in a drink is the perfect trifecta. You can add an alcoholic drink,preferably a whiskey/vodka/rum of choice and turn this into a cocktail.

Once done, serve.

I have no words to describe how happy I felt when this mango melon cocktail trickled down my dry throat! Perfect euphoric feeling!! And what I loved most about this mocktail is that despite literally taking 10 minutes to whip up, the flavors were so full, mellow and complex. And yes, with ingredients we can all find! #WIN

The meal I would love to wash down with my mango melon mocktail would definitely be my triple D drumsticks (yes, I am obsessed! But can you blame me?!) + earth and fire potato wedges and some creamed spinach. Yum!! That is what you need to be having!

To sunny days and mellow drinks!

-K


Get your downloadable recipe here :))

download best african recipes_ Kaluhiskitchen.com recipes_kenyan food recipes


All content and images are copyright protected by
DMCA.com Protection Status
Do not copy in part or whole without giving due credit.

The post Mango Melon Mocktail appeared first on Kaluhi's Kitchen.

Mbaazi wa Nazi

$
0
0

If I can close my eyes and really focus, I can clearly hear it. I can here the sound of the soft ocean waves breaking on the white sandy beach. I can almost smell the aroma of white jasmine flowers that have littered the lawn after a night of drizzle. I can almost feel the warmth and here the chatter of the townspeople as I scavenge the Lamu streets for my spices. If I close my eyes and really focus, I can feel the slow drift of the dhow at sunset. Nothing beats that experience!! I can taste the salt of the sea on my lips. I can taste all the delicious food they used to make for us. I can feel the sand on my toes; whose toe nails by now have the most hideous chipped nail polish as a result of spending too much time in the water. But who cares? Life in Lamu is about savoring moments that matter, not about seeking fleeting perfection. I often miss Lamu, more so when the pace of Nairobi threatens to bury me. But now that I cannot go to my special place at the moment, I will bring it to me through one of the dishes we had there alot: mbaazi wa nazi (pigeon peas in coconut milk). I hope when you take a bite of this dish, close your eyes and reeeeeaally focus, you will be on the beaches of Lamu with me eating good food all day long. Coz that’s what life should be about :DD

PREP TIME: 8 HOURS                  COOK TIME: 25 MIN                    SERVES: 3

Ingredients

1 cup of mbaazi (pigeon peas)

1 Cup of coconut milk

1/2 a teaspoon of harbenero chilli paste

1/2 a tablespoon of black pepper

1/4 teaspoon of turmeric

3 cloves of garlic, minced

1/2 a teaspoon of cumin seeds

1 red onion, diced

Coriander for garnish

Salt to taste

Vegetable oil for frying

Method.

Take your cup of mbaazi and place them in a container.  Add some water and let the soak for about 6-8 hours or even overnight. They will swell, and soften which will greatly reduce the amount of time they will take to cook. I bought my mbaazi from CarreFour but you can get them pretty much everywhere, even at our mama mbogas since it is grown so much locally.

Once the time has lapsed, put them to boil. This will take 30-45 minutes depending on your quantities. After they are done cooking, set them aside.

In a separate ungreased sufuria, add your cumin seeds. Lightly toast them until they are fragrant. Stay alert so as not to not burn them. Add some oil, followed by your red onion, garlic and chili. I used habenero chili by Kez Organics since it has this mild lingering heat which I really enjoy. If by any chance you cannot access it, you can use fresh chili, slit them and add them to the onions. Let this cook until the onions have softened (NOT BURNT!!!) and the garlic is fragrant.

Add your boiled mbaazi along with some salt black pepper and turmeric and allow this to cook for about 2 minutes. Add your coconut milk and mix it all in. I bought my coconut milk from Tuskys, and yes, you can get it in any other supermarket. The brand I use is Kara.

Allow everything to simmer on low heat for about 10 minutes for all the flavors to meld.

Once done, laddle your mbaazi onto a bowl and serve with your fave starch :))

Usually mbaazi wa nazi is served together with mahamri. I prefer having mine with chapati or rice since I find them more on the savory side.  Speaking of mahamri, I think we are looong overdue with a recipe, don’t you agree ;))?

As you wait for my mahamri recipe, let us enjoy my mbaazi wa nazi. The nuttiness of the coconut milk is what gives this dish it’s distinct taste. But with the mild hint of chili, and the soft crackle of whole cumin seeds, this transforms into such a full bodies dish and one you will always enjoy!

Much Love!

-K


Get your downloadable recipe here :))

download best african recipes_ Kaluhiskitchen.com recipes_kenyan food recipes


All content and images are copyright protected by
DMCA.com Protection Status
Do not copy in part or whole without giving due credit.

The post Mbaazi wa Nazi appeared first on Kaluhi's Kitchen.


Mango Coconut Faluda

$
0
0

One of the things I enjoyed most in Lamu was immersing myself in the culture of the local people. I loved sampling their food (like, duh!!!) and enjoyed even more learning how they prepare things that are typically not as common in inland regions of the country. During our last day of the Lamu Food Festival, we were treated to a hands on swahili cooking class. This was at a local restaurant on Shela beach, overlooking the sea and enjoying the breeze coming in during that hot mid morning. Making Faluda was one of my favorites! It was so easy to make, and as usual, very very tasty to have. You can check out how Umma took as through here. This time I try it out, and of course with my own twist :)). Considering mango season is coming to and end, lets wind it down in style with my chilled mango coconut faluda <3.

PREP TIME: 20 MIN            MAKE TIME: 30 MIN        MAKES:2

Ingredients

1 apple mango

1 tablespoon of cardamom seeds

1/2 a cup of coconut milk

1 1/2 tablespoons of sugar

1 teaspoon of gelatin

1 cup of milk

Pumpkin seeds (for garnish)

Raisins (for garnish)

Method

Peel your mango place this in a blender together with your coconut milk. Set aside.

In a sufuria add the milk, cardamom seeds and the sugar. Slightly split the cardamom seeds so that the flavors seep to the milk with ease. Let your milk simmer on low heat until its just about to boil. Do not do this step on high heat since you need to allow the cardamom to really infuse into the milk. After you are done, turn off the heat, discard the cardamom seeds and allow the milk to slightly cool down.

After the milk has cooled down, add the mango-coconut milk puree and mix it in. If it does not mix together that smoothly, pop this into a blender and run it for about a minute so that everything mixes perfectly.

Pour this into a jug. In a small bowl. Add the gelatin and 6 tablespoons of water and mix it all up. Pour the gelatin into the jug that has the mango coconut milk and mix it all up. The gelatin is what makes your faluda have a jelly-like consistency. I bought my gelatin from carrefour and you can also get some from Walibhai on Biashara Street. It is not of your reach :))

Ladle this to your bowls and allow them to solidify and cool. I put mine into a freezer just to speed up the solidifying process and ensure my dessert was cold and not at room temperature.

After all, sweltering March deserves this sunny, chilled dessert <3. Dig in!

This dessert not only has those warm inviting flavor of the coast, but it also has all the flavors that I love most and the fruit I love out of all: Mango. The nuttiness of the coconut, the aromatic cardamom flavor and the sweet luxurious mango all in one bite is something you will never forget!

As we bid mango season farewell, why not do it the right way? 😉 
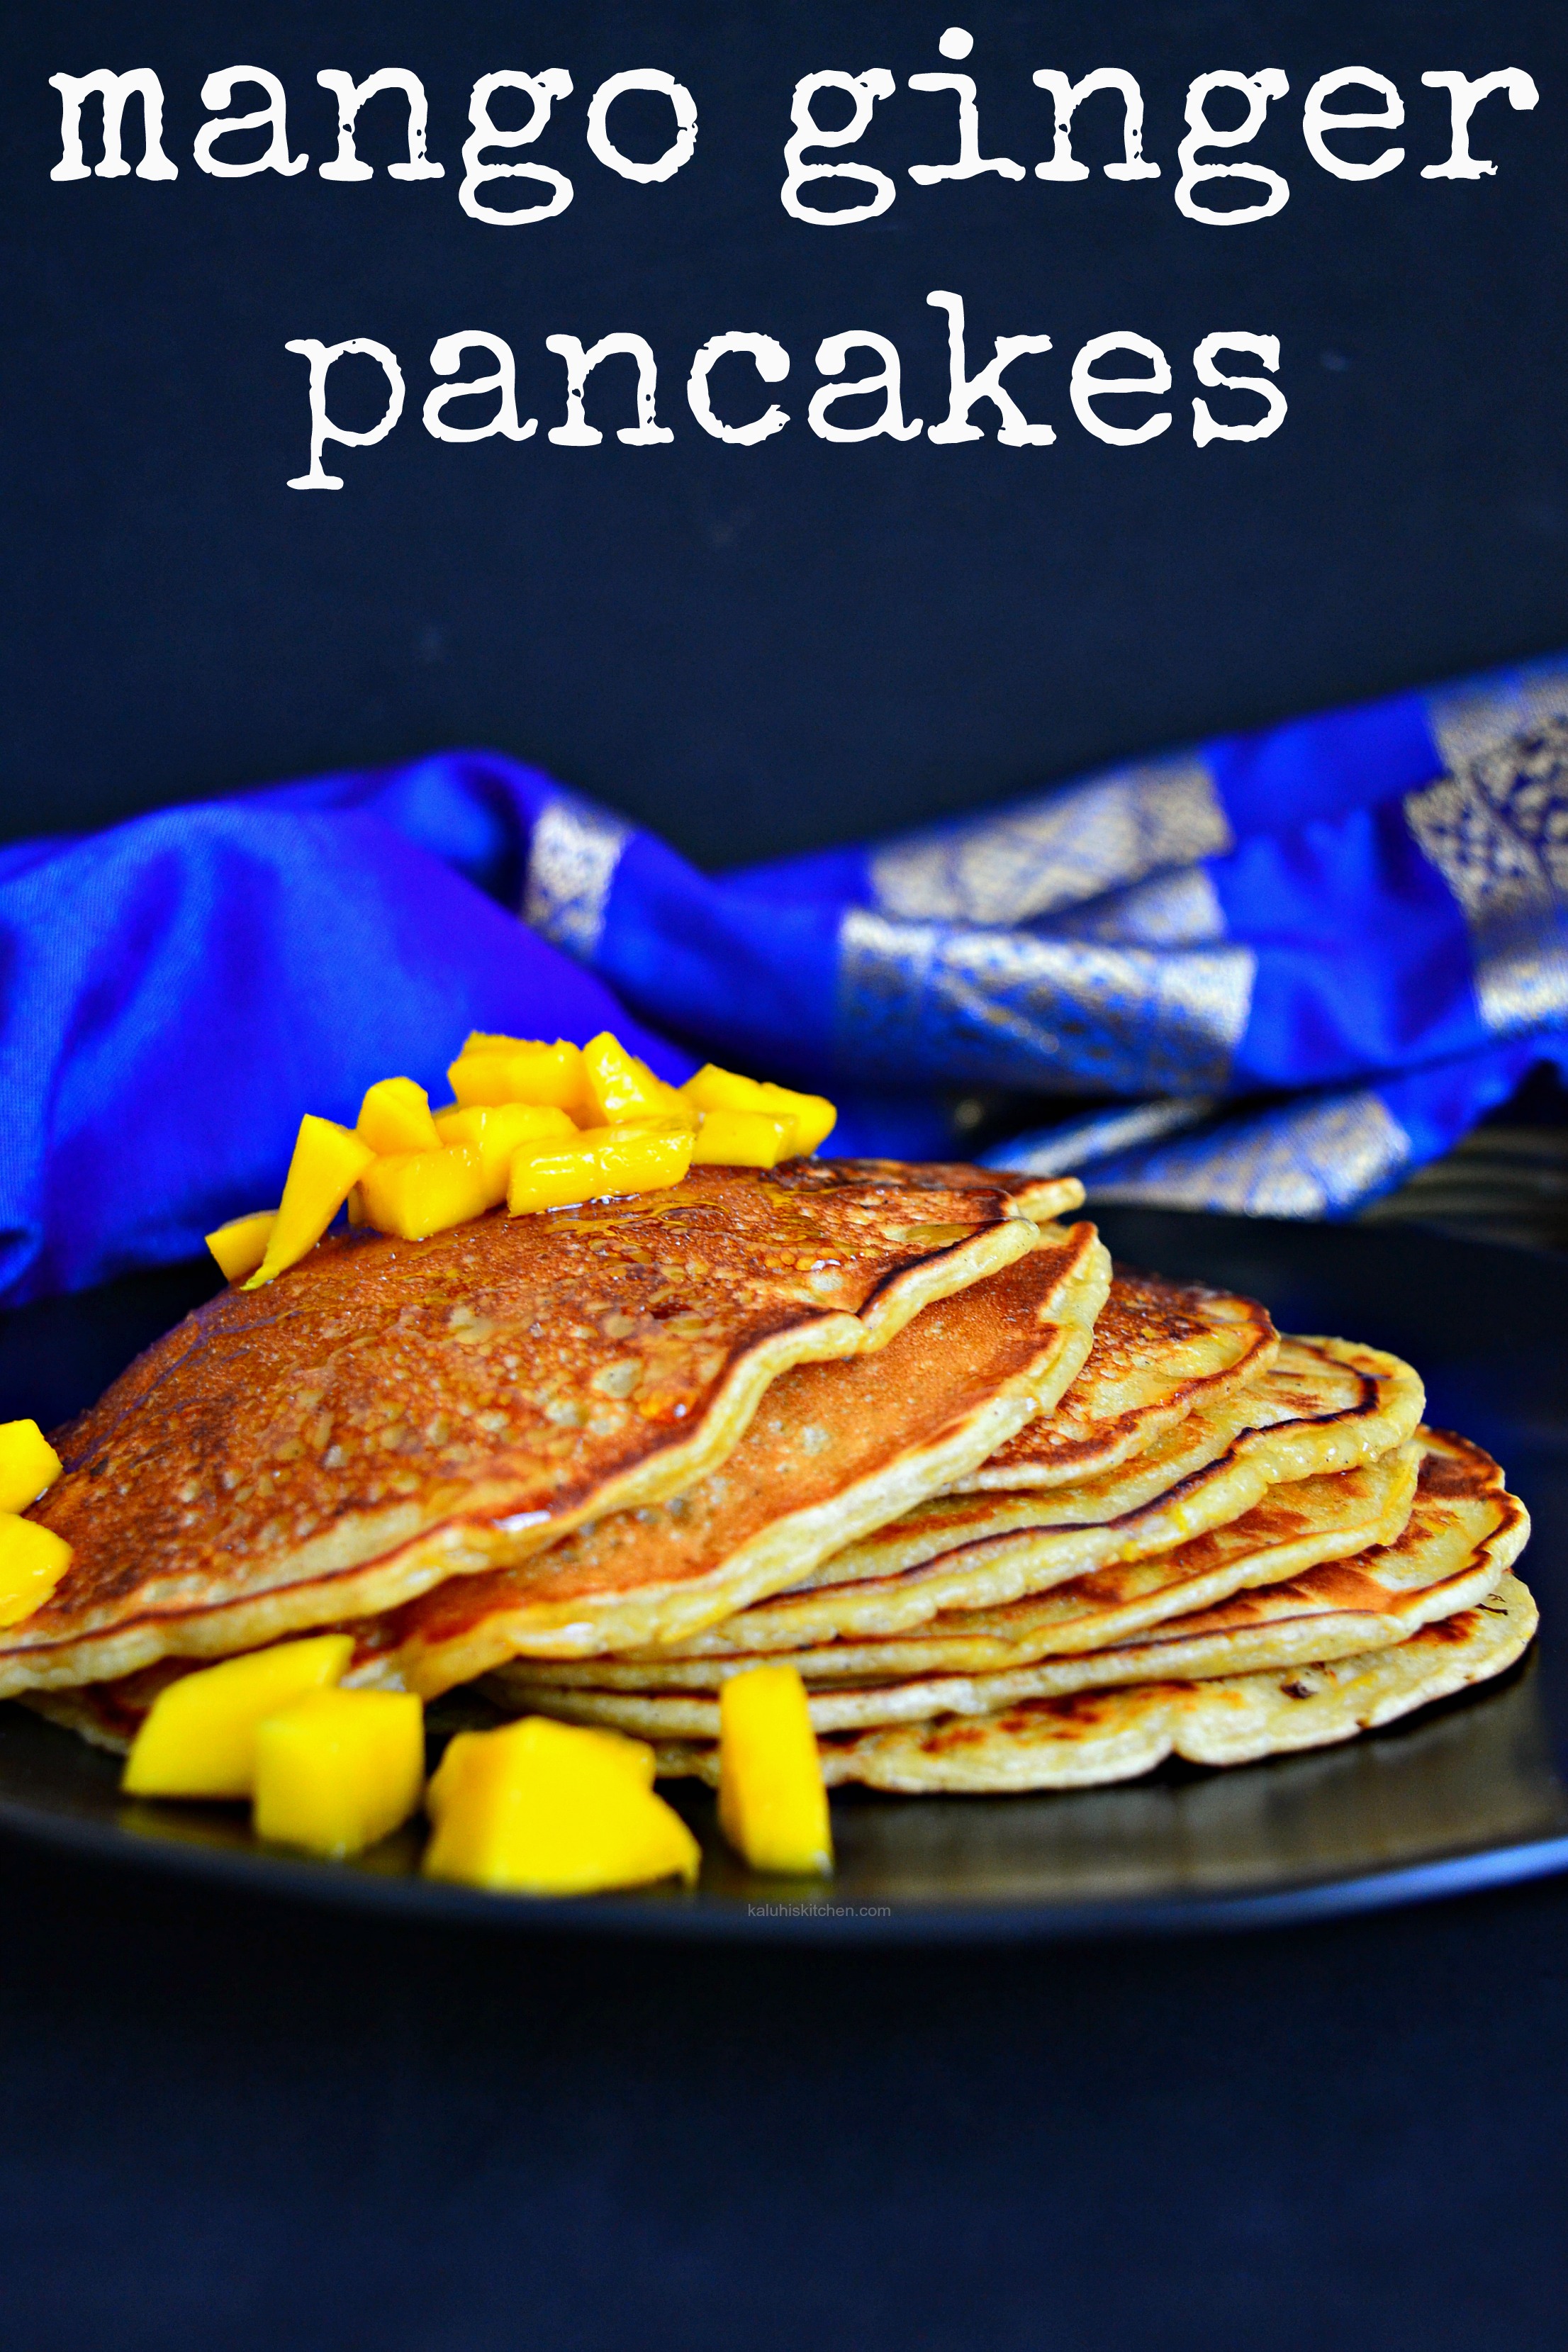
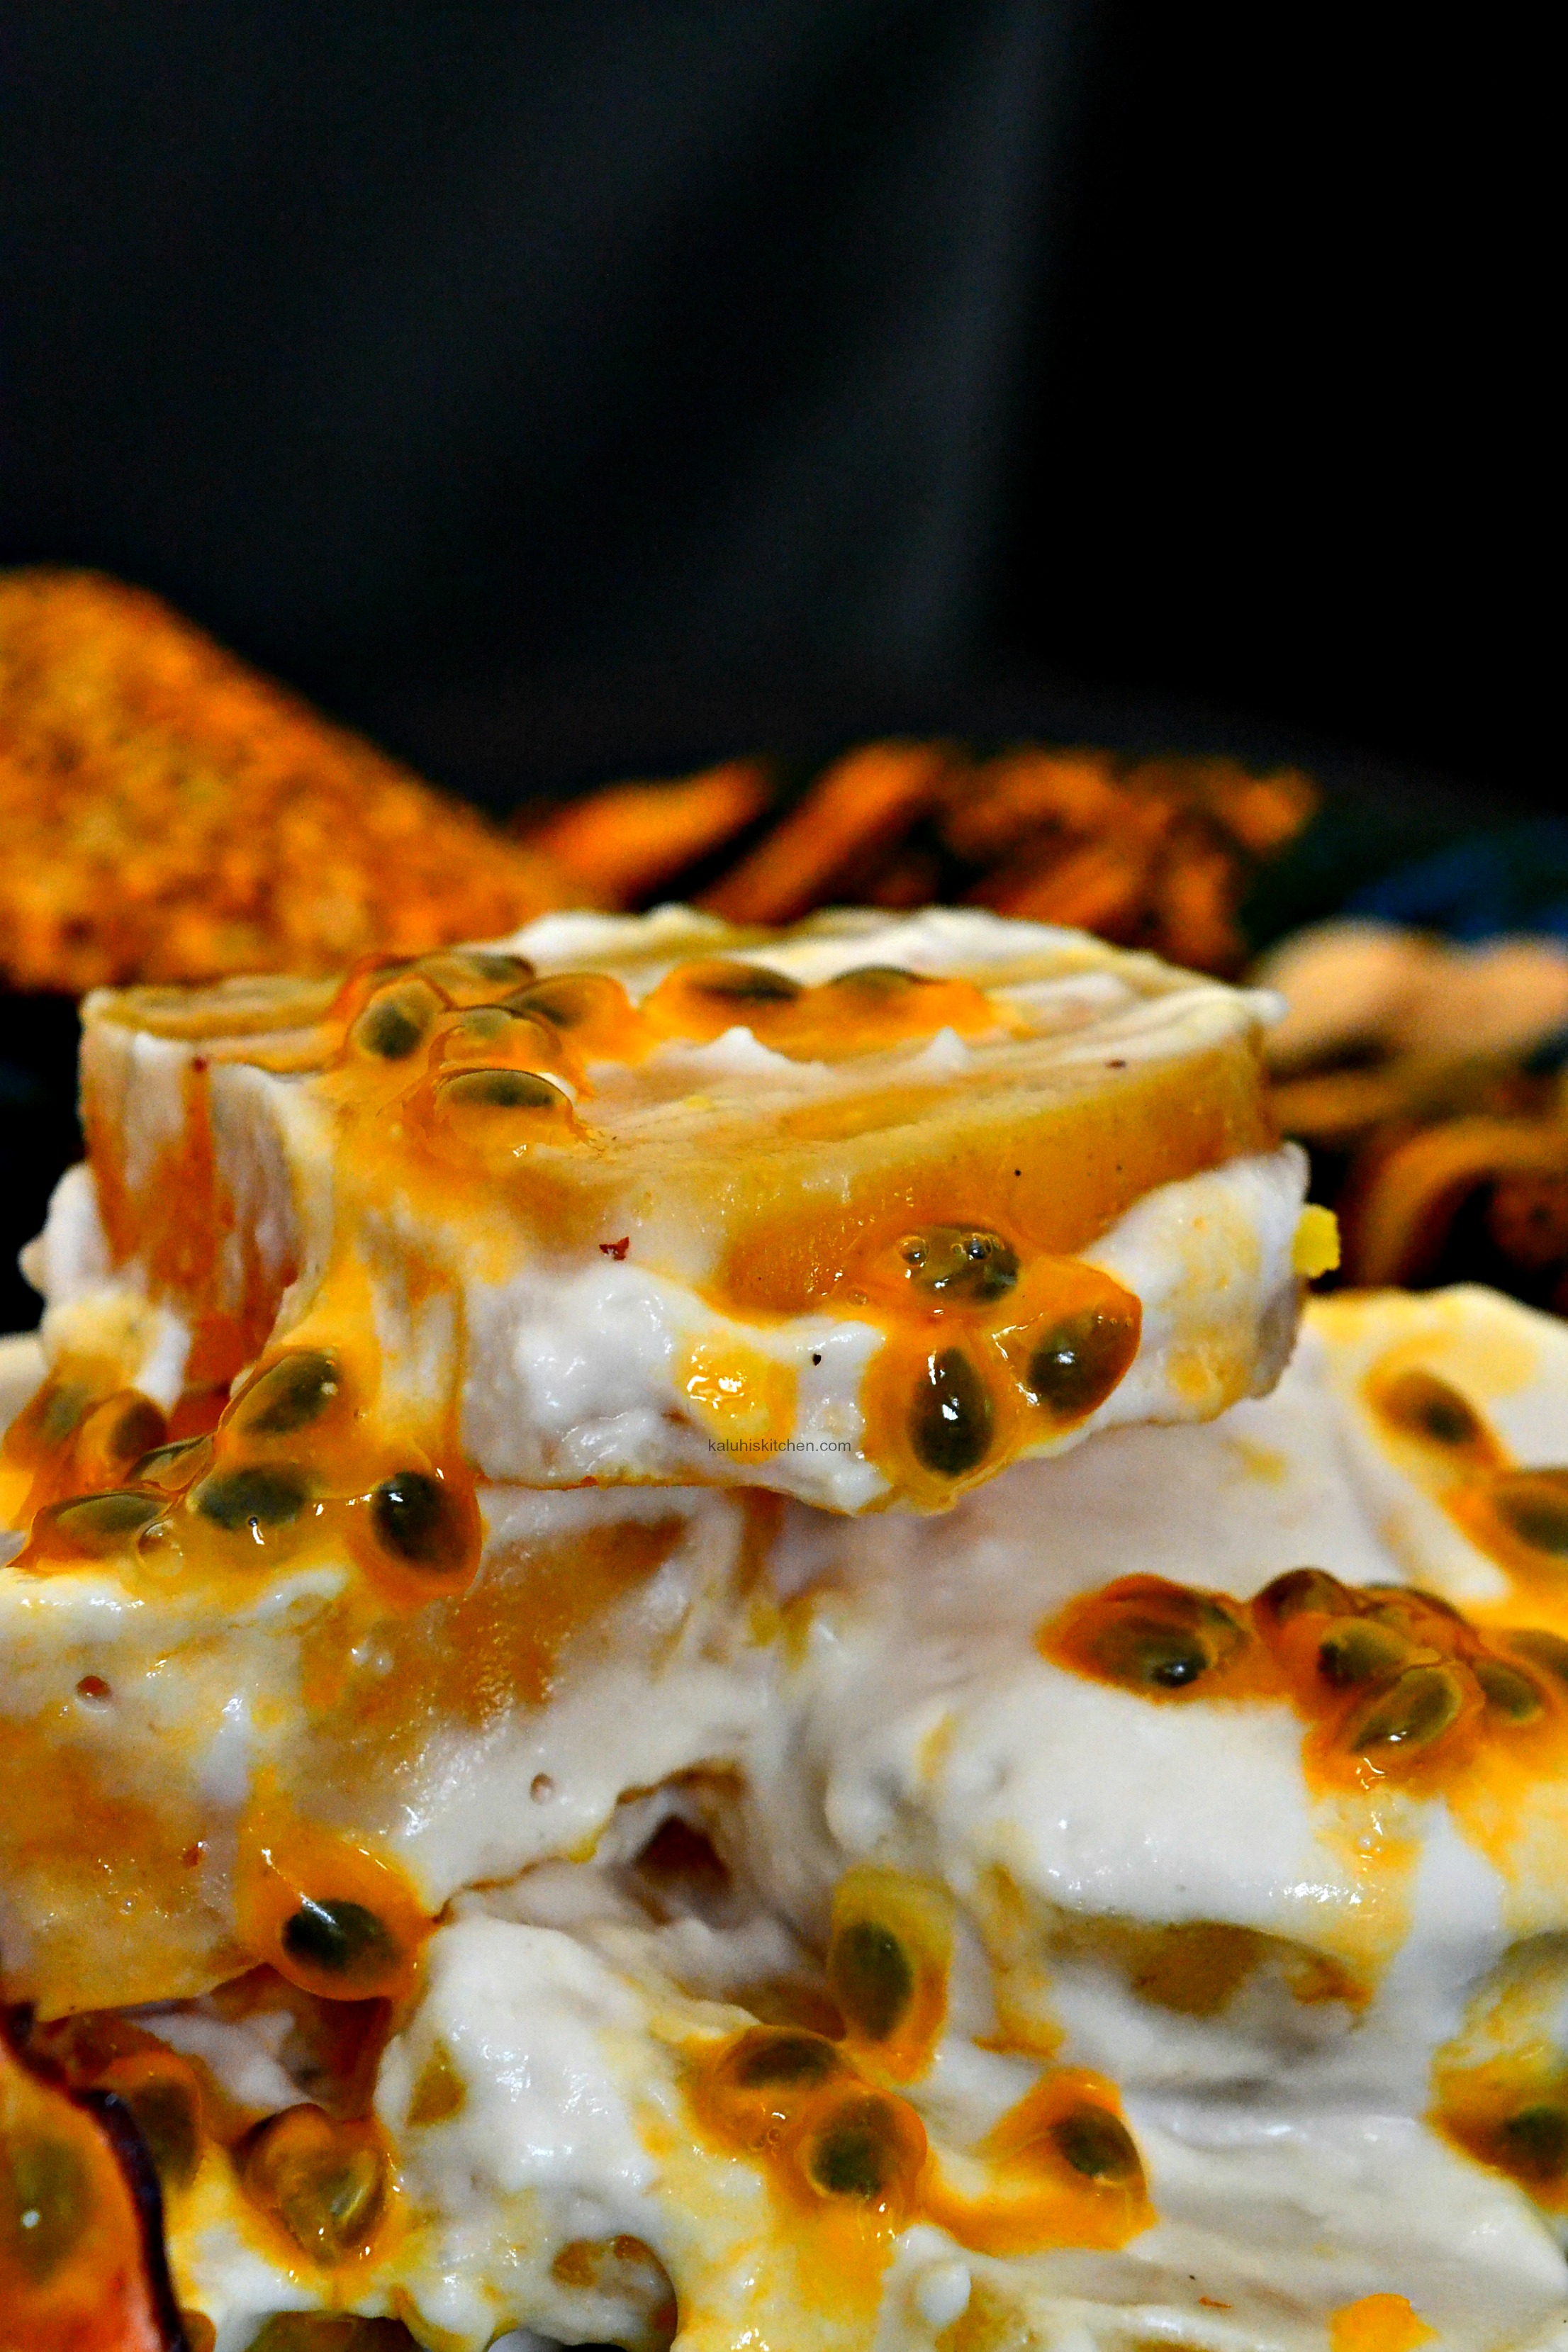
Once you try this out, maybe you can play around with other fruits and flavors even after mango season is long behind us. But for now, let’s enjoy it while it lasts <3. Give my other mango recipes a try too :)) : Like my mango posset, mango mint salad with passion fruit syrupmango lassi and mango ginger pancakes.

To everything sunny and delicious!

-K


Get your downloadable recipe here :))

download best african recipes_ Kaluhiskitchen.com recipes_kenyan food recipes


All content and images are copyright protected by
DMCA.com Protection Status
Do not copy in part or whole without giving due credit.

The post Mango Coconut Faluda appeared first on Kaluhi's Kitchen.

Mahamri

$
0
0

I always tell you guys not to get discouraged when you encounter kitchen blunders while cooking. Instead, you should learn from your mistakes, pick your self up, and try again util you get it right. Our mamas did not raise quitters :DD. As someone who cooks all the time, kitchen blunders and horrific recipe disasters happen from time to time. But with time, the frequency of the mistakes lessen since you get to know what works and what doesn’t. Your mistakes only aid in making you better if you choose to learn from them. Let no one lie to you that they never make mistakes in the kitchen. We all do! I showed you some of my massive fails in this post (read it if you haven’t). I stumbled a little bit while making my mahamri too. My first try had me create the hardest, flattest and most hideous mahamri LOL! I then sat down, thought hard and figured out where I went wrong and got it right in my next try. I will take you through how to make bomb mahamri, tell you exactly where I went wrong the first round and make sure you get it right on your first try <3

PREP TIME:  2 HOURS            COOK TIME: 30 MIN        MAKES:12

Ingredients

2 1/ 2 cups of all purpose flour

1 cup of coconut powder

1 tablespoon of freshly ground cardamom

6 tablespoons of sugar

2 tablespoons of ghee

1 tablespoon of instant yeast

1/2 a cup of warm milk

1/2 a cup of hot water


Method

In a bowl, mix your dry ingredients: the flour, crushed cardamom, yeast and sugar. Mix everything until well combined.

Add the water while mixing the content, followed by the milk. When all the content are roughly mixed together, melt the ghee and rub it all in. Knead the dough for a minimum of 15 minutes until it is no longer sticking to your hands and it soft and elastic. It is one hell of an arm workout LOL, but trust me, your tongue and tummy will thank you later. Allow it to rest and rise for a minimum of 40 minutes until it has doubled in size. Mine rested for 2 hours and sometimes my mom lets it rest overnight.

***

Mistake I made the first time:

  1. I kneaded for less than 10 minutes. I mean,LOL at my self for this supreme laziness. And this manifested itself in the result.

2. I did not give my dough ample time to rest and rise. After kneading for less than ten minutes, i had the audacity to proceed to cook after letting my dough rest for just 10 minutes. Fail Kaluhi! Fail!

***

Once that is done. divide your dough into four balls, each about the size of an orange. Roll each one out and divide it into quarters.

Heat your oil  and proceed to fry until each side is golden brown. Your oil should be moderately hot and not too too hot or cold. As soon as the mahamri turns golden brown flip it. If it stays too long on the heat, especially on the inflated side, it will burst and oil will seep in, and for sure we do not want that.

***

Mistake I made first time:

3.  The oil I used was extremely hot. This made the surface of the mahamri attain a blistered appearance, or as the coastal people call them, vipelepele.

4. I did not use enough yeast, neither did my dough rest and rise, so the end result was nothing short of flat blistery burnt mahamri. But thank God I found my mistakes and aced it the next time.

***

Below is the end result of my failed mahamri attempt. But now that I have explained where I went wrong, and what you should do to get it right, I am sure you will ace it at first try.

Once you are done making your mahamri the right way ;)), remove form the heat and serve with your favorite savory meaty dish or mbaazi. I personally LOVE having my mahamri with good ol’ tea!

Perfectly airy, perfectly flavored and perfectly soft and smooth!

Having this made me reminice about the slow, relaxed, humid mornings of Lamu. Having mahamri every single morning was one of my highlights. And now that I can make my own right at home, this will be one of my favorite indulgence.

The soft sweet dough with the nutty flavor of the coconut perfectly complimented by the warm taste of freshly crushed cardamom is one of those things that will make any one of your mornings your best one yet! Now that you have the best recipe, along with do’s and don’ts, you really have to give this a try!

Cheers!

-K


Get your downloadable recipe here :))

download best african recipes_ Kaluhiskitchen.com recipes_kenyan food recipes


All content and images are copyright protected by
DMCA.com Protection Status
Do not copy without expressly asking for permission or giving due credit

The post Mahamri appeared first on Kaluhi's Kitchen.

Chop House- Menu Tasting Review

$
0
0

Nothing excites me more than having fantastic food with great company. My last week Thursday at Radisson Blu, Upper Hill Nairobi, was just that! Several food bloggers including myself and other media journalists had been invited for a media tasting and all I can say is that I was blown away by everything. We were asked to give our opinion about everything and this is what the review is all about. I would like to take you through what we had and I hope you make a visit there and experience everything for yourself. The rating of each dish is out of 5 stars, which i’d like to call K-stars, because this is a rating by me :DD. From all the questions and comments I received from my Instagram story on the afternoon I walked you through the tasting, I am sure this is something you will love <3.

Restaurant Ambiance

Chop House is located right at the ground floor, on your left when you enter. It has a very modern clean, crisp feel, with most of its tones consisting of greys and blacks. It is very cosy, romantic even, especially at night when it is dark. It really is a place I would enjoy having a dinner date at or maybe even taking colleagues for a business meeting.

Service:

The staff at chop house are very very professional and warm. They are the kind of staff who make you feel at home and genuinely seek to make your visit memorable and comfortable. They check in from time to time to see how your meal is going and if you require anything but without being intrusive. You know how sometimes you visit a restaurant and the waiters check in on you every 3 minutes till you feel uncomfortable LOL? Chop house is not like that. Service is A1.

Price:

For the entire course, which we are about to get into in the next section, you would pay only KES. 5000, which to me is quite fair considering the standard of meals you shall be served, the number of courses and the calibre of the restaurant you will be dining in.

Food

Now, to what we are all here to read about, The food!!

Starters:

The first starter consisted of hot oak smoked salmon, blistered scallops with scallops with caper berry sauce and langoustine in parmesan and cointreau foam. The salmon was moist and yes you could taste the smokiness of the oak as the name of the dish indicates. The lemon and radish balm that was served with it perfectly complimented the smokey fish flavor. And as we know, lemon flavors and fish flavors are always a match made in heaven! I really really love my salmon as I told you in this post and it was to my delight that this love affair was reignited! The scallops were delicately sweet,tender and perfectly seared and went so so well with the caper berry sauce. I am very particular with how my scallops are cooked and I have say, this is one of the very best I have ever had. Everything simply complimented each other and this was my favorite dish to have during the entire tasting! We also had langoustine in parmesan and cointreau foam which is lobster dish, that went perfectly with the creaminess of the  parmesan foam and contrasted so well with the crunch of the roasted butternut.  Our starter was served with a chardonnay, which is my favorite white wine, and almost always compliments fish flavors. This was no exception. Our Casillero Del Diablo Chardonnay in particular went really really well with the oak smoked salmon.

Final verdict for the first starter is the full score of 5 K-stars. They hit the ball right out of the park with this one!

The second starter:

Photo credit: Joy Opiyo

Our second starter was a very delicious beef wellington coated in a brioche crust served with crispy potatoes and a tarragon hollandaise dripping all over it together with a red wine beet root  sauce at its base. How delicious does this sound?! This starter in particular tuned in to all our senses: It looked so beautiful and the colors contrasted so well that we dis not even know how to eat it. The aroma was so very inviting. I loved how well the beetroot sauce infused with red wine went with the beef, again, a combination you can never go wrong with and incorporating beets was really ingenious! The beef was super tender and very very moist. The crispiness and crunch of the potatoes added an excellent textural component and went well with the hollandaise sauce. Everything blended well and the taste of the dish overall was explosive. My only dislike was the thickness of the brioche crust. I found it too heavy for the beef and a little overwhelming. Were it a little bit thinner, it would have been perfect for me. All in all, the plates were wiped clean by everyone on the table. And that is always a fantastic sign :))

The K rating for this is 4.5

To clear our pallete:

photo credit: Joy Opiyo

We had a small serving of a raspberry and ginger sherbet with gin and tonic foam. The reason we needed to clear our pallete is so that the flavors of the previous dish,the beef wellington, do not mix with those of the next beef dish so that we enjoyed it to the max. One of the key ingredients that were listed, ginger, was however not detected in the sherbet. It had some dill though and that provided some fresh balance from the sweetness of the raspberry. However, I think a more assertive ginger taste would do a much better job complimenting the sweet raspberry and clearing our pallete.

My rating:

Main:

This was named “Art of the Josper”. So fancy, I know! *sips wine and flips braids* This consisted of a charred New York sirloin steak, with a homemade devils sauce, some garlicky green beans and a very generous serving of fries. This looks like a small serving, but it is actually very filling especially considering the starters that came before this. The flavors of the steak were spot on! It was cooked medium rare, hence it was very juicy. The mild spice seasoning together with the fresh thyme and rosemary sprigs that were served with the steak were perfect with the meat. Ironically, the steak was more on the tough and chewy side, and I feel to enjoy your steak to the max, you do not need to spend most of the time chewing with so much effort. For this dish, the devils sauce was said to have a sweet and spicy flavor, but my palate took up only spicy notes and no sweet. A sweet-spicy flavor would have tied everything together so well. My favorite thing on the plate, to my surprise, were the garlicky French beans. They were so crunchy, cooked really simply but the flavors really worked! The freshness they brought to the dish was very much welcome. This was served with Kumala Pinotage Red Wine, another perfect food-drink pairing.

My verdict for the entree: 4 K-stars

Dessert:

photo credit: Joy Opiyo

We had a chocolate fondant cake with burnt orange ice cream and a butter scotch sauce. How delicious does that sound?!! I usually am not a chocolate cake person as I find most of them a bit too rich, however this one was moderately sweet and you could still appreciate the taste and warmth of the chocolate which I loved. On its own, the burn orange ice cream was cloyingly sweet and for me, the orange notes, which I was dying to taste not as strong or as prominent as I would have loved them to be. It would be my perfect ice cream were the sugar a little less and the tang of the orange more prominent. Sweetness of desserts is usually perfectly balanced out with tang of citrus fruits and I feel the ice cream needed the orange note to really come out. However, when you have some of the ice cream and some of the cake in one bite, everything balanced out. That is because the very very sweet ice cream is tempered by the moderately sweet chocolate cake. And you know chocolate and orange flavors go so well together. The butterscotch sauce was nice and creamy but again, a bit too sweet for me. I would like to point out that I do not have much of a sweet tooth. But those who love dessert more than life itself (LOL) licked clean their plates and enjoyed each bite.

K stars:

***

I rarely eat out, but this is one of the restaurants I would recommend to anyone! It is one of two restaurants in Nairobi that I would visit over and over and over again. Be it for date night, or a business meeting or some solo-meal time, Chop House will ignite all your senses!

OVERALL K-RATING:


All content and images are copyright protected by
DMCA.com Protection Status
and belong to Kaluhi’s Kitchen unless otherwise stated


The post Chop House- Menu Tasting Review appeared first on Kaluhi's Kitchen.

My Sweet Stay At Lazizi Premier Hotel

$
0
0

I have said this before, and I will say it again: Nairobi traffic can send you to the brink of insanity. Lord forbid it rains or a trailer overturns on Mombasa road. Everything comes to a stand still. Meetings get canceled, dates get postpone and flights get missed. All this can simply be fixed and avoided by being at the right place at the right time. I remember the time my cousin Khetiwe came home for her holiday visit, she nearly missed her flight because of on going construction of the Southern bypass at that time. We all wished we would have left earlier and had lunch at a nearby hotel then see her off at the airport without stress, running people over like mad race horses rushing and anxiety. Next time she is in the country, I will for sure recommend Lazizi Premier Hotel for lunch, which is right inside our airport, and will save us the hustle of crossing the through monstrous Nairobi traffic. Here is a full review of my stay there:

Ambiance

Lazizi Premier has a very warm yet modern ambiance that makes you feel right at home. There are plenty of beige and grey tones which are offset by reds and mustards. I initially thought that since the hotel is right at the airport, the noise level would be a bit on the higher side, but to my surprise, it was really serene. That was because the rooms have a vacuum sealed double layer of glass which locks out all the airport noise.

That makes sure your stay is cosy and your nights very peaceful. One thing they have to improve on is the strength of the Wi-Fi signal and its coverage too so that those who may need to get work done before embarking on their journey do not struggle.

Service

The service was pretty good. The staff were very professional and very chatty with all the guests that were staying there along with us. They were ready to help out whenever need arose all round the clock with the duty manager just a call away.

Price

Prices of the coffee shop and the restaurant range more or less the same as that of any other restaurant in Nairobi. Their cakes and pastries prices range between 400-600 shillings while having a buffet meal at the restaurant either at lunchtime or in the evening, inclusive of drinks may be about KES.3000, which is pretty awesome for a buffet meal. The restaurant, coffee shop and bar are open to everyone, so if you are in the airport vicinity you can definitely drop by and treat your tummy to something delicious.

In case you may be planning to make a longer stay and not just have a meal, the room rates range between 280-400 USD.

The food

The food at Lazizi is quite nice. Kitchen 9 is their restaurant that offers buffet meals from breakfast to dinner. It echos more of a comforting meal you would have at the comfort of your home as opposed to your regular hotel food.

The buffet does have plenty of variety, with the dishes served over lunch different from those served during dinner. The cuisine that is mostly served is Kenyan, but with a modern eclectic twist to everything and some Indian dishes too. I personally could do with more defined flavors, more unexpected combinations and more character to the Kenyan dishes in particular. I was informed that they are still in the process of improving their menu with focus on having a banquet that will suit various palettes since they receive guests from such diverse backgrounds. Nevertheless, they should go bold with their flavors regardless of cuisine and adding more flavor to their food will take their menu from really nice to absolutely fantastic.


One of the dishes I enjoyed most during our stay was the coconut milk baked snapper and the mustard and mushroom lamb stew. Those two are memorable to me because they had such full flavor especially the coconut milk baked snapper.

The fish was moist and the lamb was tender. . The variety is fantastic, but plenty of work needs to be done on ensuring all dishes deliver on flavor and not just a select few.

The coffee shop: Aroma is open 24 hours a day. So it does not matter if you are are going to receive your guest at 3 a.m or you are waiting for your flight at 11 p.m, you can always pass by Aroma and have some coffee and their delicious pastries. After all, we just can’t all fit in the airport Java, so why not come down to the more relaxed, more spacious Aroma Coffee Shop.

In comparison to the food at Kitchen 9, the pastries were very delicious, had as much variety but delivered better in terms of flavor. The pastries and cakes are made fresh each day, so you do not need to worry about getting sub par pastries.

In case you may not have much of a sweet tooth and want something more filling, they make pizzas in their custom stone oven as you watch. It is such small things that really excite me!

If you would like to enjoy a little drink while waiting to travel or just after receiving your guest, then Velocity bar is for you.  The bar has a clean modern and sophisticated feel and they serve a wide range of cocktails, mocktails for those who do not consume alcohol, draught beers and a variety of international wines.

I could always use some wine, honey! *Olivia Pope glass swirl*.

***

What else can you do at Lazizi Premier hotel in between meals and especially if you are staying over for 12 hours or more? Well, you can treat yourself to a full body massage or a sauna session at Euphoria Spa. Better yet, you could have a swim at their roof top infinity pool overlooking our national park. No better way to relax before embarking on your journey!

Next time you are making a trip out of the country, or receiving guests or family, do it the right way! Avoid the Nairobi rush and treat yourself to all Lazizi Premier Hotel has to offer :))

Cheers!

KALUHI <3


All content and images are copyright protected by
DMCA.com Protection Status
Do not copy in part or whole without giving due credit.

The post My Sweet Stay At Lazizi Premier Hotel appeared first on Kaluhi's Kitchen.

Coconut Crepes with Passion Fruit Curd

$
0
0

“Absolutely delicious!!!” Those were the first words that popped into my mind after having my first bite of this creation! My eyes widened and my heart raced as I savored the flavors of my coconut crepes with passion fruit curd. I pushed my camera aside and sat on the floor and just finished the first crepe before I got up to get some tea and eat some more. That morning, I had woken up with  a severe Kraving for something sweet after enjoying lots of nyama-choma the past weekend. I just wanted something sweet so my mind went to work. I remembered taste a lemon curd I had at my friend’s place and I decided to make one but with passion fruit. To make my breakfast even more delicious, I decided to make crepes and add some desiccated coconut which I have lately been loving as an ingredient of late.Also, I am more of a crepe girl than a pancake girl :)). Have you ever made something for the very first time from the top of your head and shocked yourself with the amazing outcome? This was one of those days for me! I am sooooo excited to share this recipe with you, since you too can make this masterpiece and experience fantastic flavor with ingredients that are readily available to you.

PREP TIME: 10  MIN            COOK TIME: 30 MIN            SERVES:2

Ingredients

For the crepes

1 cup of all purpose flour

1 egg

3 tabespoons of sugar

3/4 cup of milk

2 tablespoons of dessicated coconut

For the curd

1 egg yolk

6 passion fruit

3 tablespoons of caster sugar/icing sugar

1 tablespoon of unsalted butter


Method.

First, begin working on your curd. In a bowl, add your egg yolk and the granulated sugar. Whisk those together until combined.

 It is a crucial ingredient since it makes the curd thick as it would a custard. To this core your passion fruit and whisk it all until completely combined. DO NOT use carton passion juice. You need the actual fruit in order to keep ingredient balance.

Take a sufuria and put some water to boil and place the bowl with the curd mixture over the sufuria. The steam from the water is what will be used to make the curd. I did not use direct heat while making this curd because the egg yolk will likely curdle, and no one has time to watch scramble eggs form among passion fruit (yuck!)

For your curd, you need to constantly stir for about 10 minutes until it had thickened and coats the back of your mwiko the same way uji (porridge) would when it is ready. At the 5 minute mark, add your butter. Once done, take form the heat and sieve.  Place this in your fridge for it to cool. You can make this in advance and just have it in your fridge so that when you need some, you can just get it without going through the whole process.

Now, for the crepes!

Place your egg and your sugar in a bowl and whisk until frothy and pale yellow. In another bowl, combine your flour and the desiccated coconut until well mixed. Add the frothy egg mixture and fold it in. Once roughly combined, add your milk bit by bit until the batter had the consistency of a light yoghurt. The lighter your batter, the thinner your crepes.

Proceed to cook your crepes by ladling your batter onto a greased pan, allowing each side to get about a minute on its surface or until golden brown. Look at how beautiful the coconut looks <3!

Fold your pancakes on your plate, drizzle some passion fruit curd over them, unleash your inner glutton and tear this down like the food beast you are ;))

The coconut crepes brought out the amazing taste of this nutty ingredient and goes so well in nearly everything sweet. It is an ingredient I have been really loving lately and I was so stoked it’s beauty shone through in this recipe. It was beautifully complimented by the sweet and mildly tang taste of the passion fruit curd. Besides passion fruit, you can use lemon, oranges or tangerines to make the curd. Citrus season is around the corner so book mark this recipe and fill your fridge with all kinds of delicious curds.

The beauty about this curd is, you can have it with both crepes and pancakes, as a drizzle over fresh maandazi or over freshly baked cake! Either way, you will love it <3

Ready to make your breakfast and brunch is unforgettable! Your first stop has to be this recipe!

To all things delicious!

-K


Get your downloadable recipe here :))

download best african recipes_ Kaluhiskitchen.com recipes_kenyan food recipes


All content and images are copyright protected by
DMCA.com Protection Status
Do not copy without expressly asking for permission or giving due credit

The post Coconut Crepes with Passion Fruit Curd appeared first on Kaluhi's Kitchen.

Viewing all 286 articles
Browse latest View live