Quantcast
Channel: Kaluhi's Kitchen
Viewing all 286 articles
Browse latest View live

Cumin Chicken and Mushroom Fried Rice

$
0
0

I absolutely love mushrooms!!! I can have them during all mealtime and I enjoy how easily they can be incorporated into nearly any dish you want!! I was deep in my love affair with mushrooms as I told you on twitter when I decided to make this recipe. It turned out way better than I had imagined and my mom really really enjoyed my cumin chicken and mushroom fried rice. And in my book, if mom  loves it, you know it is really good!!

Before we get into it, I would like to thank each one of you from the bottom of my heart for your support and encouragement through the years up until my being part of “Beyond The Plate: Best Food Blogs From Around The World”.  You are appreciated and I am where I am because of you! Thank you for all the warm comments and good vibes you all sent my way!  {{{*HUG*}}}

Now, let’s get into this bomb recipe!!

PREP TIME: 15 MIN         COOK TIME: 20 MINUTES             SERVES: 4

Ingredients:

1 cup of basmati rice

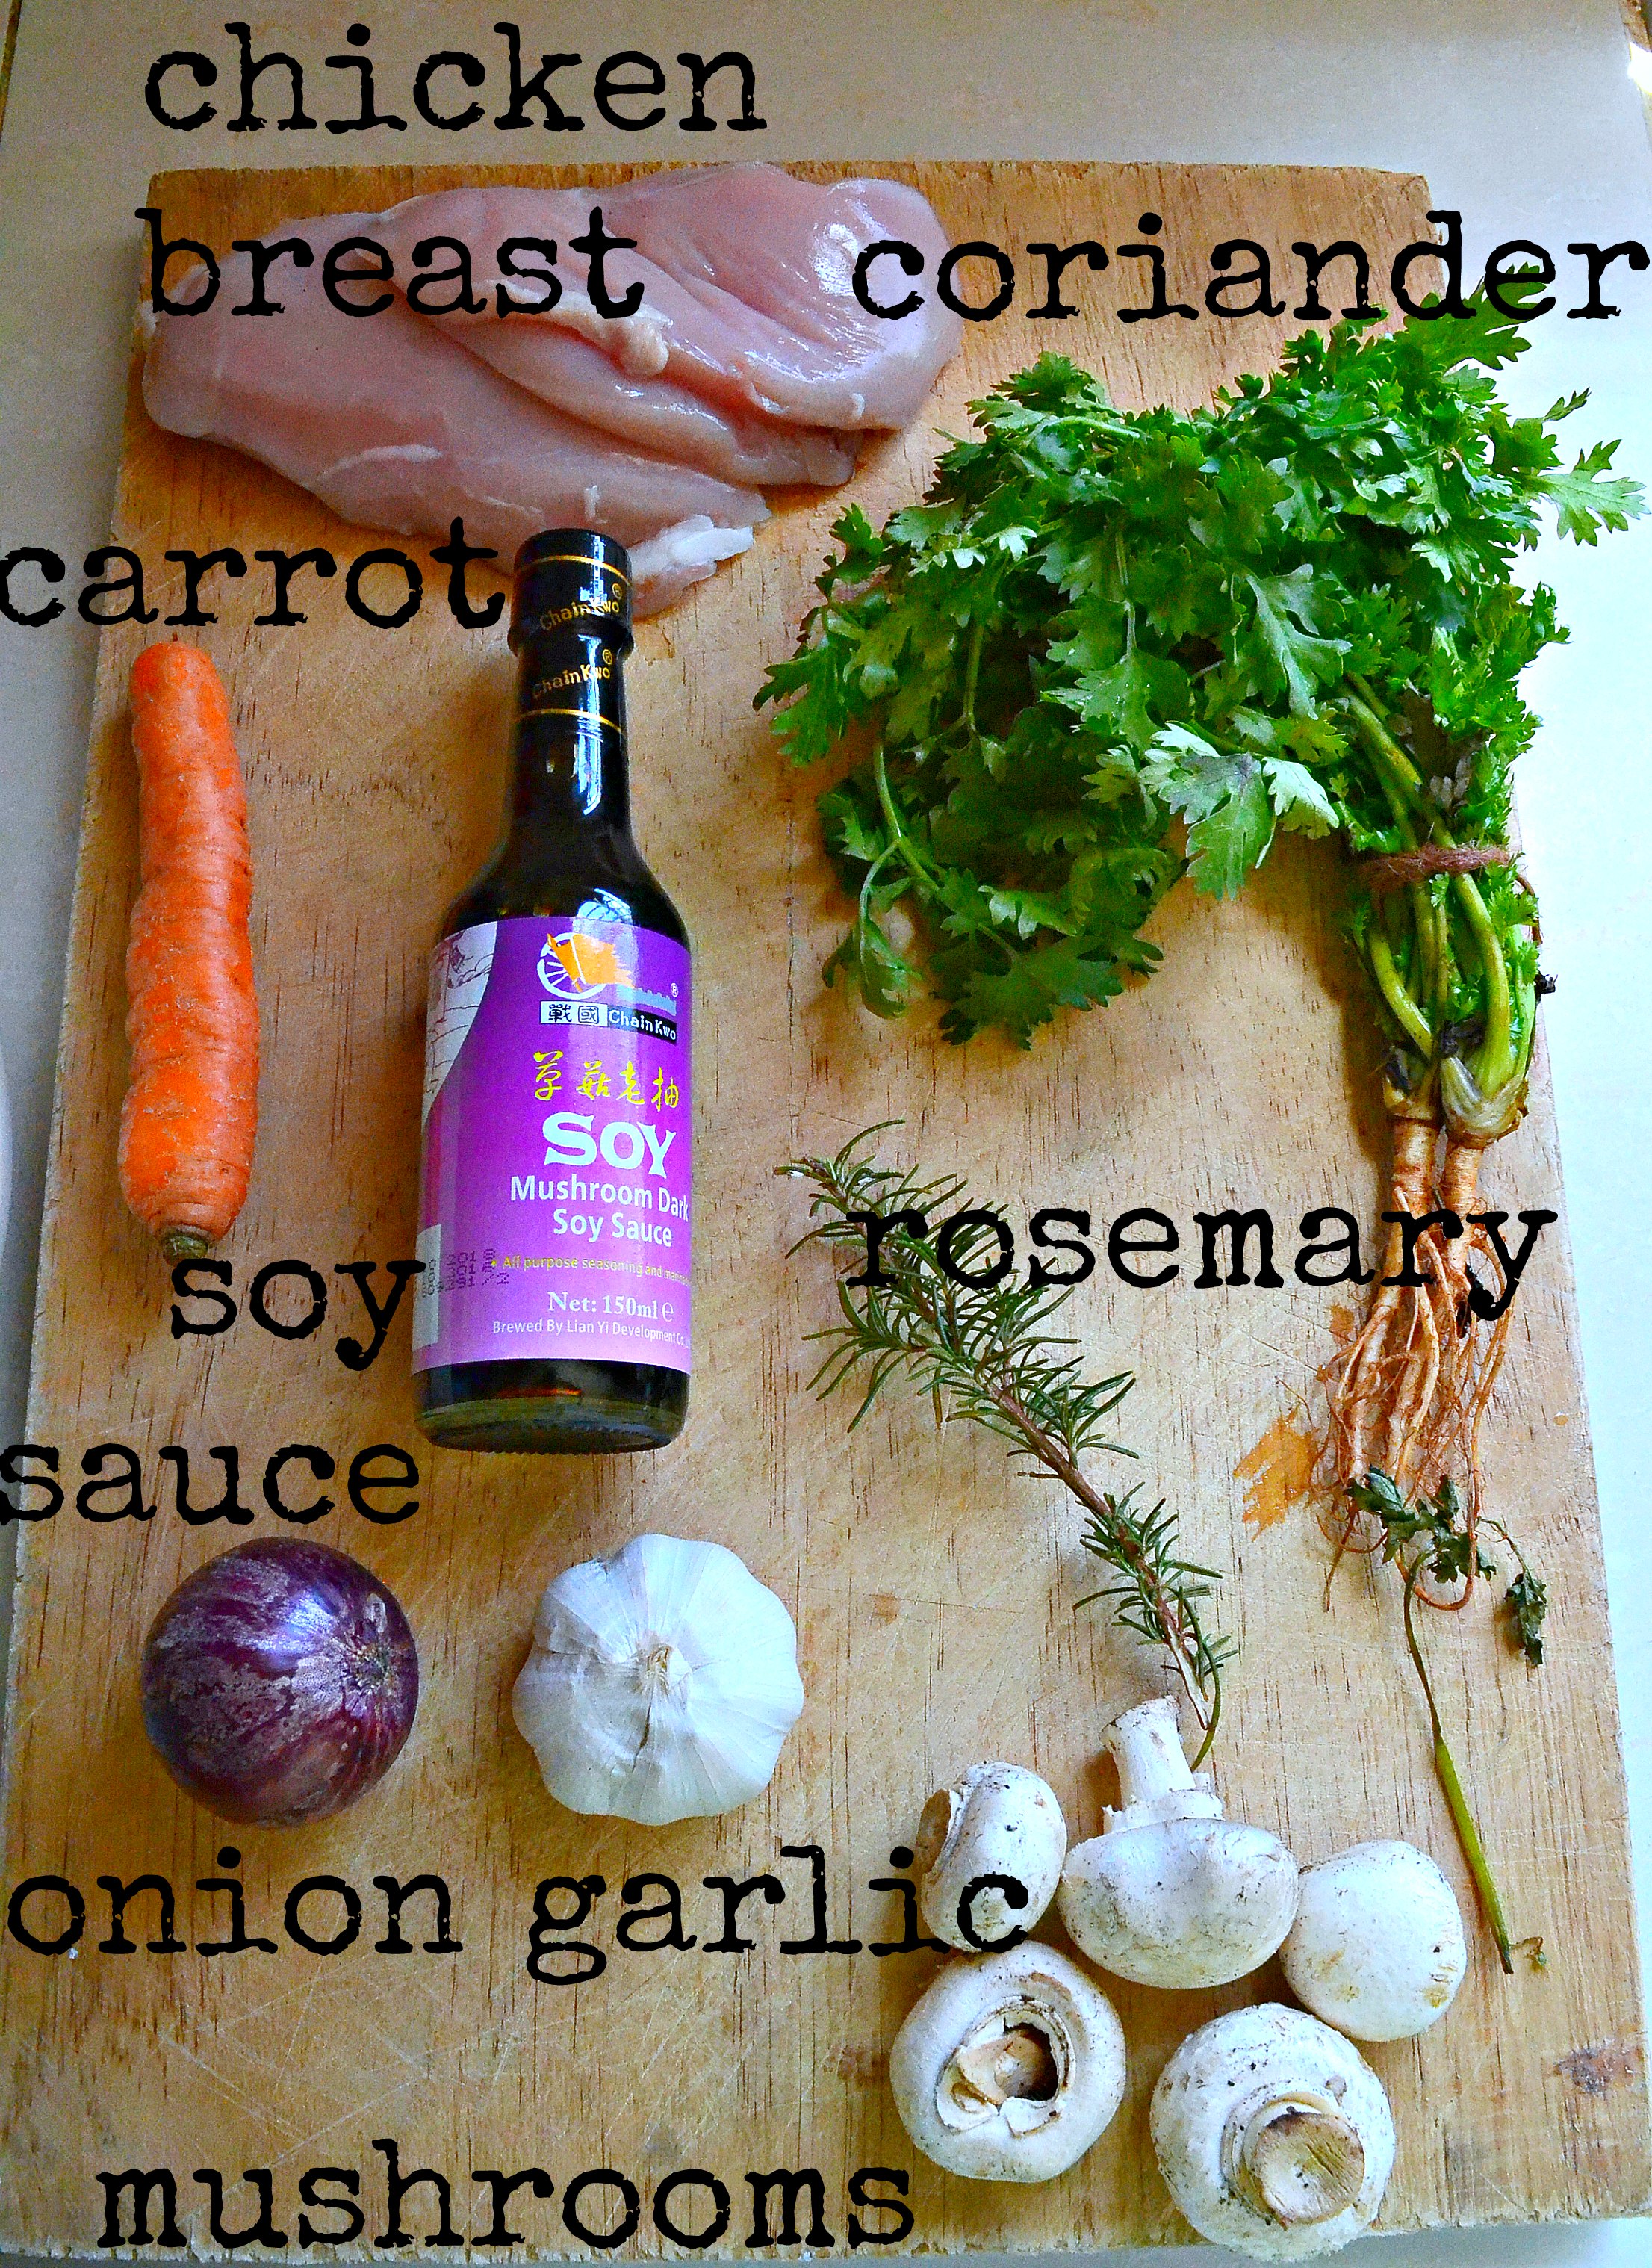
400g of chicken breast, cubed

1 cup of button mushrooms, sliced

1 red onion, finely chopped

Coriander (Both stalks and leaves), chopped

5 cloves of garlic, minced

1 tablespoon of fresh rosemary

1/2 a teaspoon of cumin seeds

3 cinnamon sticks

1/2 a teaspoon of paprika

1 tablespoon of soy sauce

1 carrot, very finely cubed

Salt and pepper to taste

Vegetable oil for frying

Method

Put your rice to cook. Once the rice is done, set aside. As that is going, prepare the other ingredients. I used button mushrooms for this recipe, which I bought at 150 bob a pack, and I cooked three other dishes with. How gorgeous do these look!!

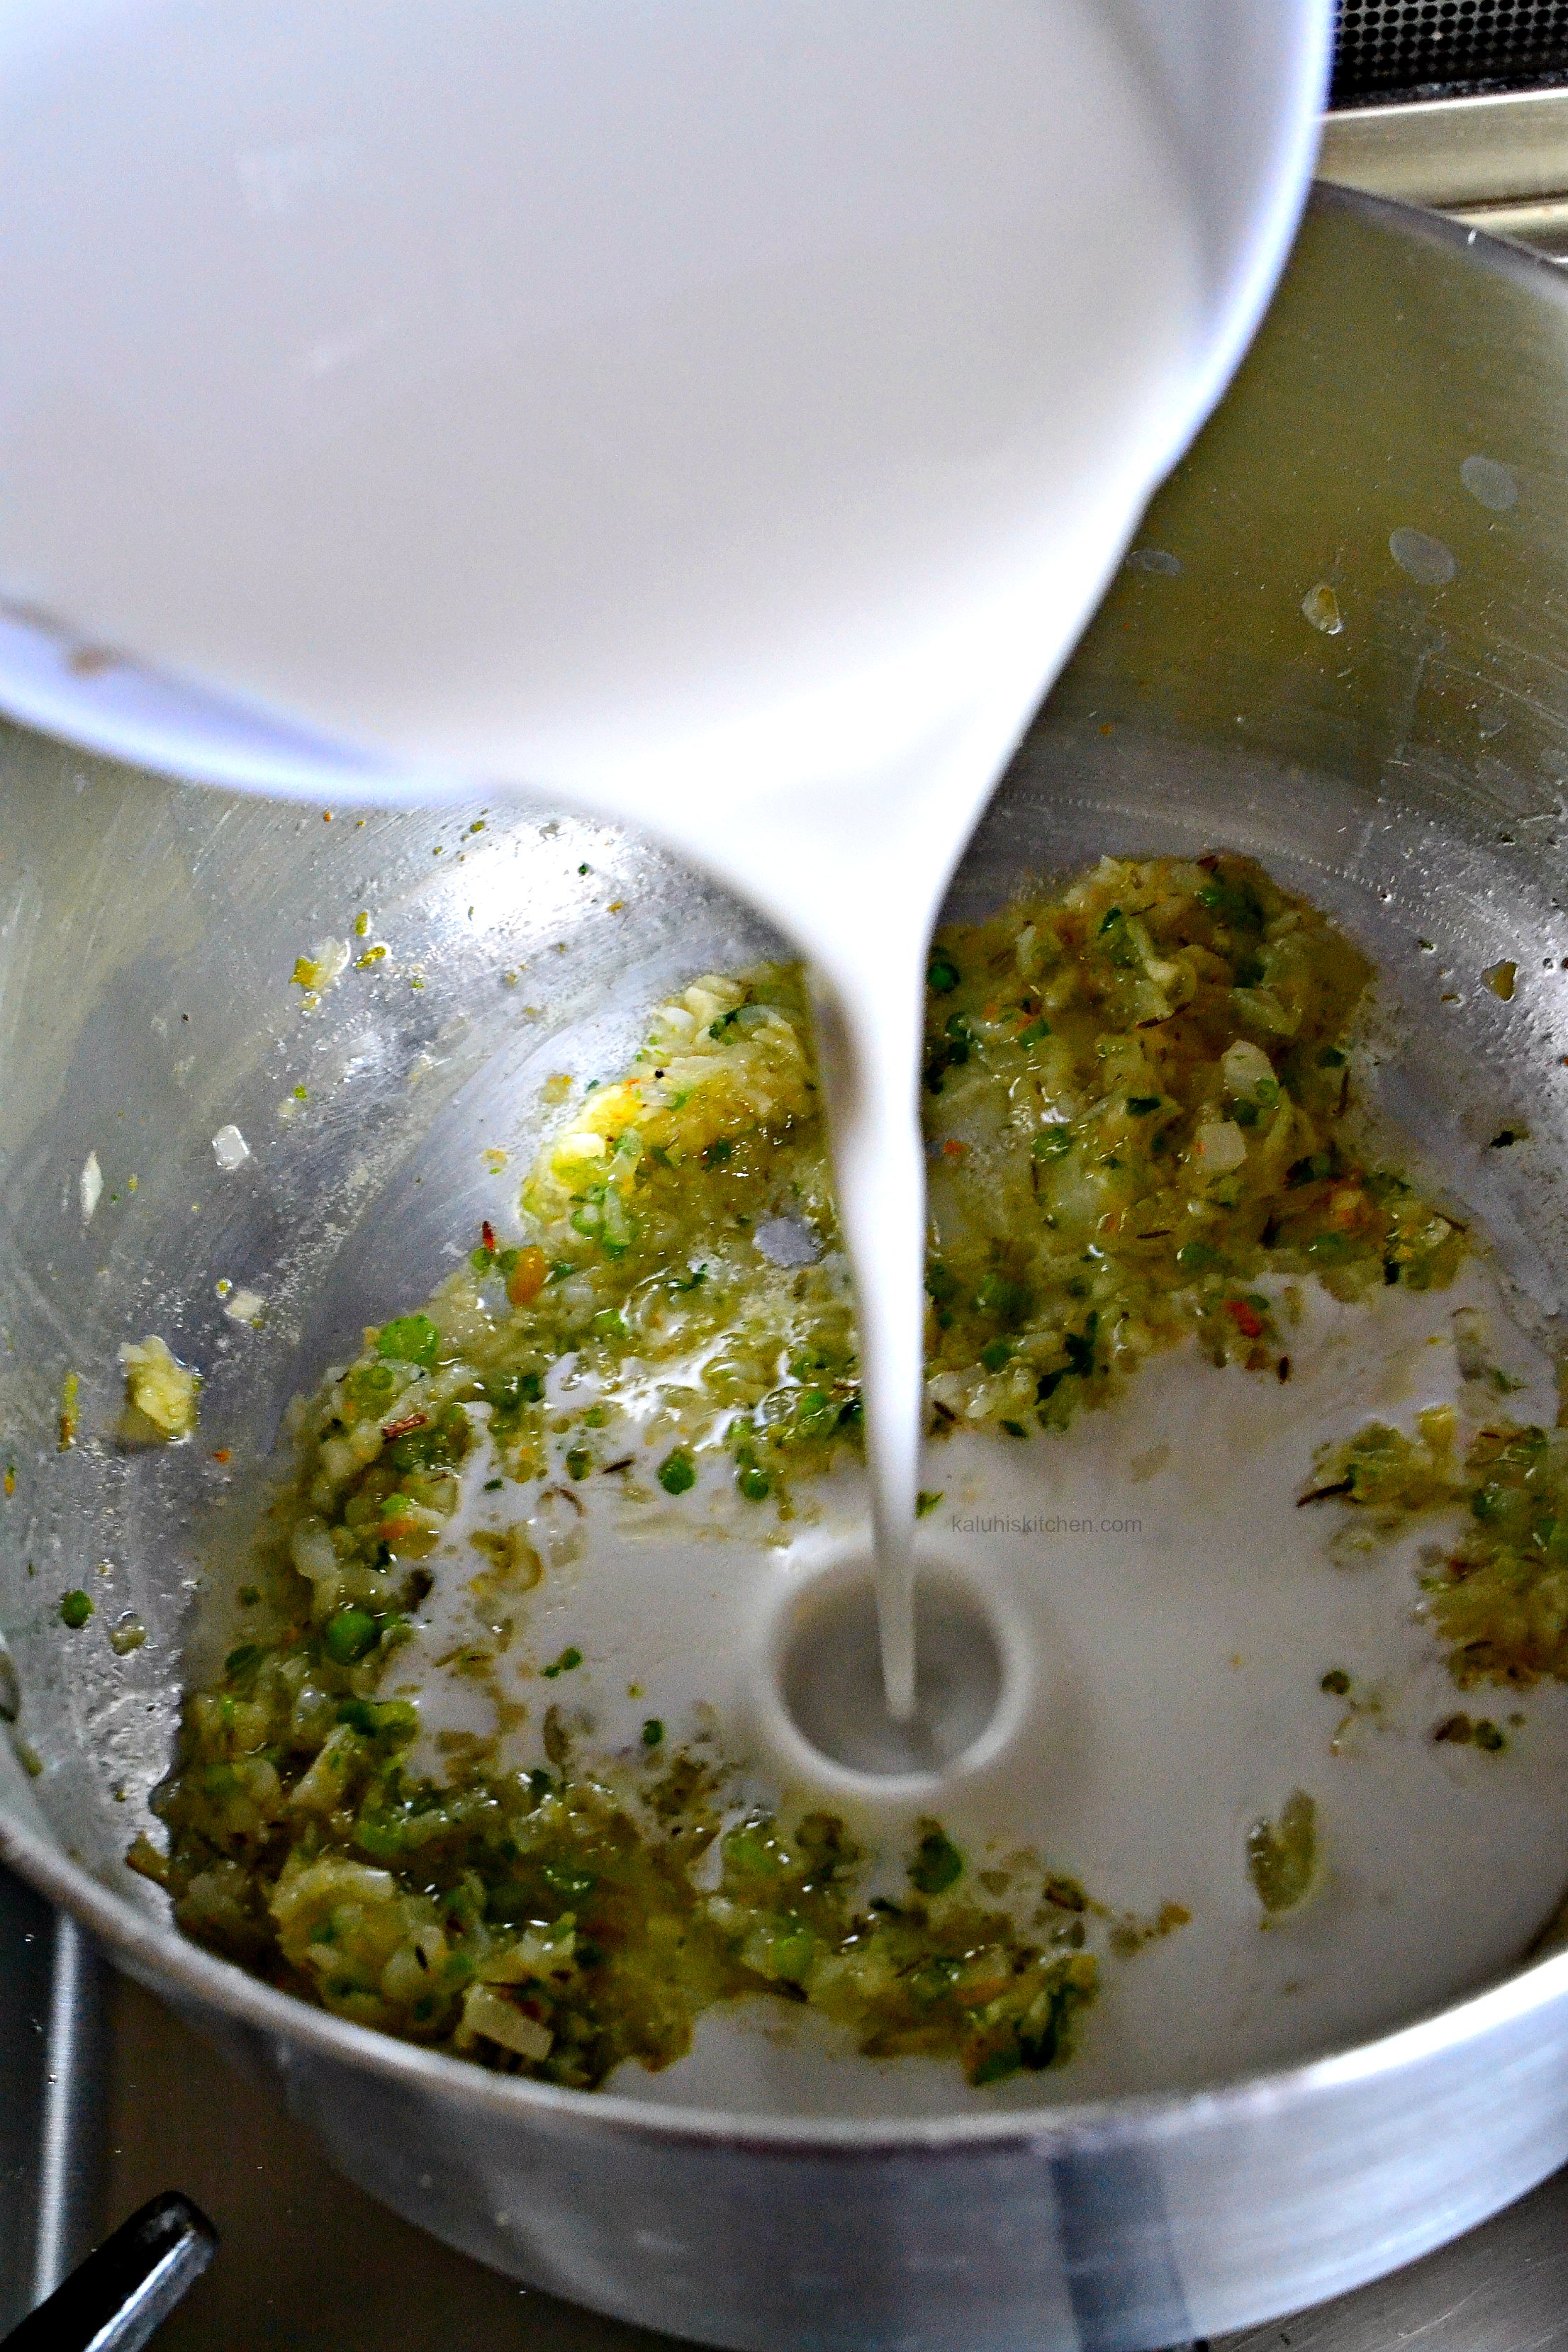
In a pan, heat some vegetable oil and add your red onion, coriander stalks, cumin seeds and cinnamon sticks. Cook these until fragrant. And let e tell you, your kitchen will smell like paradise!!! I purchased both my cumin seeds and cinnamon sticks from Tuskys at  60 shillings and 120 shillings a pack. If you do not get the whole spices, the already ground cumin and cinnamon will do.

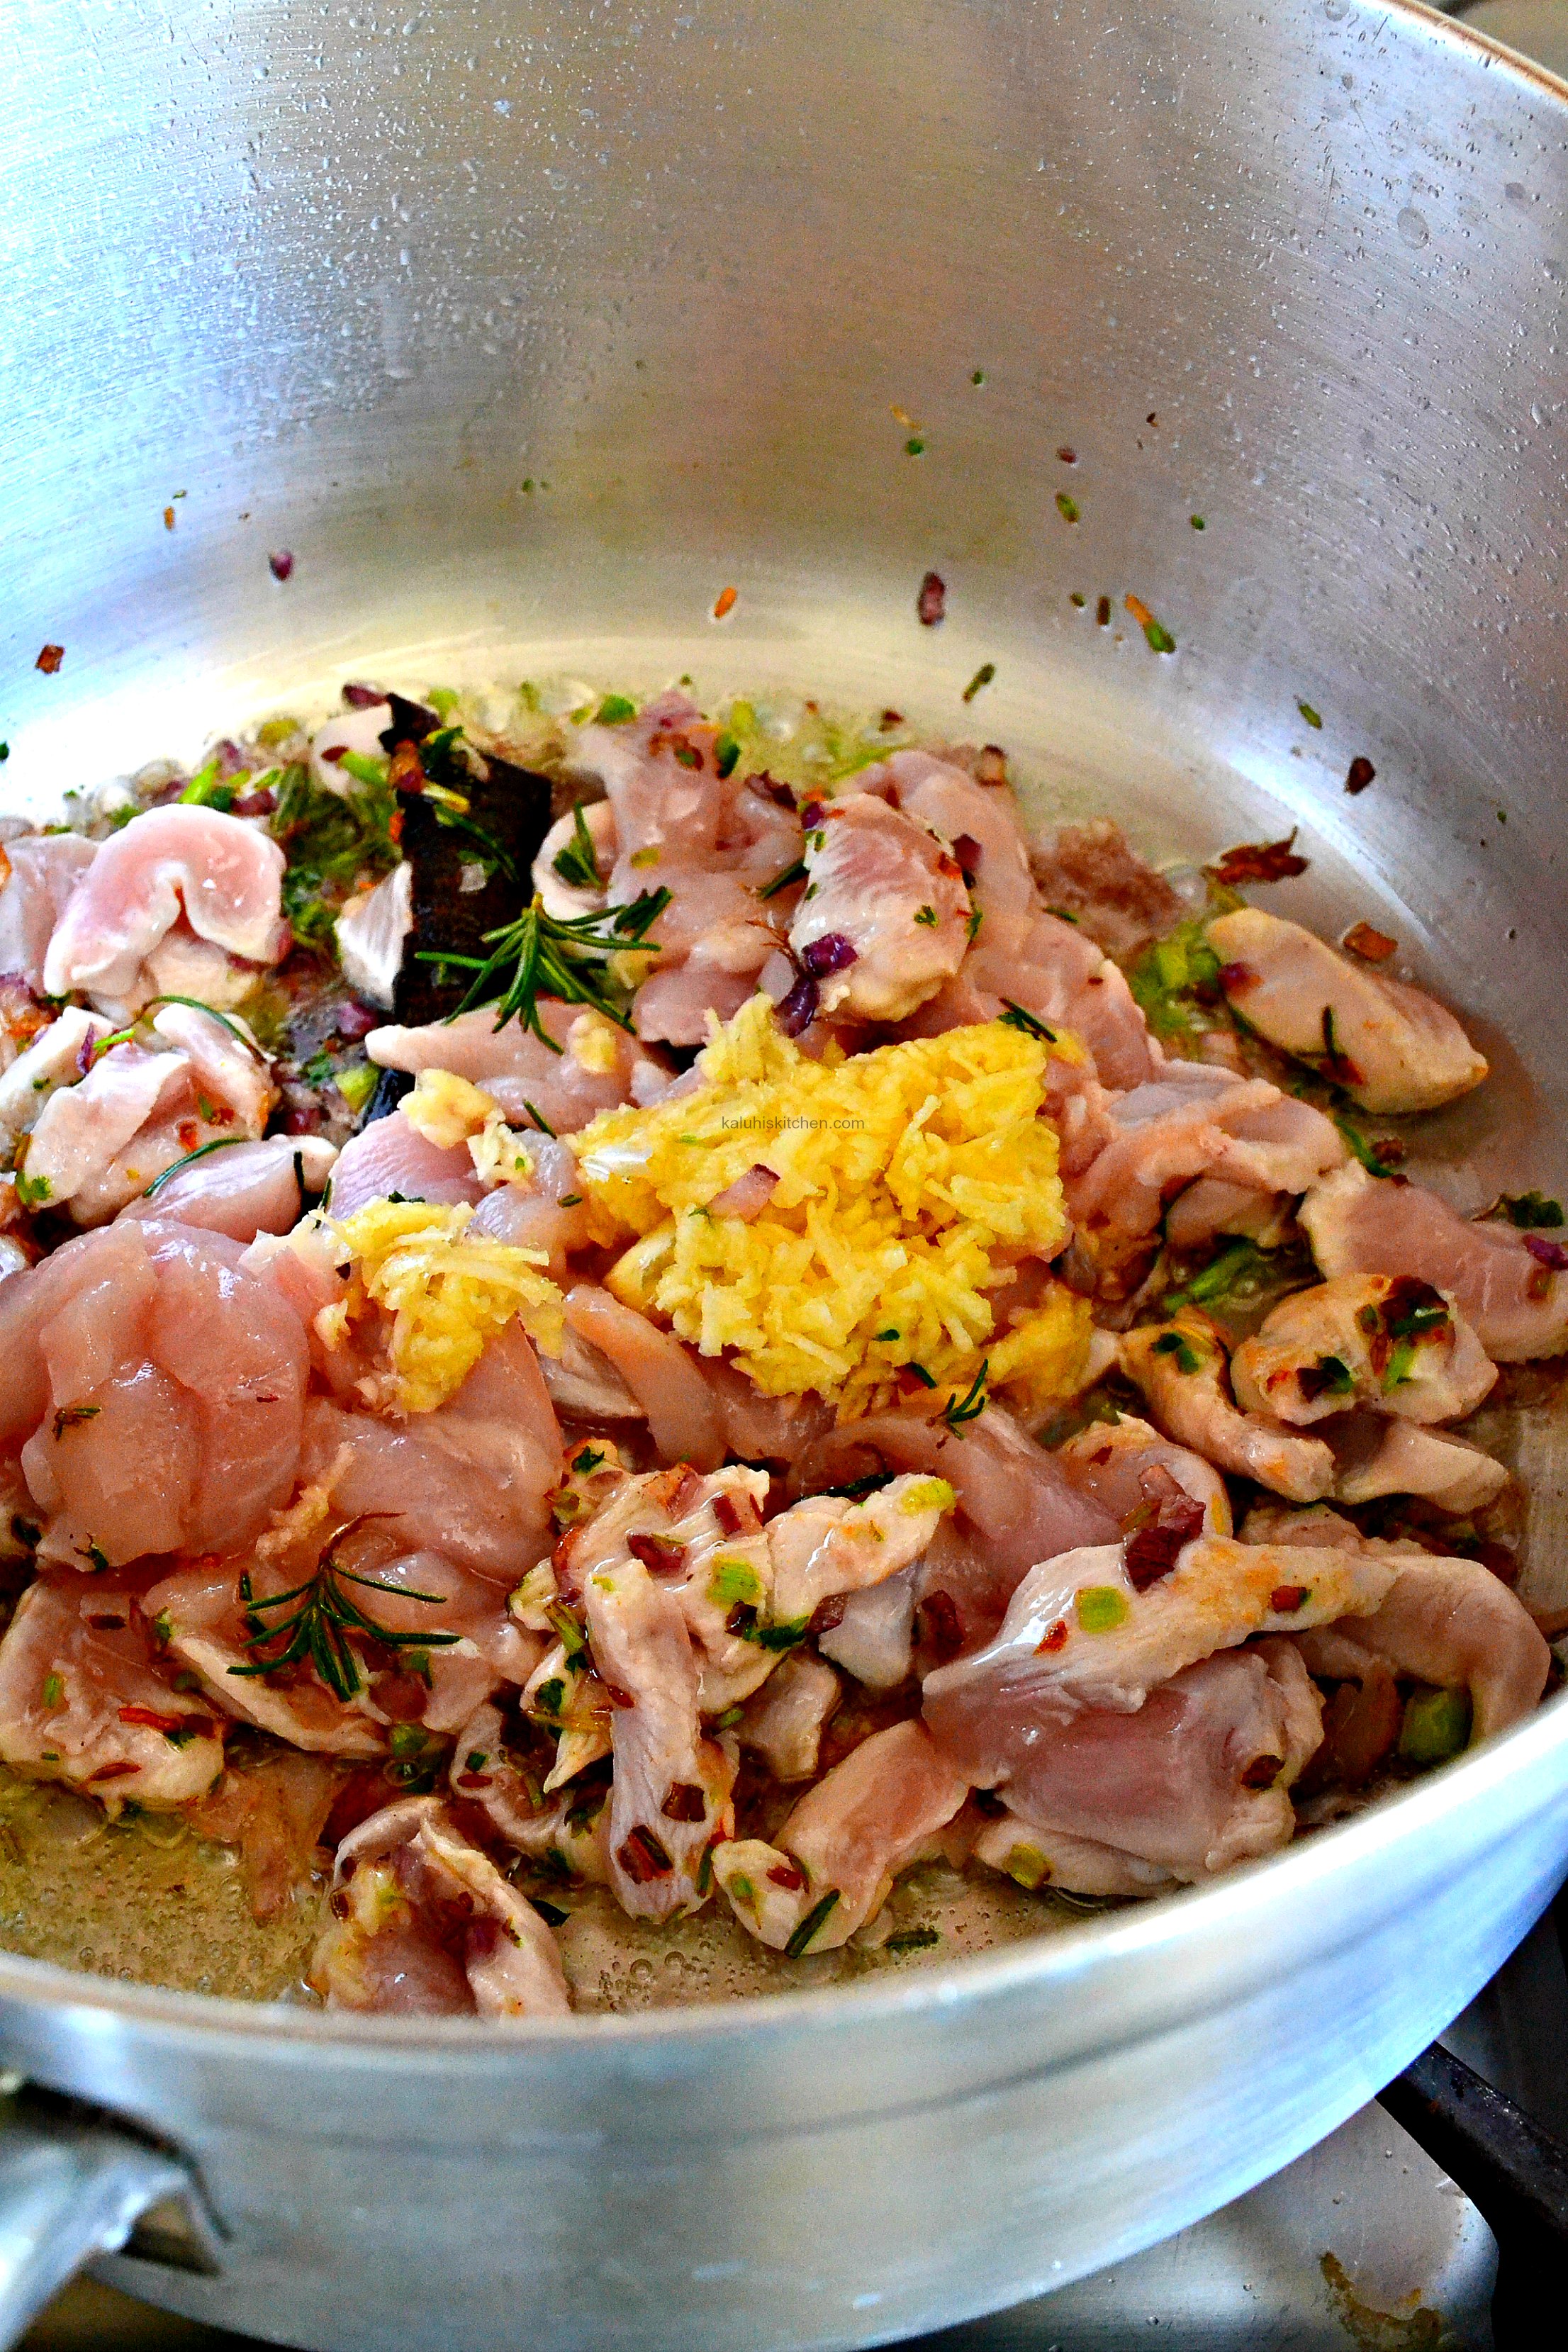
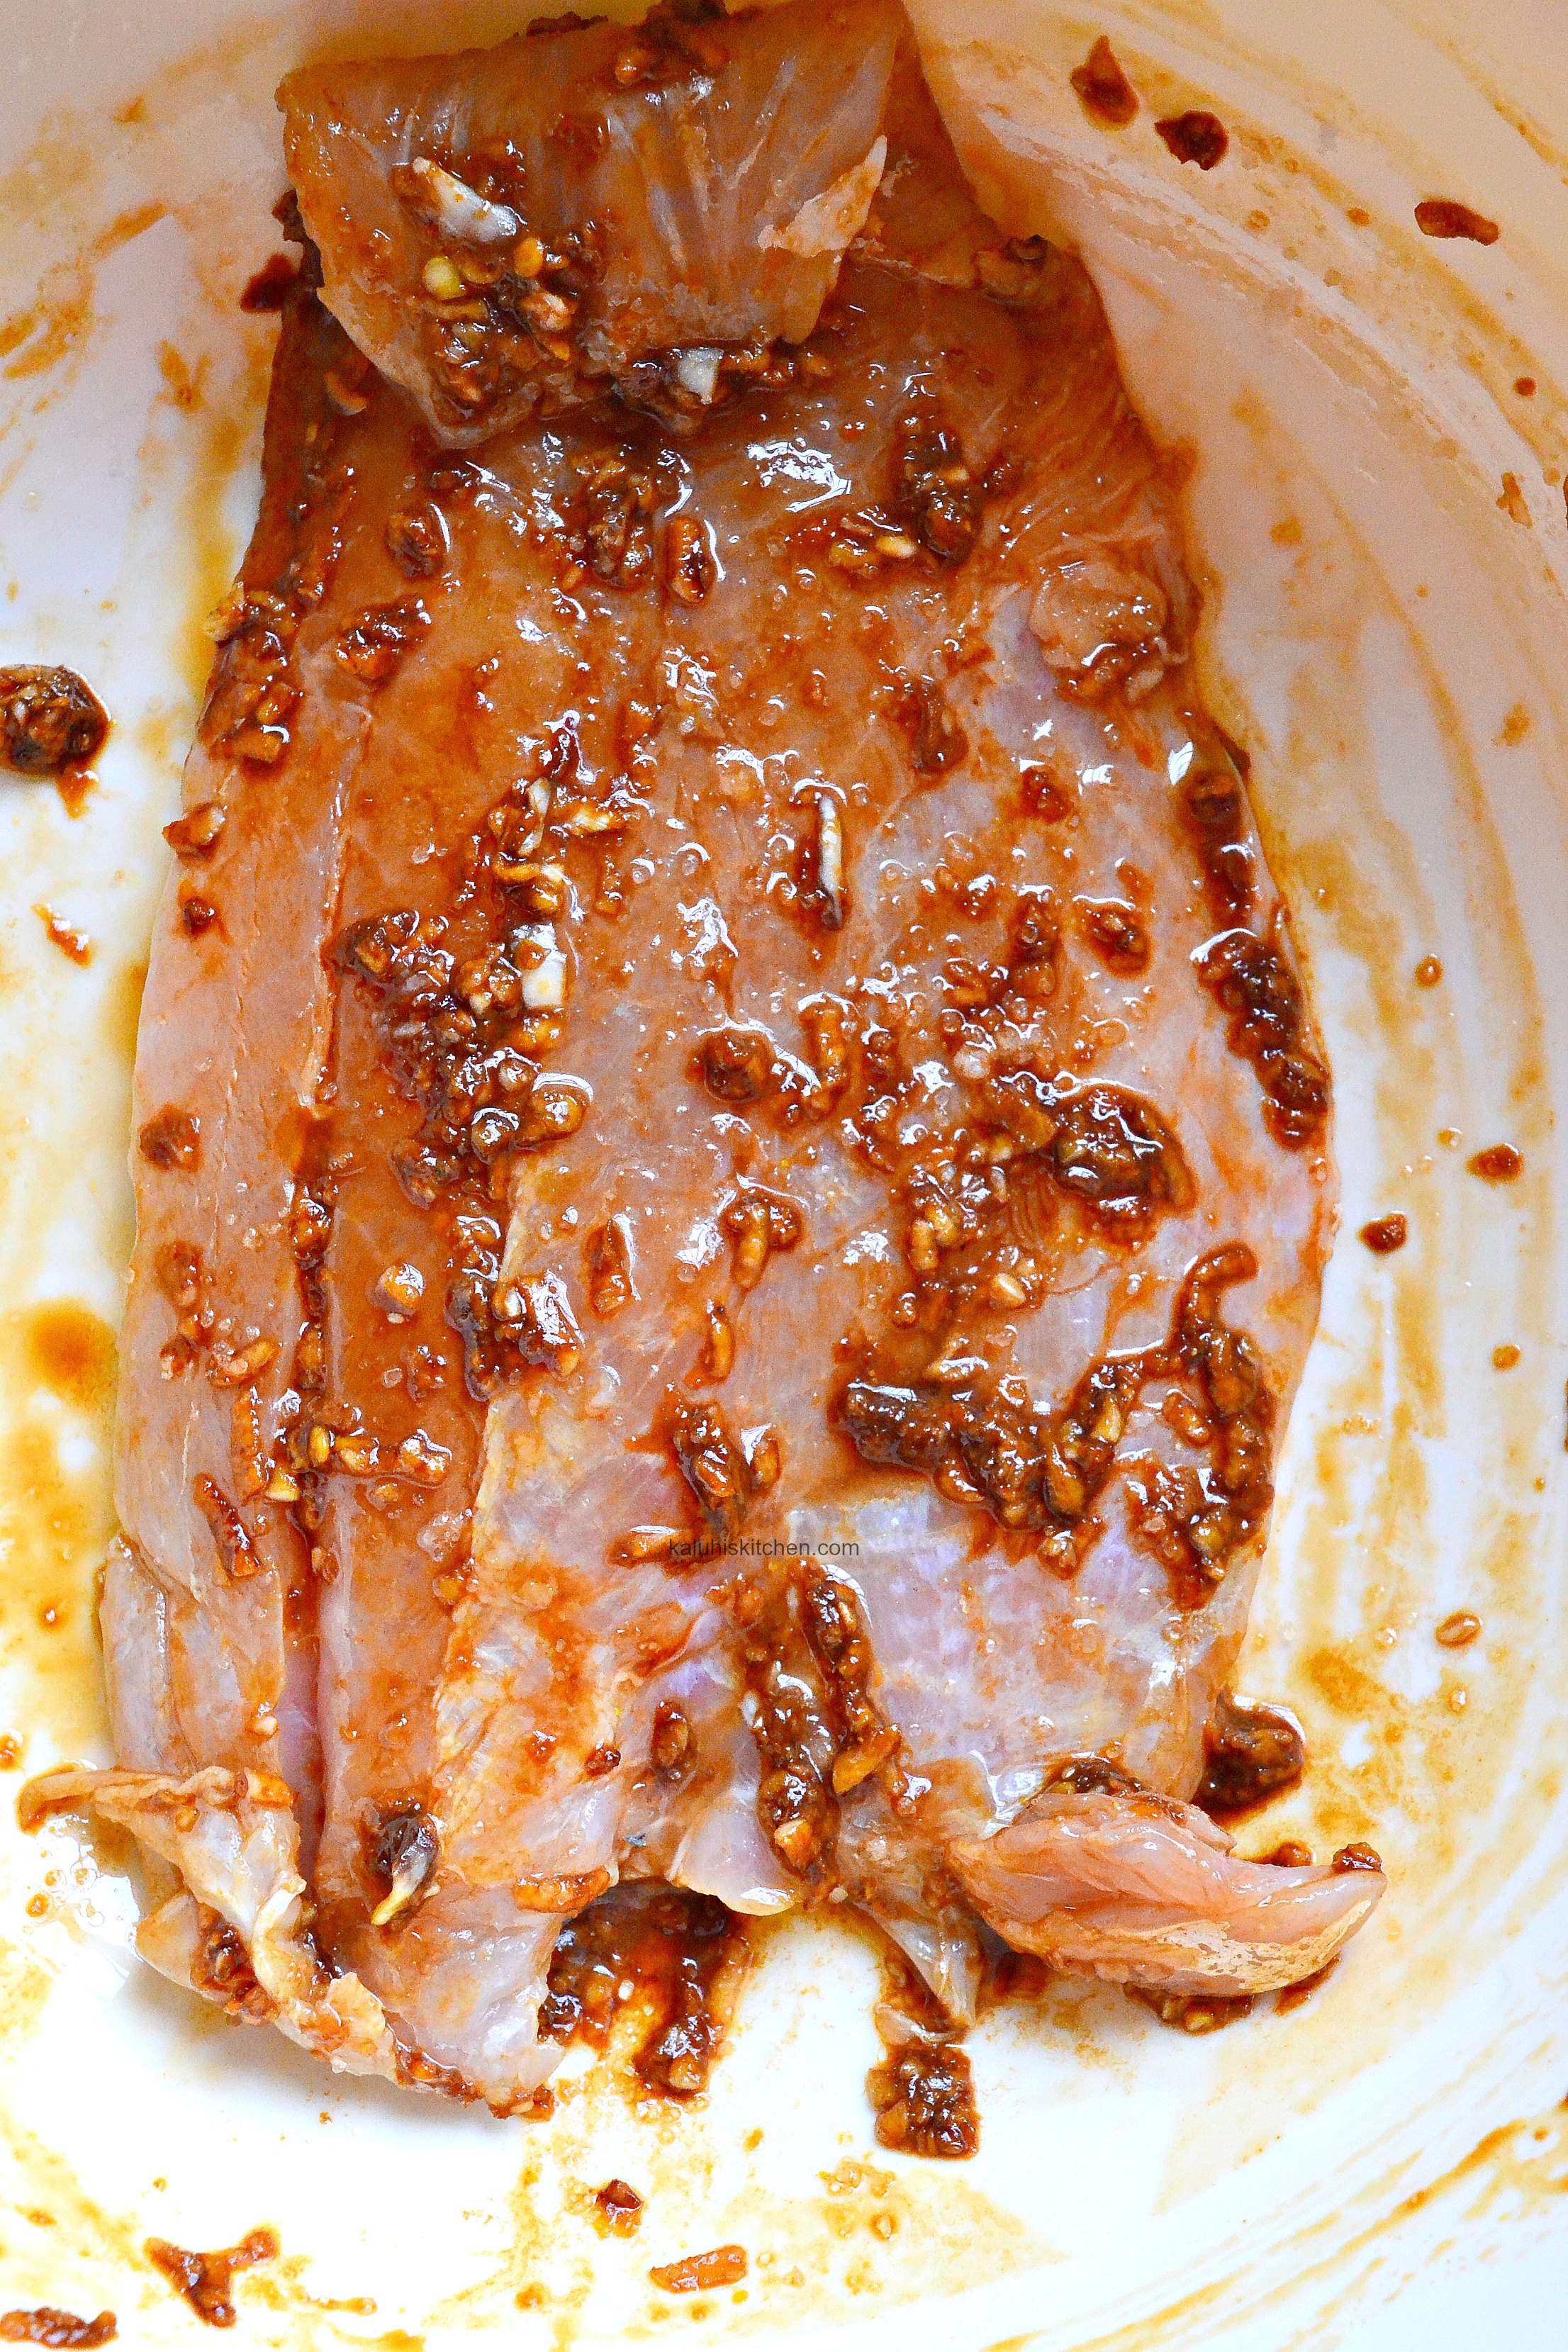
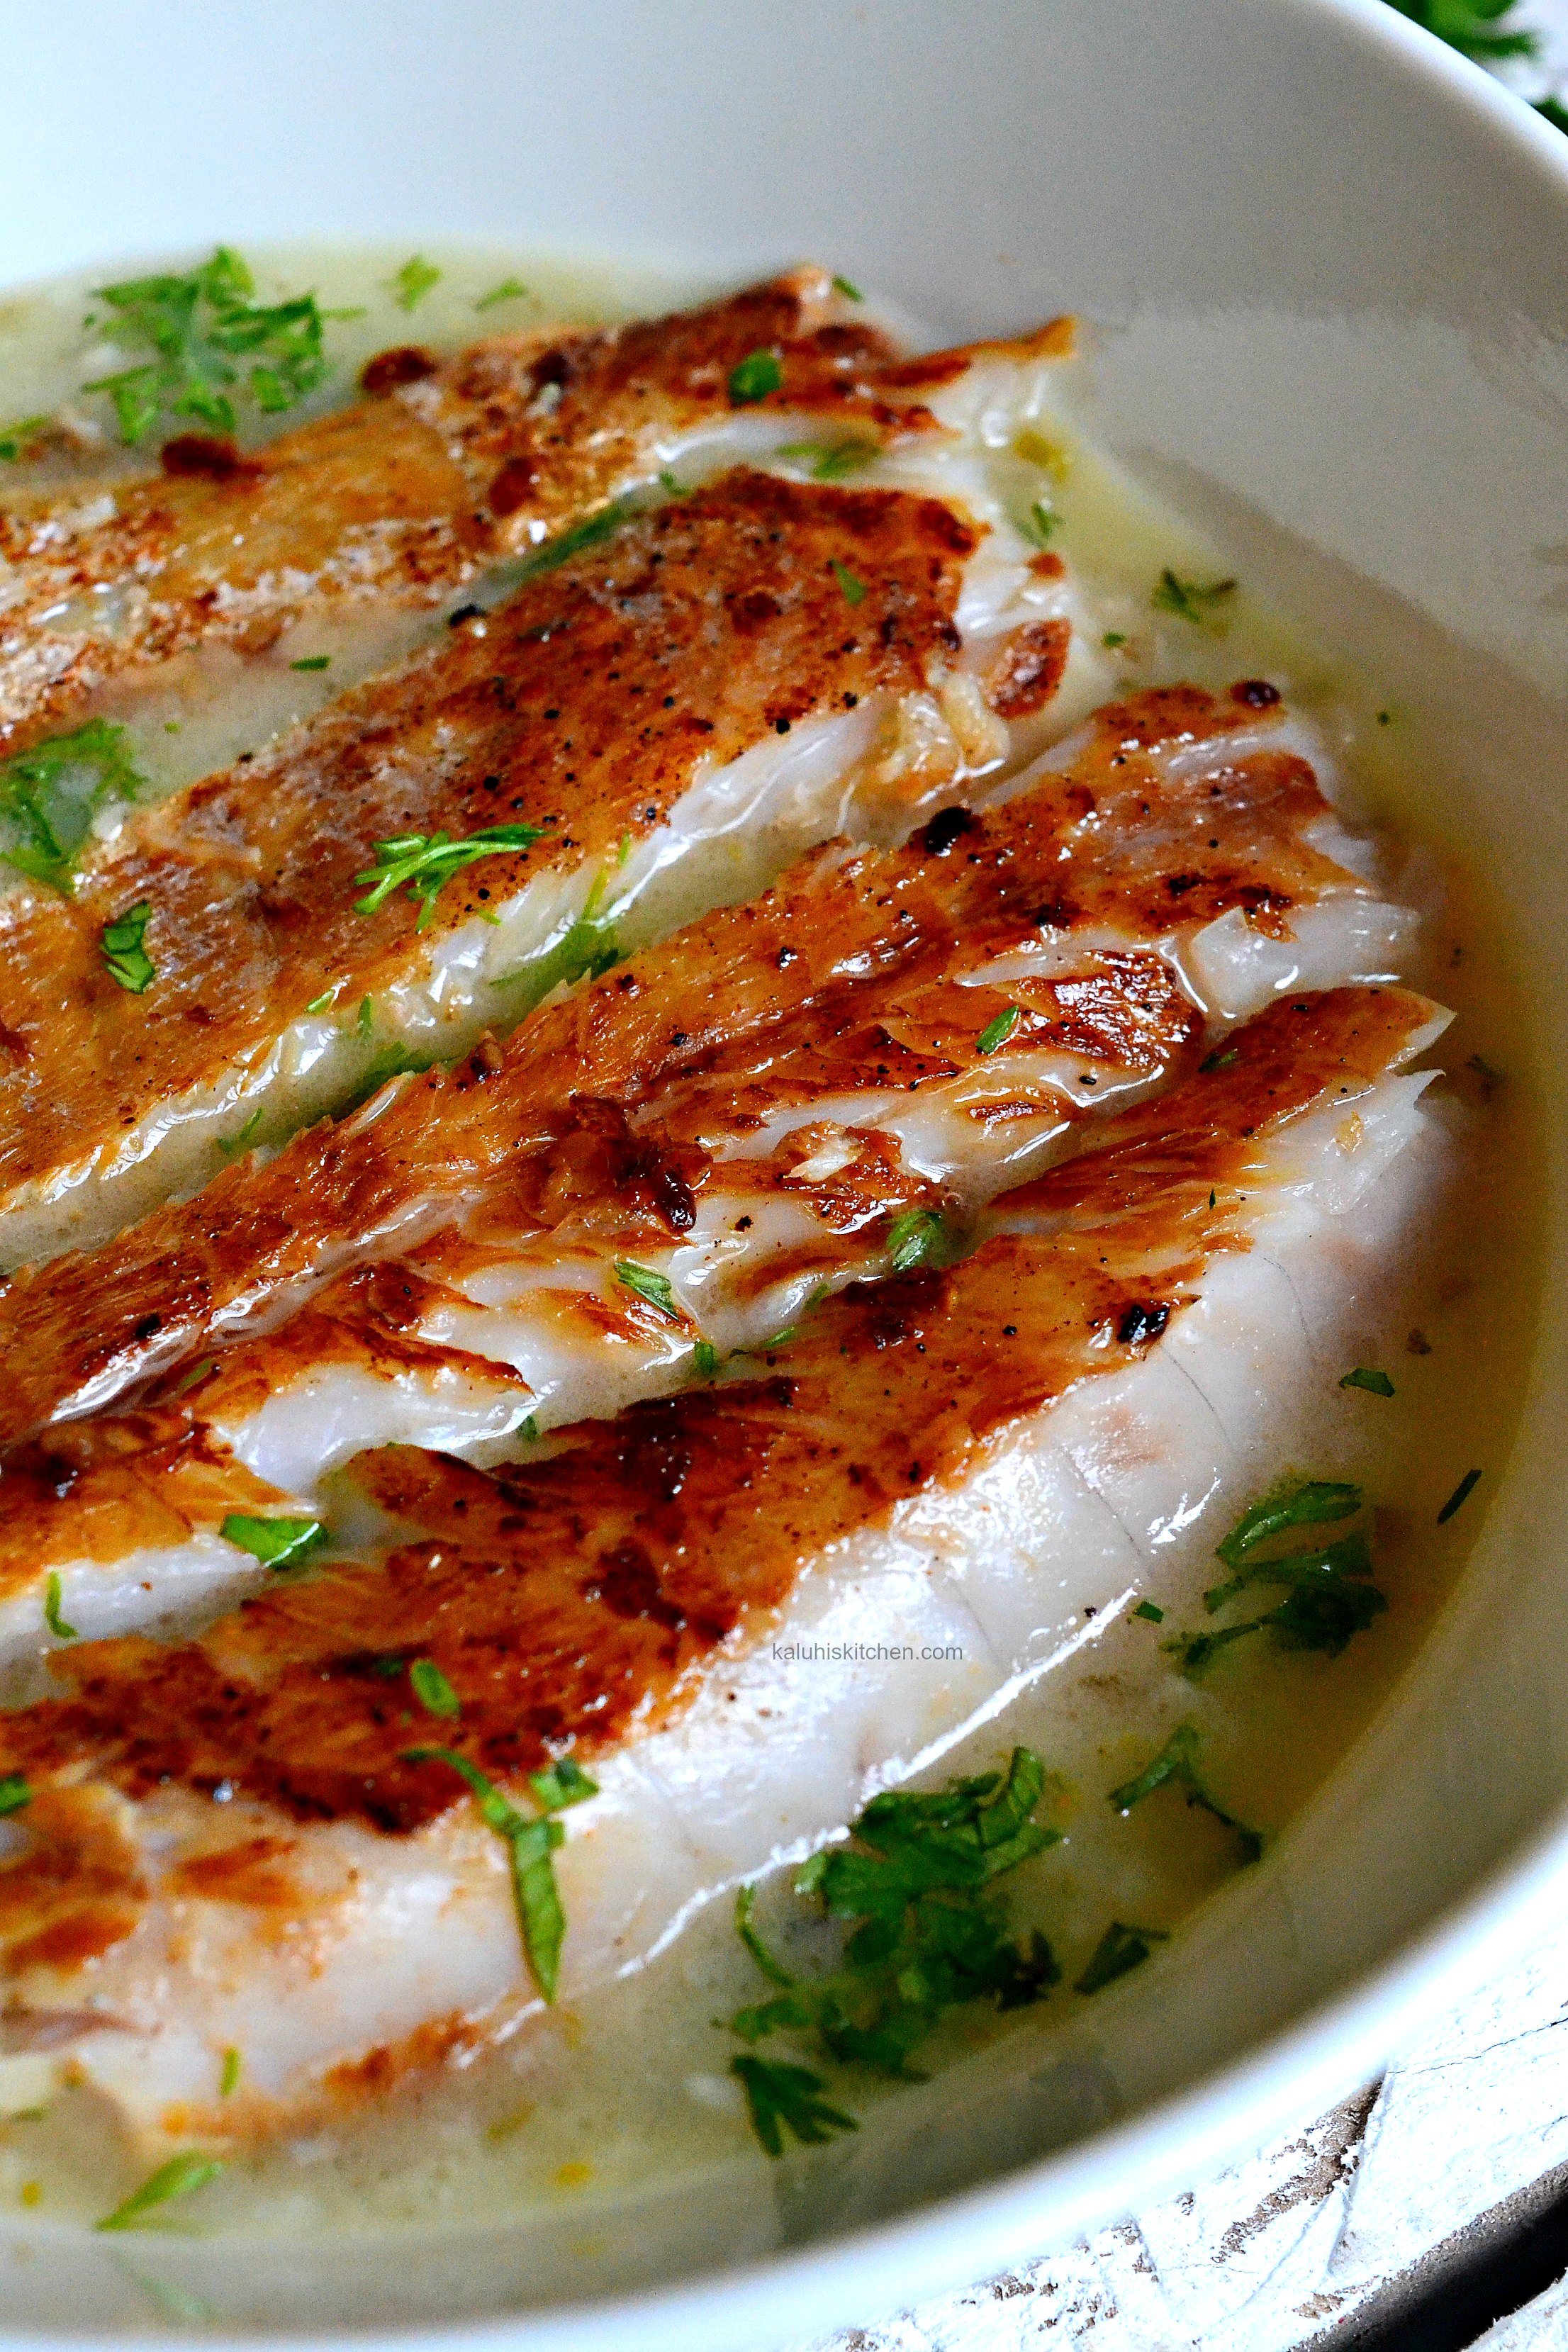
Add your chicken strips, which should be cut into strips or cubes , together with the paprika, pepper, rosemary, finely cubed carrots and garlic.Because the chicken is cut into thin strips, it will cook through really fast. Once the chicken has just started to turn white, add the mushrooms and cook everything until the chicken is completely cooked through. This will take 8-10 minutes.

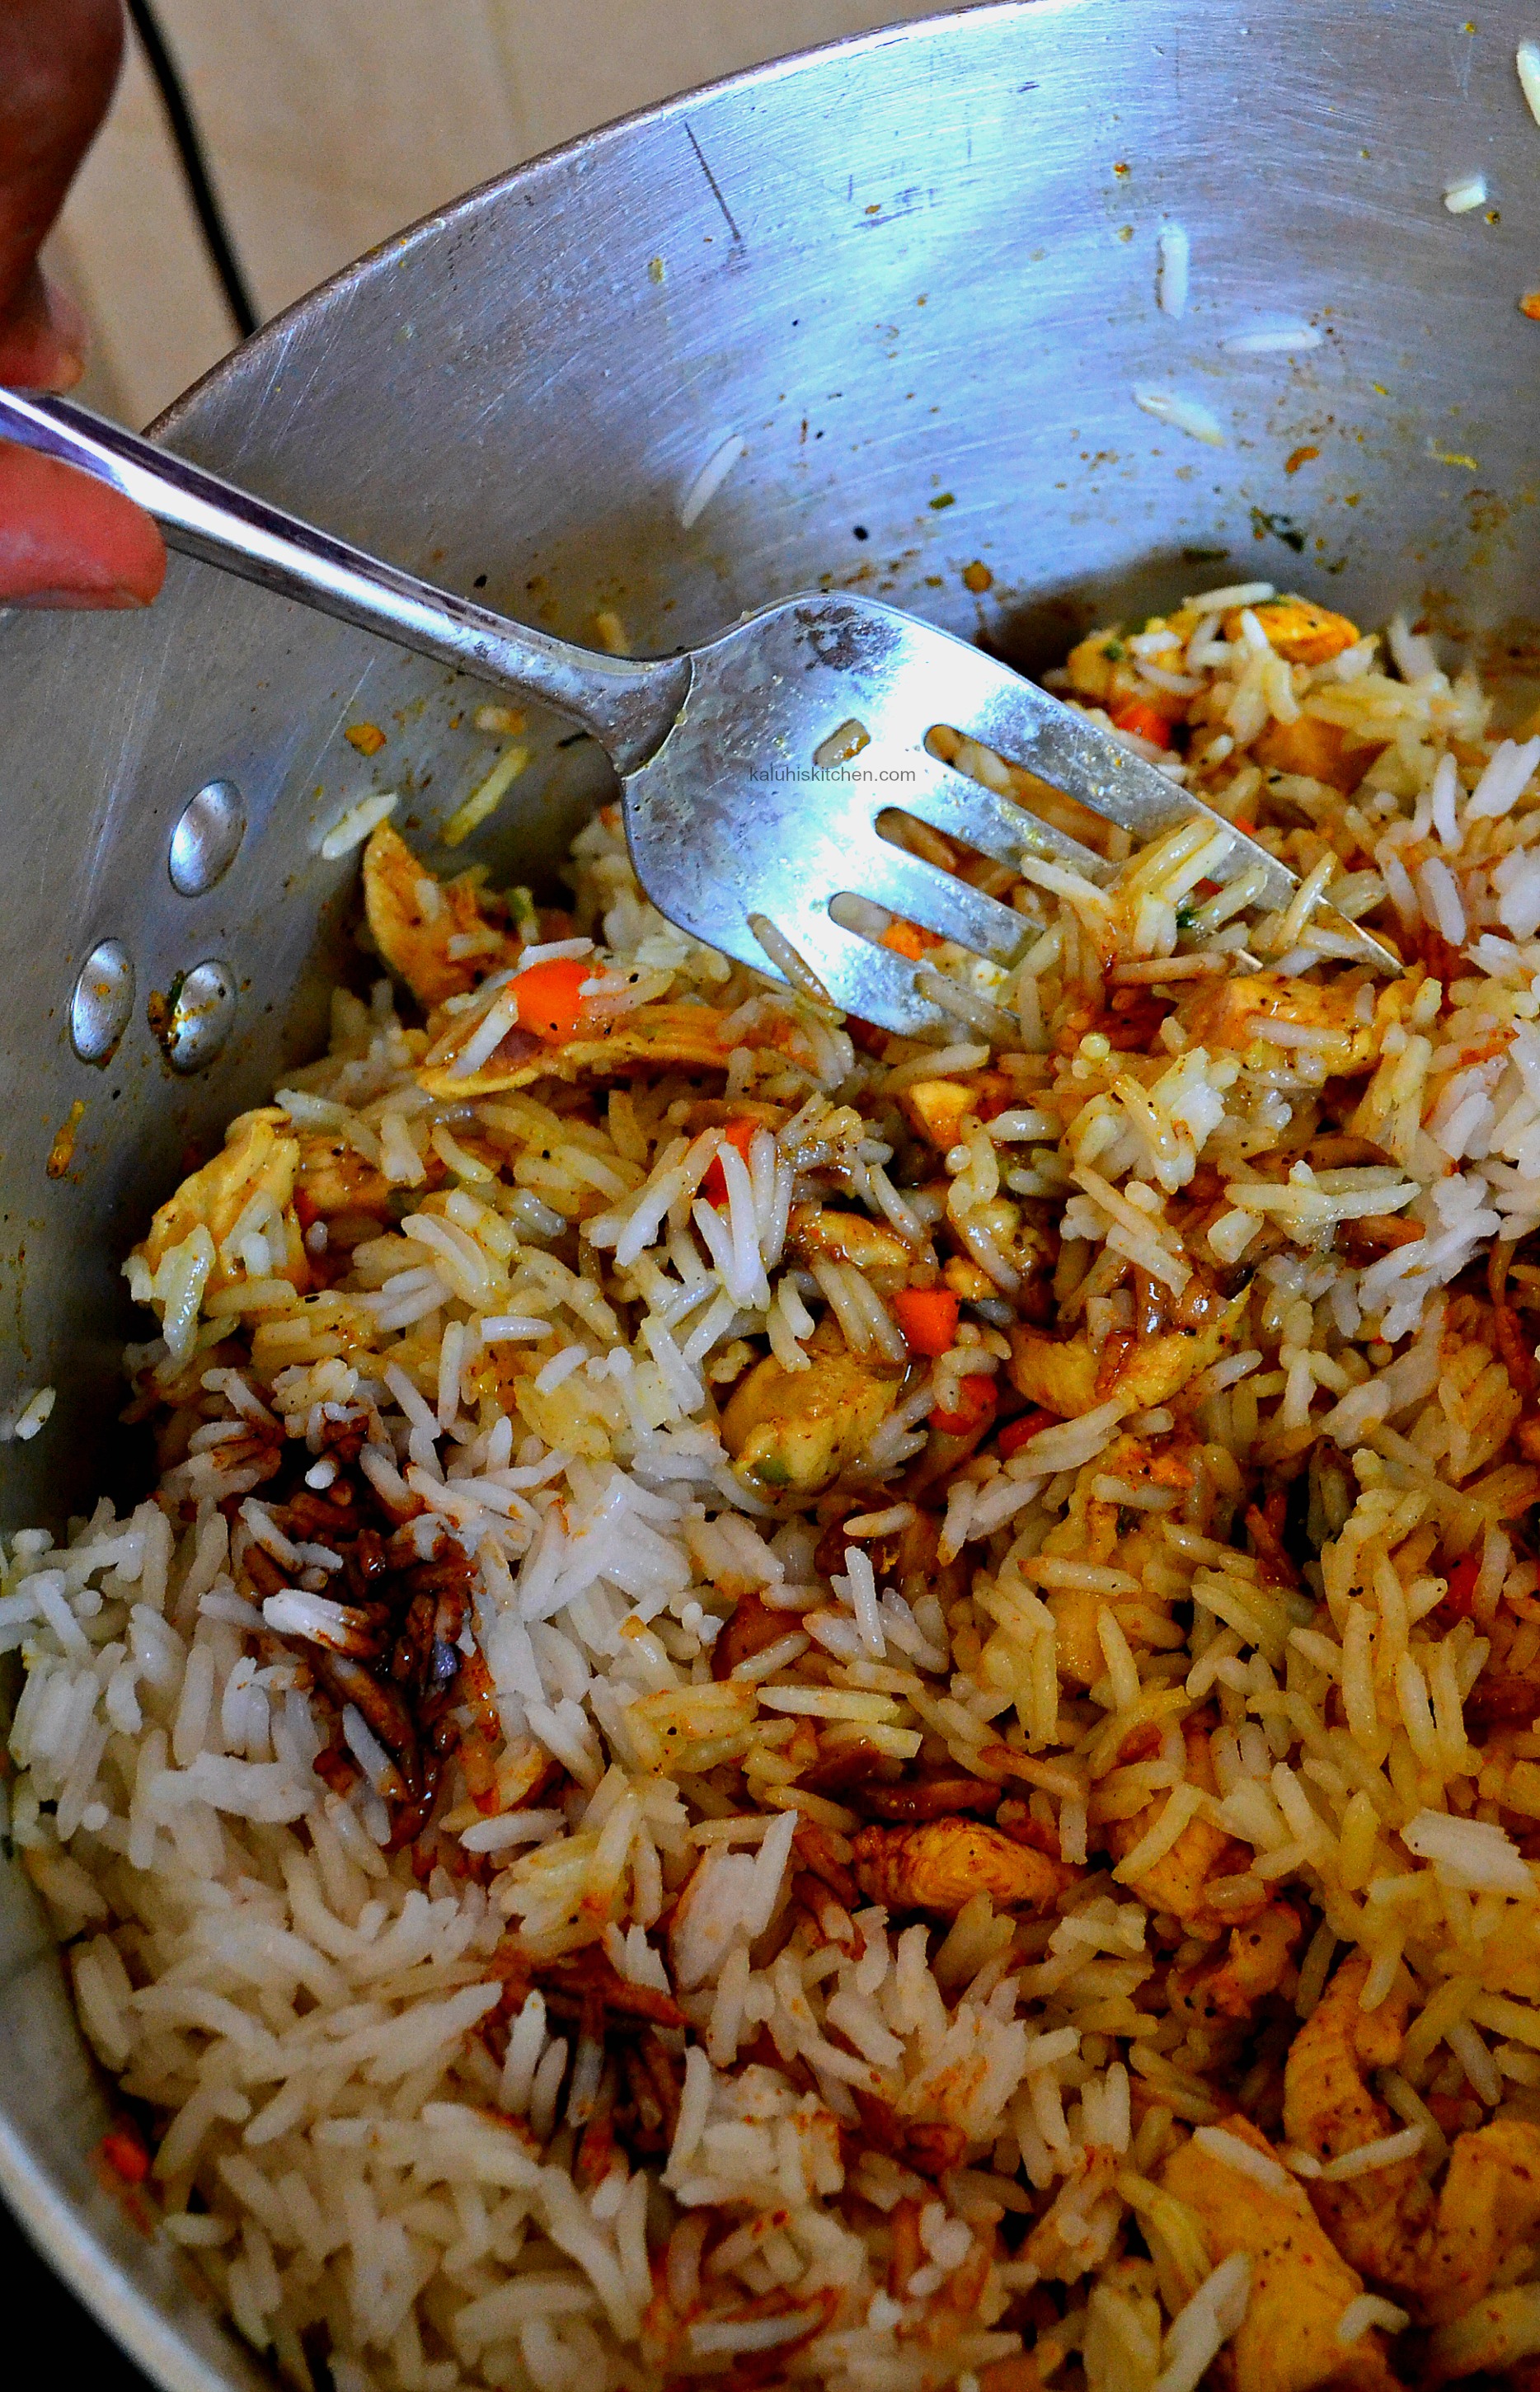
Add your cooked rice into the pan and a tablespoon of dark mushroom soy sauce soy sauce. I bought my soy sauce from Tuskys at 110 bob.  Toss this with a fork until everything is completely combined. If you use a mwiko you may end up mashing the rice even without intending to, so a fork is best for this.

You can also use left over rice for this recipe, you do not have to make fresh and that’s what makes fried rice my go-to mid-week meal! It transforms plain rice into the tastiest meal ever!! Make sure your rice is nice and singular ,or ‘moja moja’ as Kenyans may say, so that your cumin chicken and mushroom fried rice looks attractive and not like a lumpy broken-up mass.

Once done discard your cinnamon sticks (if you used them), add your coriander leaved and serve hot!

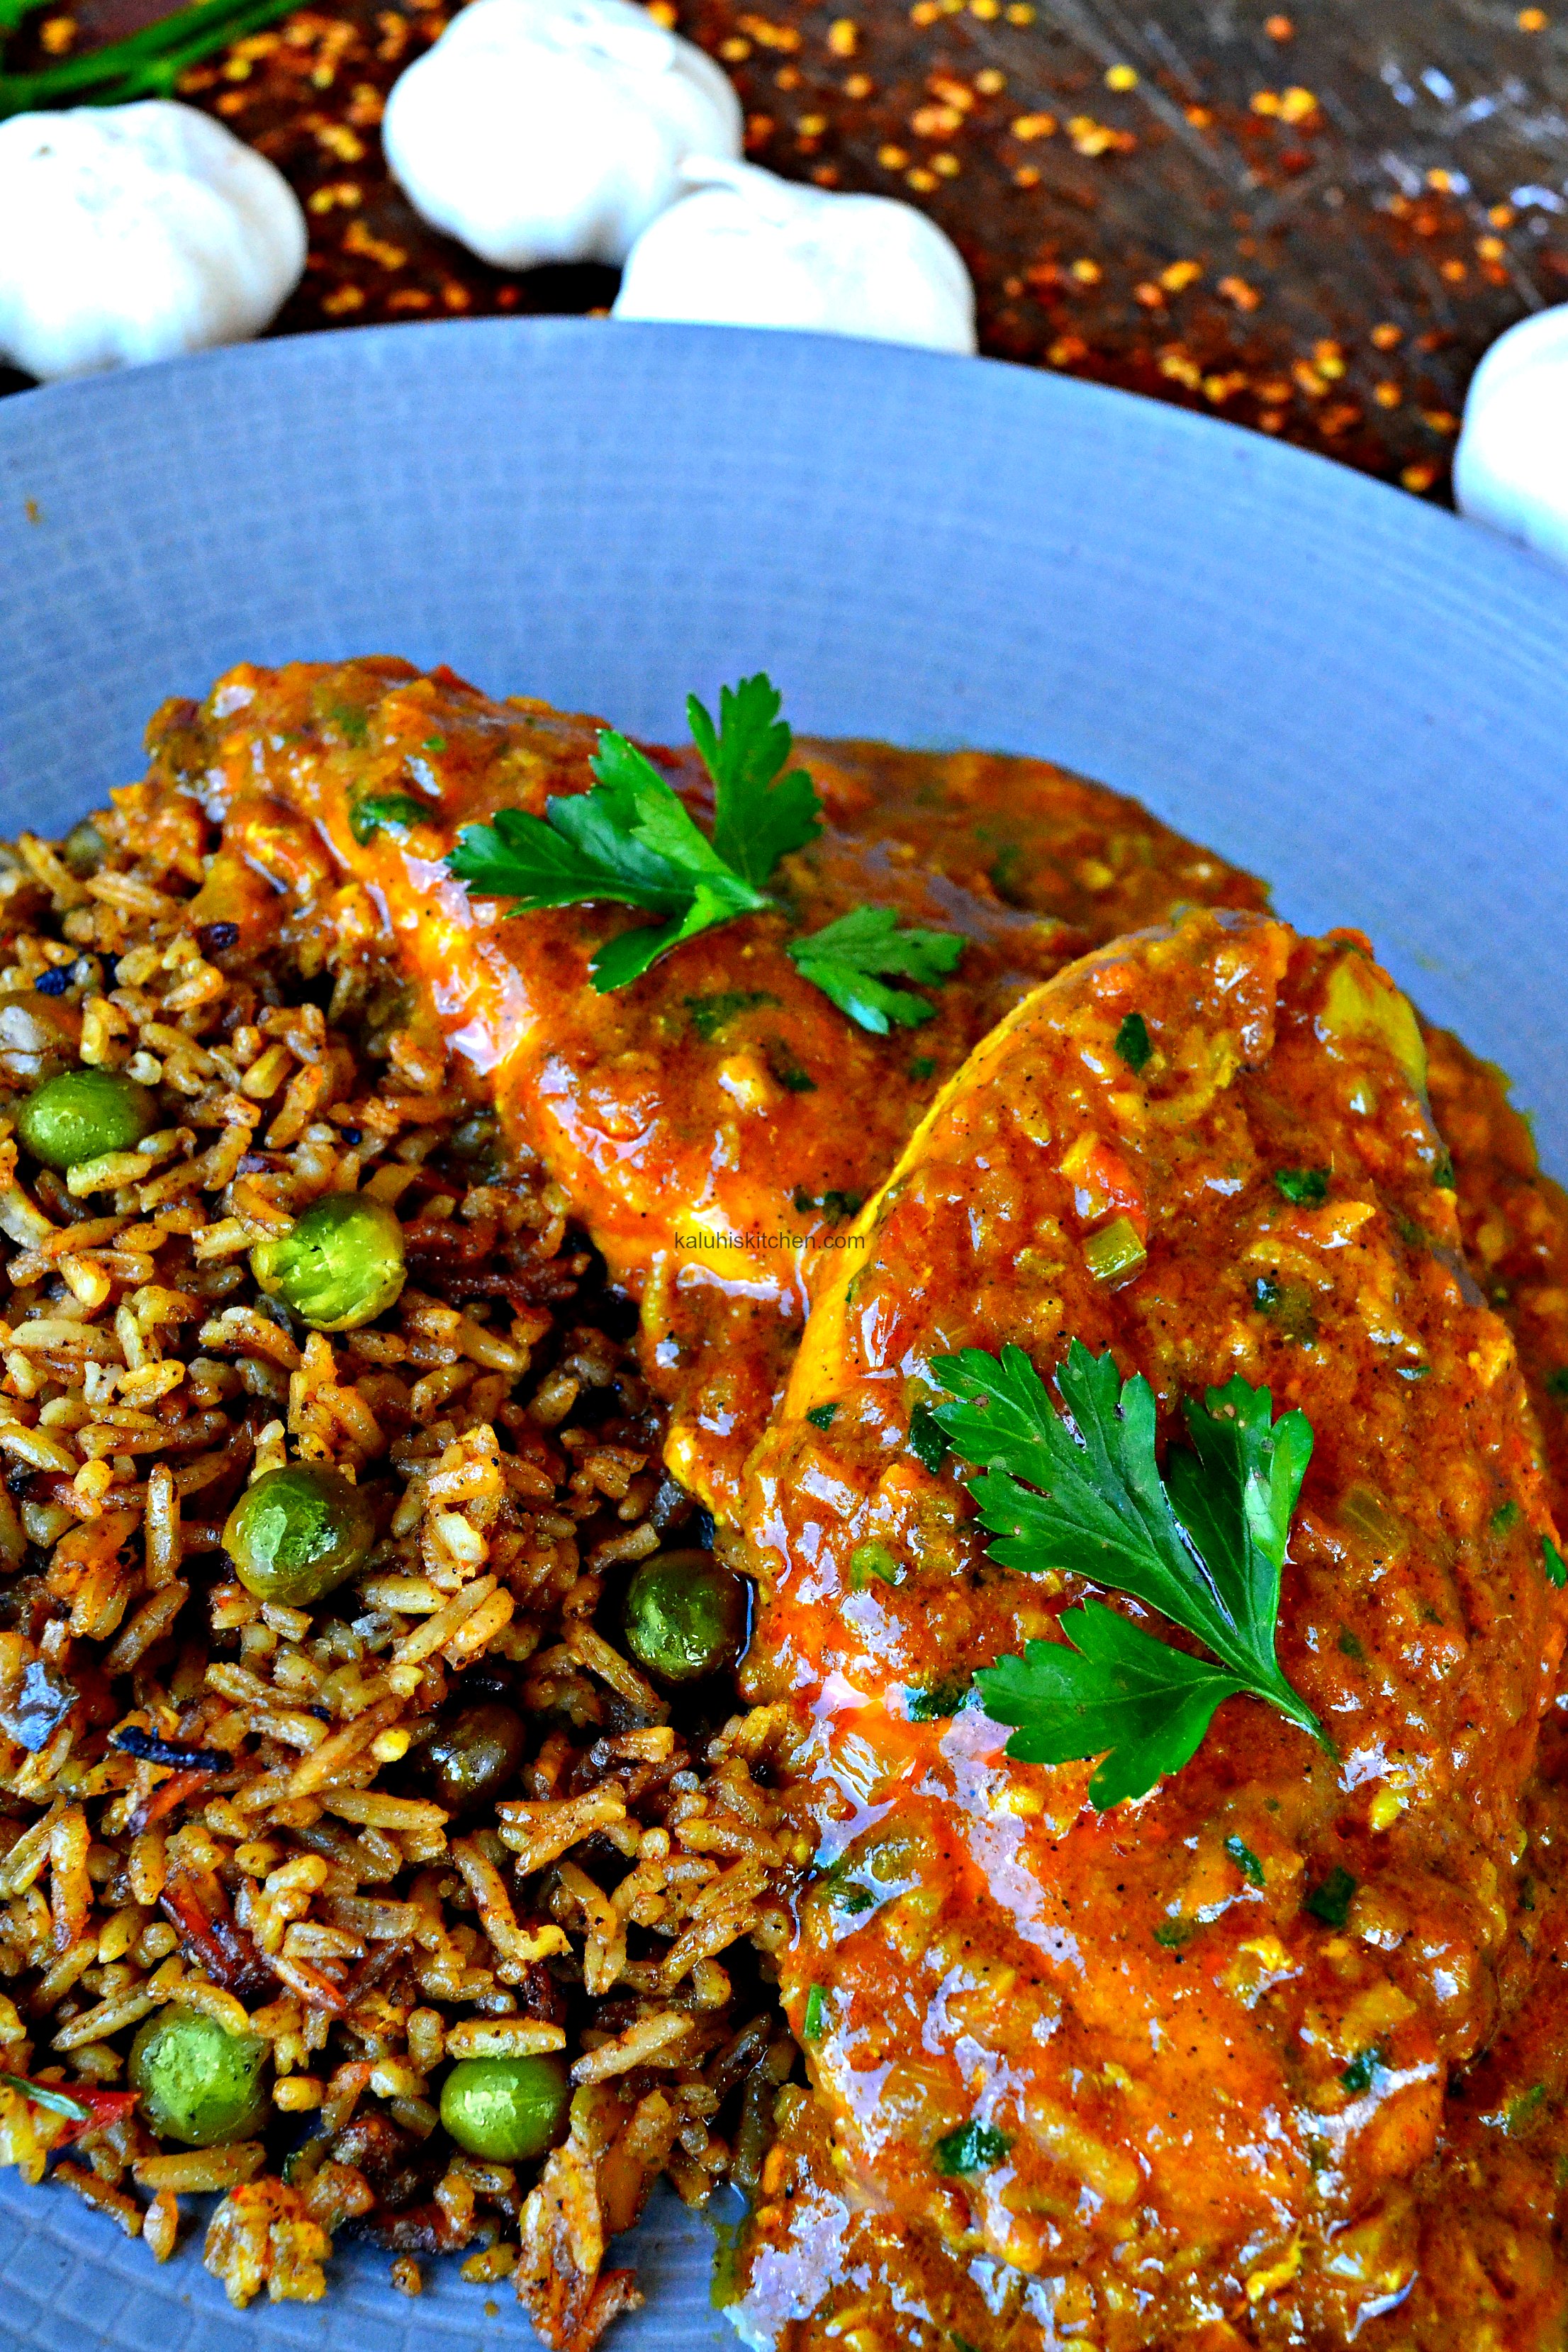
It is meaty, mushroomy, fragrant, spicy and herby! All good things set in perfect balance that come together and unleash such an unforgettable feast!! The warm taste of the cinnamon and cumin awakens all the flavor and the herby rosemary and coriander keeps everything fresh! The garlic beautifully compliments the chicken and the mushroom tied everything together. Who knew such deep flavors could be developed in 20 minutes!??!

How gorgeous does this plate look?? You can check out my other fried rice recipes here, here and here, but before you do please please give my cumin chicken and mushroom fried rice a go <3.

Happy Friday!

-K


Get your downloadable recipe here :))

download best african recipes_ Kaluhiskitchen.com recipes_kenyan food recipes


All content and images are copyright protected by
DMCA.com Protection Status
Do not copy in part or whole without giving due credit.

The post Cumin Chicken and Mushroom Fried Rice appeared first on Kaluhi's Kitchen.


Garlic Potato Wedges with Pineapple Habanero Dip

$
0
0

My mom and I have quite a number of likes we have in common when it comes to kitchen ingredients. Lately, we have been obsessed with a habanero dip we got from Kez Organics. I did an Instagram story (If you do not follow me in Instagram, you’re wasting your life!!) sometime back when I was making matumbo step-by step with this dip instead of regular pili pili, since this is how mum and I love it. We have been hooked since and everyone else at home is now almost as obsessed!

And you know what makes it even better? It is made by Kenyans, In Kenya, for Kenyans!!! It fills my heart with joy when we make such quality products and buy from our own. This is one of many Kez organics chili recipes I will be making because I just want you guys too to experience quality products that are readily available and deserve to be known by everyone. Now, lets get down to business!!! For today: Garlic Potato Wedges with Pineapple Habanero dip.

PREP TIME:        MAKE TIME:        SERVES: 6

Ingredients:

For the potatoes

15 new potatoes

1 large red onion, finely diced

1 bulb of garlic, minced

3 tablespoons of fresh rosemary

3/4 tablespoon of turmeric

3/4 tablespoon of paprika

Salt  and pepper to taste

Vegetable oil


For the dip

1 cup of mayonnaise

1/2 a cup of fresh pineapple

3 tablespoons of very finely chopped onion

1/2 a teaspoon of Kez Organics Habanero dip

1/2 a tablespoon of honey

1/2 a teaspoon of finely chopped rosemary


Method:

Wash and peel your potatoes. Slice them up into wedges and place them in a large bowl. Add the red onion, garlic, rosemary, paprika, turmeric, salt, pepper and some vegetable oil enough to just coat them.

Mix everything up until combined. Spread them on your tray and put them to bake at 200 degrees for about 40 minutes or until completely cooked and soft.

You may be wondering ” What if I do not have an oven, does that mean i’ll miss out on this recipe :((?” Well, worry not, I have you covered <3. If you do not have an oven, you can boil your potatoes together with the spices, rosemary, garlic and red onion. Once they are done, proceed to fry them in very hot oil to get the exterior nice and crunchy. Do not use tepid oil as you will get a soggy result.

As that is going, work on your sauce. I used my Kez organics Habanero dip in this sauce. A jar costs KES.400 and lasts a lifetime since it is very potent in my opinion. Check out their Instagram page for more deets.

In a blender, add your mayo, followed by your pineapples, and the honey. Your pineapple MUST be sweet. Blitz it until everything is completely combined.

Be careful not to make it too runny. If you do not have/do not like pineapples, you can use mangoes/sweet plums.  Ladle onto a small bowl add your habanero chili, very finely chopped onion and rosemary. Add the chili bit by bit and taste then adjust upwards if need be to suit your taste. Allow to chill for a few minutes.

Once everything is ready, serve.

One of my favorite contrasts is that between hot and cold; and you can be sure that the hot garlic potato wedges and the slightly chilled pineapple habanero dip delivered just that!

Not only was that hot-cold contrast so good, but the flavor definitely delivered! The garlicky-rosemary flavor of the potatoes wend well with the mild sweetness of the creamy habanero dip which had the same notes too.

The Potatoes that were crispy on the outside and nice and soft on the inside were the perfect accompaniment to this pineapple habanero dip. This pineapple habanero dip, with it’s sweet spicy herby kick, would also be so perfect with roast chicken or really spicy fish fingers.

So easy to make and such explosive flavors! I hope you enjoy this as much as I did!

Much love!

-K


Get your downloadable recipe here :))

download best african recipes_ Kaluhiskitchen.com recipes_kenyan food recipes


All content and images are copyright protected by
DMCA.com Protection Status
Do not copy in part or whole without giving due credit.

The post Garlic Potato Wedges with Pineapple Habanero Dip appeared first on Kaluhi's Kitchen.

Pork Ribs Choma with Mango BBQ Sauce

$
0
0

The school holidays are upon us and that means, those of us with siblings, the house is fuller, warmer and of course, noisier LOL! And as expected, one of the highlights of being back home is enjoying all the fantastic home food that cannot be recreated anywhere else. Remember how that was the ultimate joy of being home back during our boarding school days?? For my younger sisters who are home for the holidays, that is their MAIN joy of being home. I can’t blame them! They literally have a mental list of the things we (read my mum and/or me) need to make! One of my younger sisters was doing her rounds on Instagram and saw some pork ribs and decided that is what we MUST make during the weekend. Being the sweet, nice (sometimes overbearing, controlling, bossy) elder sister, I decided that Easter Sunday would be pork Sunday. Boy! Wasn’t I glad that my sister’s Kraving pushed me that direction! I gave you a sneak peek on my Twitter and Instagram and decided to give you this recipe today as opposed to next week because it is too bomb to hold on to any longer! For this glorious Friday: Some pork ribs choma with mango BBQ sauce.

PREP TIME: 48 HOURS (Relax fam! Includes marination time :DD)

COOK TIME: 20 MIN              SERVES: 3

Ingredients

For the marinade

3 tablespoons of honey

2 tablespoons of dark mushroom soy sauce

2 tablespoons of minced ginger

7 cloves of minced garlic

1/2 a tablespoon of habanero dip

For the Mango bbq sauce:

1 red onion, finely chopped

4 cloves of garlic, finely chopped

1 cup of ketchup

3/4 cup of mango pulp

3 tablespoons of brown sugar

1/2 a teaspoon of cayenne pepper

1/2 a tablespoon of black pepper

1 tablespoon of worcestershire sauce

Salt to taste

1 tablespoon of apple cider vinegar

Method

Prepare all your marinade ingredients. In a bowl, add all of them and mix until evenly distributed. Pour this over your pork ribs and ensure it covers every inch. Allow it to  marinate for not less than 24 hours (I let mine marinate for 48 hours, refrigerated). Remember, the longer it marinates, the deeper and more intense the flavors. Totally worth the wait!

Once done, proceed to choma (roast) or if you do not have an outdoor grill, or the weather is not conducive for outdoor grilling, you can use your oven. I opted for a flame roast since I know each one of you can use that option plus I was going for that smoky flavor that would otherwise be missing were I to use an oven.

Pork roasts really fast, so depending on the thickness of your ribs, you will need about 20 minutes. Once done, slice and set aside.

For the sauce, add the red onions and garlic into a sauce pan and let them cook until fragrant. Be careful not to burn the garlic. Then, add the ketchup,sugar, vinegar, cayenne pepper, worcestershire sauce, black pepper and the star of the dish, mango pulp. This is similar to the triple D sauce we made here, which I modified slightly and used for this recipe since its tried and tested. As for the mango make sure it is sweet and blended completely into a pulp so that it gets incorporated well into the sauce. You can use any other fruit for your bbq sauce if you want that unique sweet kick and fuller flavor.

Cook this down for about 10-15 minutes until the sauce thickens and all the flavors come together. You can adjust the chili-sugar ratio to suit your taste and personal preferences.

After the sauce is ready, take your pork ribs and baste the sauce all over them. Be generous with the sauce, don’t hold back :)). Once done, dig right in!!!!

Look at the these perfect beauties!!! Care for one?

You can never ever go wrong with sweet-spicy flavors when it comes to pork. The marinade sunk in to the meat so beautifully and so intensely that the meat had such amazing flavor on its own. Add the mango bbq sauce into the mix and you have pork ribs choma that you will be thinking off every night before you fall asleep!

The slight char and smoky flavor which I LOVE was also a plus for me! Tender smokey pork, with a fruity spicy bbq sauce which you can all make right at home…doesn’t get better than this!!! One of my twitter followers @mikefromruai always says, Friday is meant for pork, but after having these pork ribs choma with mango bbq sauce, I say, everyday is meant for pork!

You MUST MUST MUST try out this recipe!

To great food,

-Miss K


Get your downloadable recipe here :))

download best african recipes_ Kaluhiskitchen.com recipes_kenyan food recipes


All content and images are copyright protected by
DMCA.com Protection Status
Do not copy in part or whole without giving due credit.

The post Pork Ribs Choma with Mango BBQ Sauce appeared first on Kaluhi's Kitchen.

Rosemary Mint Marinated Lamb Stew

$
0
0

One of my highlights of 2016 that I told you of in this post was my visit to Johannesburg with Google Africa. I had always wanted to visit South Africa, and having this chance to experience Johannesburg was one week I will live to remember. Besides their absolutely rich culture, vibrant people and amazing weather (just like Nairobi’s <3), I totally loved their food! From the familiar like moqhoudu, which is known as matumbo to Kenyans, I absolutely loved bobotie, sosaties, milk tarts and everything else. I loved eating salmon and litchi every morning. We also had lots of lamb and oxtail while down south. My favorite dish was a lamb stew we had at Vuyo’s; it was stewed with rosemary and I loved it!!! I ate the most that day (as usual LOL!) but I couldn’t help myself.  With inspiration from that unforgettable week in the Rainbow Nation,I decided to recreate this dish based on the flavor notes my palate could remember, the ingredients I had and of course with a twist of my own. I was more than satisfied by the outcome and I hope you enjoy my rosemary mint marinated lamb stew as well :))


PREP TIME: 24 HOURS        COOK TIME: 40 MIN        SERVES:3

**Prep time is inclusive of marination time

Ingredeints

For the marinade

1/2 a kg of lamb

5 cloves of garlic

1 cup of plain yogurt

1 tablespoon of seasalt

2 tablespoons of fresh rosemary

2 tablespoons of finely chopped mint

1/2 a cup of fresh coriander, chopped

1/2 a teaspoon of chili paste (regular bird’s eye chilli will work as well)


For the stew

4 new potatoes, peeled and cubed

2 carrots, cubed

1 tablespoon of black pepper

4 cloves of garlic, minced

Bay leaves (1, dried)

1/2 a tablespoon of fresh rosemary

1 tablespoon of tomato paste

1 red onion, finely chopped

1 large tomato, finely chopped

Fresh coriander, finely chopped

Salt to taste

Vegetable oil for frying


Method

In a container, add your cubed lamb, together with your marinade ingredients. Mix it all up until completely combined and allow it to sit refrigerated for 24 hours or up to 48 hours. Remember, the longer you marinate, the more intense the flavors shall be.

***

For other meat stews, check out my go to marinades:

*For beef: Chili, minced red onion and green bell pepper, minced garlic,

*For goat meat: check out what I used from this recipe.

*For chicken: Rosemary, Garlic, ACV or balsamic vinegar, turmeric

*For a bomb pork roast: check out this other post I did

***

Once done, put the lamb to boil, along with all the contents of the marinade until tender. Drain any excess water and set aside.

In a pan, add your chopped red onion and garlic and sautee until softened. Add the tomatoes, bay leaves, finely chopped rosemary, pepper and tomato paste along with 1/4 cup of hot water and let this simmer for about 5 minutes until all the ingredients meld. I bought my dried bay leaves from Tuskys at about 120 bob and it goes really really well with all kinds of stews. You can of course adjust the spices and use the ones you have at hand/prefer <3. I like my lamb really herby so that the distinct flavor of the meat stands out.

Add the potatoes and after 5 minutes, add your lamb and let these cook down together slowly until the potatoes are cooked through.

Cover with a lid and let this simmer on medium high heat for about 10-15 minutes. Three minutes before serving, add your carrots. I add my carrots towards the end so that the cook but retain some texture which adds more body to any stew. Once the time has lapsed, garnish with your freshly chopped coriander and serve.

My lamb stew was so beautifully tender, very richly seasoned and so hearty! I had it for all mealtimes, except breakfast until it was finished. You could taste the rosemary, feel the kick of the chili and savor the very delicious and distinct taste of the lamb.

Like any other red meat, you can enjoy your lamb with a starch of choice. Be it rice, chapati, potato wedges or ugali, this will not disappoint you!

Keep it K!

xx


Get your downloadable recipe here :))

download best african recipes_ Kaluhiskitchen.com recipes_kenyan food recipes


All content and images are copyright protected by
DMCA.com Protection Status
Do not copy without expressly asking for permission or giving due credit

The post Rosemary Mint Marinated Lamb Stew appeared first on Kaluhi's Kitchen.

Boozy Banana and Raspberry Parfait

$
0
0

I had wanted to type out this blog Wednesday last week so that it could be ready and scheduled for you guys by Friday last week. However my Wednesday was at the mercy of someone who could not keep time and just like that my whole day was wasted and ruined (and they did not apologize for keeping me waiting for 3 hours!! *flips table*). If you know me well, you know ‘African Timing’ in one of my top pet peeves and just like that my mood was severely dampened. I got home so tired, and quite disappointed, but decided to get my mood up by talking to you guys <3.I did that by holding an ‘ASK ME ANYTHING’ on all my social media platforms. My Facebook and Instagram audience are a bit more reserved and I think scared to actually ask me anything (why are you scared of me guys? I don’t bite) But my twitter fam went all out! That is where the party was! I laughed non-stop from 6 p.m to 11 p.m! When I told them to ask me anything, Lord, I opened Pandora’s Box and funny enough, I thoroughly enjoyed it! You can check it out here!

I finally got time later last week to type this blog and three other recipes I am looking forward to sharing with you in the coming weeks. So first, allow me to share something really sweet and delicious that my two younger sisters enjoyed and I know you will too!

PREP TIME: 20 MIN     MAKE TIME: 20      MIN MAKES: 2

Ingredients

400g of raspberries

3 tablespoons of cognac

1 teaspoon of orange zest

1/2 a tablespoon of finely chopped mint

1 cup of plain yogurt

2 sweet bananas

1/2 a cup of roughly chopped milk chocolate

1 tablespoon of caster sugar


Method
In a pan, add your raspberries and caster sugar. On medium low heat, let these cook down until the raspberries have just started to seep. I bought my raspberries from CarreFour where they were going for 89 shillings a pack, which I think was pretty fair! My mint cost 20 bob.Besides raspberries, you can use plums, grapes, strawberries, mango; any sweet fruit.

Add the mint, orange zest and cognac and let this simmer down for about 5-7 minutes. When I say orange zest, I mean the grated rind of an orange. You can use any other citrus fruit, preferably limes or tangerine. Be careful to only grate the colored part as the white part will introduce  bitterness to your sauce that is totally not needed.

I used cognac because that is what I had at hand. For this dessert, whiskey, brandy or rum would make perfect substitutes for cognac. If you do not take alcohol, you can remove it entirely from this recipe but note it will not taste the same as mine did.

You can use this sauce over your crepes, pancakes  and fresh cakes to add a little kick to your brunch sessions. So easy to make yet adds a lot of character to almost anything it is added to!

The alcohol will burn off as the sauce simmers and the sauce flavors to completely meld. You will not get drunk when you have this dessert, but what we are going after is the deeper flavors and notes of the beverage sans the alcohol. It will look like this once you are done:

Once done, remove from the heat and allow to cool.

Begin layering your parfait, starting with the yogurt at the bottom, then your bananas, then the boozy raspberry syrup, some chocolate. There is no rule for the order of layering, this is just what I went by when I was layering mine. :))

Repeat the same till the top of your tumbler than garnish with some fresh raspberries and serve.

For me, this boozy banana and raspberry parfait was the perfect dessert or snack if you may! It had the perfect balance of fresh raspberry, tang flavor or the orange zest that balanced out the sweetness of the syrup. The chocolate went really well with both the mint and the zest. The dairy of the yogurt and the taste of the sweet bananas was soft to the palate and complimented all the sweet notes there in. The booziness of the cognac ties everything together and adds character to what would otherwise be an ordinary dessert.

You can try this out with any sweet fruit you have at hand and any other alcoholic drink as I have recommended above. Play around with this recipe and let me know how it goes and which bomb [insert fire emoji] flavors you develop.

And the beauty about this is, you can have it slightly chilled on a hot afternoon, or at room temperature on a cooler day indoors. Either way, your tummy will thank you!

To all things delicious!

-K


Get your downloadable recipe here :))

download best african recipes_ Kaluhiskitchen.com recipes_kenyan food recipes


All content and images are copyright protected by
DMCA.com Protection Status
Do not copy in part or whole without giving due credit.

The post Boozy Banana and Raspberry Parfait appeared first on Kaluhi's Kitchen.

Cumin and Clove Viazi vya Rojo

$
0
0

I have always loved the hotter months of the year. I love that I do not have to plan on carrying a coat in case it rains. I love that it is the time I can wear my short dresses and flirty skirts to my satisfaction. I love that I eat plenty of my favorite fruit,mangoes, and the weather forces me to drink more water than I usually would. I live for December-March! We have just entered our rainy season and I am actually really digging the cooler weather which is a bit out of character for me. I love my boots and sweaters. I love my hot chai masala and biscuits as I watch Scandal (My current favorite character is Eli Pope!) I love the pitter-patter of rain on the roof top as I drift to sleep. I find dark clouds so pretty! I love the indulgent food this weather compels me to have! One of them, which is quite warming and filling is this cumin and clove viazi vya rojo, which I am happy to share with you and hope you will enjoy as much as I do!

PREP TIME: 20 MIN     COOK TIME:20 MIN      SERVES: 3

Ingredients

7 potatoes

1 sprig of rosemary

4 cloves of garlic

1 table spoon of tamarind paste (or lemon juice)

1 onion diced

4 tomatoes, blended

1 clove

1/4 teaspoon of whole cumin seeds

1/2 teaspoon of paprika

1/2 teaspoon of royco

1/4 tablespoon of chili flakes (or fresh chili)

Salt

Method

Peel the potatoes and slice them into wedges and place them to boil together with the rosemary, cumin, clove and garlic until 3/4 way cooked. The flavors will sink into the potatoes and that is exactly what we want. Once done, remove from the heat and set aside.

In a pan, add some vegetable oil, together with the red onion and garlic. Let this cook until it is fragrant. Add the tomatoes, the ukwaju paste (or 3 tablespoons of lemon juice), paprika, chili flakes and royco. Check out how you can extract your Ukwaju (tamarind) from this post. I used Royco Sundried because it has a deeper color and added paprika to enhance this amazing quality.

You can also use the original Royco if that is what you prefer, however, you will need to add some turmeric too to make the color pop! Regardless of the Royco variation you choose to use, the outcome will be bomb! Let this simmer down for about 5-7 minutes so that all the flavors really meld and come together.

Once the time had lapsed, add the potato wedges and allow them to finish cooking through in the sauce so that they absorb all the flavors.

Once done, garnish with some fresh rosemary/basil/dhania and serve. Look at this amazing beauty! **licks screen**

Not only did the potatoes have such a beautiful abundance of flavors due to the herbs and spices they were cooked with, but the rojo also had such fullness which perfectly complimented the potatoes. The warming qualities of the clove and garlic make this meal even more comforting as we set into the rainy season.

You can serve this with a fish dish such as my chili coconut tilapia masala or my meatball tikka masala and I can guarantee you that this will be a feast you will live to remember! So so soooo delicious yet also very very simple to prepare!

To bomb recipes!

-K


Get your downloadable recipe here :))

download best african recipes_ Kaluhiskitchen.com recipes_kenyan food recipes


All content and images are copyright protected by
DMCA.com Protection Status
Do not copy in part or whole without giving due credit.

The post Cumin and Clove Viazi vya Rojo appeared first on Kaluhi's Kitchen.

Garlic Kuku Kienyeji (with homemade spice blend)

$
0
0

My mom is obsessed with her chickens! Each time she comes back from her visit upcountry, she has to bring new chickens with her. I do not like them because of the work involved rearing them. I would prefer if we kept just three at a time, but she wants us to have a whole brood with us. Recently she brought 3 new ones, which later got anxious because of the new environment, panicked and retreated to the hedge. So my mum and I in unity and strength I had to chase them down, catch them and get them to their pen. It is never an easy task! My mum was laughing the whole time while I was doing the hard work. This city girl just couldn’t keep up!! But eventually, all three were caught and secured in their pen. Keeping chickens is such a hassle, which I would rather not indulge in. But all this is made worthwhile by knowing the feasting that will come after all the trouble will be unforgettable. And my sweat paid off when I dug my teeth into this kuku kienyeji (free range chicken) recipe that I made with a homemade spice blend. I shared sneak peaks with you on twitter and InstaStories over Easter but today, the long wait is over and I will share the recipe with you! You will loooooove this one!

PREP TIME: 2 Hrs     COOK TIME: 50 MINUTES         SERVES:7

Ingredients

For the spice blend

1 tablespoon of dried rosemary

1 tablespoon of whole black pepper seeds

1 tablespoon of cumin seeds

1/2 a tablespoon of chili flakes

3 cloves

1 cinnamon stick

1 bay leaf

1/2 a teaspoon of turmeric

1/2 a tablespoon minced ginger


Other Ingredients:

1 kuku kienyeji (free range chicken), chopped into pieces

1 red onion, finely chopped

5 cloves of garlic, minced

1 green bell pepper, finely chopped

1 tablespoon of tomato paste

2 tomatoes, minced

Salt to taste

Vegetable oil for frying

Coriander for garnish


Method

Let’s make our spice blend first :)). I decided to go with: rosemary, clove, cinnamon, bay leaves, turmeric, chili flakes, cumin and black pepper. All the spices were whole, which i proceeded to slightly toast, then crush with a kinu (pestle and mortar) since my spice crusher decided to break on this very day *sob*! I purchased ALL my whole spices from Tuskys but they are also available in CarreFour, Chandarana and Nakumatt with prices ranging between 60bob-180bob. You can use already crushed spices too though. I like crushing my own since I like my spice blend not to be too fine. Also, you can adjust the ratio of the spices and the mix to fit your preference and that is what makes cooking fun!

Once done, put that aside and get into cooking your chicken.

Chop your chicken into sizable pieces. Put them to boil together with 4 tablespoons of munyu mukhereka which will act as a meat tenderizer and add more flavor to it. Kuku kienyeji takes quite a long time to cook. You do not boil it until it is cooked through, but go further and boil it until it is tender. That can take up to 2 hours but if you have a pressure cooker, the time can be much shorter.

I know you may be thinking, what on earth is Munyu Mukhereka?!! Let me explain:

***

Munyu Mukerekha is a salt which also doubles up as a tenderizer widely used by Luhya people to add flavor and make certain foods softer or more tender. It is made from the ashes of burnt sun-dried bean pods or sun-dried matoke peels. The ash is then put in a perforated tin with some water and left undisturbed. The water drains through the perforated tin without debris but contains a lot of the sought after sour taste and alkalinity.

The resultant liquid is the munyu mukerekha. To tenderize, our kuku kienyeji, matumbo, meats (and kunde and sometimes meat too), we boil it with it. It is not compulsory, but makes a world of difference when used. In my opinion, it is a MUST HAVE for every kitchen.

Where can you get it? It is unfortunately not sold commercially (it used to be but production stopped) but you can always borrow from your Luhya neighbors. We are a giving people, so just ask them for some Munyu and you will be sorted! <3

***

Once the chicken is tender and the water had dried down, let it the chicken get a slight char then set aside.

In that same sufuria, add you red onion,chopped green bell pepper and minced garlic. This allows them to cook in the fat of the chicken and hence have a fuller flavor. I also did not want extra sufurias to wash ;)).

Once the onion and garlic is softened and fragrant add the tomatoes, and tomato paste plus some salt and 1/4 cup of hot water and allow this to cook down for about 4 minutes.

Add the boiled tender chicken, plus the spice blend and mix it all in. Add some stock/hot water 1/4 cup at a time until you reach the soup thickness consistency you prefer. Do not pour 3 jericans of water then wonder why your gravy is not beautifully thick and rich unless of course that is your preference. Always add bit by bit then stop once your gravy is as thick as you prefer it to be.

Let this simmer on medium high heat until all the flavors meld and sink into the chicken. This will take about 30 minutes. Once done, remove from the heat, garnish with your coriander and serve.

Who ever says kuku kienyeji is not tender may not have mastered how to make it tender! This is one meal I just cannot miss out on when it is cooked, and with this garlic kuku kienyeji recipe, it is one I could have every singe day if I had the chance!

You can never go wrong with you garlic when you are making kuku kienyeji. It really came through and the home made spice blend knocked the ball out of the park! Such full flavors developed right in your kitchen! Something refreshing about knowing exactly what is in your spice blends and having the freedom to modify it as you prefer and please!

This was a major slurp fest! And thank God this would go with nearly all starches and sides; be it chapati, or ugali or roast potatoes or matoke. Whatever you choose to have it with, you will thoroughly enjoy!

Eat good!

-K


Get your downloadable recipe here :))

download best african recipes_ Kaluhiskitchen.com recipes_kenyan food recipes


All content and images are copyright protected by
DMCA.com Protection Status
Do not copy in part or whole without giving due credit.

The post Garlic Kuku Kienyeji (with homemade spice blend) appeared first on Kaluhi's Kitchen.

Lemon and Poppy Seed Cupcakes

$
0
0

I love eating delicious things with company I enjoy! The day I made these cupcakes I had the GORGEOUS Lyra Aoko come over and also shoot the entire baking process and have this as out first collaborative project. I love how she thinks and I an so captivated by her creative process. So for someone as awesome as her to say she wants to capture my creative process, there was no way I was going to say no! I am borderline obsessed with her and I am not even gonna hide it! You remember when I told you that she is one of Kenya’s greats in this post. Check out her blog, get inspired by her Instagram, follow her on Twitter and also subscribe to her YouTube channel. All images for this post were captured by Lyra Aoko. <3

For both of us, this was work, but it did not feel like it because we are both doing what we love! We went through the morning creating, all the while talking about life, our careers, our families, boys (duh!) and literally everything else. The outcome was great! I made a few missteps first time trying this, maybe due to getting too immersed in our delicious conversations, but I retried the recipe and found my errors and I will show you how to get it right when you give this a try! :))

PREP TIME:       BAKE TIME:       MAKES: 

Ingredients

1 and 1/2 cups of all-purpose flour

1 and 1/2 tablespoon of poppy seeds

2 teaspoons baking powder

1/2 teaspoon salt

A cup of sugar

1/2 cup  unsalted butter, softened to room temperature

2 large eggs, at room temperature

1 tablespoon of lemon zest

1/4 cup of lemon juice

1 and 1/2 teaspoons pure vanilla extract

3/4 cup of plain yoghurt


For the frosting

250g full-fat block cream cheese, softened to room temperature

1 tablespoon of vanilla extract

1/4 cup unsalted butter, softened to room temperature

3 cups of confectioners’ sugar

1/8 teaspoon salt

Method
Preheat your oven to 180 degrees. Line a 12-cup muffin pan with cupcake liners. I bought my liners(about 100 of them)from Nakumatt at about 200 bob.

Proceed to make your cupcakes.  Combine your dry ingredients first: the flour, baking powder, and salt together. Set aside.

Using a mixer, beat the butter and sugar together on high speed until smooth and creamy. That will take about 3 minutes. Scrape down the sides with a rubber spatula or a mwiko (I used a mwiko <3) to bring everything together.

Add the eggs and vanilla, then beat on medium-high speed until combined. Scrape down the sides and up the bottom of the bowl as needed.

With the mixer on low speed, add the dry ingredients until just combined. With the mixer still running on low, slowly pour in the plain yoghurt, poppy seeds, lemon juice, and zest until combined. Do not over-mix. I bought my poppy seeds from Tuskys Kenyatta Avenue but they are available on any large supermarket and in HealthyU as well. They provide a beautiful textural contrast. Check out this drop scone recipe I used them in as well. :))

By lemon zest, I mean the grated rind of a lemon. Be sure to grate only the colored part since the white section will introduce some bitterness and we definitely do not want that :))

Once just combined, take your mwiko and give it a mix once again just to ensure there are no lumps at the bottom. The batter should be nice and thick.

Pour/spoon the batter into the liners – fill only 2/3 full to avoid spilling over the sides.

Remember when I told you I made some mistakes first time trying this out? My first mistake is that I filled my cupcake liners too high. When you fill them, ensure you do so just 2/3 up and not 3/4 as I did. Filling them too high will make them swell over, which is not a necessarily bad thing, but for the sake of uniformity and allowing them to cook through better, fill them in just at 2/3.

Side note: When you make mistakes in the kitchen, do not let them shut you down or discourage you. Instead, embrace them as part of the learning process and find out exactly where you went wrong. Learn from it and do better the next time. That is how we improve and become better :)).

Once done, proceed to bake for 20-22 minutes. You will be able to tell that they are done when you a toothpick inserted in the center comes out clean. Once done, remove from the oven and allow them to cool down completely before proceeding to frost. As you wait for that, proceed to make your frosting.

For the the frosting:

In a large bowl beat the cream cheese and butter together on high speed until smooth and creamy. Add confectioners’ sugar (available in all supermarkets), vanilla and salt. Beat on low speed for 30 seconds, then switch to high speed and beat for 2 minutes.

My second mistake: I made the frosting with spreadable cream cheese *face palm* as opposed to the block cream cheese. They may be one and the same thing, but the outcome is always different with the former runnier and the later nice creamy and stiffer making it perfect for a frosting. You can also use whipped cream instead of cream cheese and it is also much cheaper (yeiiiii!)


Once your cupcakes are cooled and the frosting is done. Proceed to frost your cupcakes then dig in!!!!!

You can also experiment with other fruit flavors and even infuse other exciting tastes into your frosting. I think we should bake more here on #KK don’t you think? I will def bake more and I am excited to get better at it too! Try this out and let me know how it goes :)) After all, this is baking weather.

To many more collaborations!

-K


Get your downloadable recipe here :))

download best african recipes_ Kaluhiskitchen.com recipes_kenyan food recipes


All content and images are copyright protected by
DMCA.com Protection Status
Do not copy in part or whole without giving due credit.

The post Lemon and Poppy Seed Cupcakes appeared first on Kaluhi's Kitchen.


Ginger and Coconut Milk Matoke

$
0
0

“Would you make a matoke recipe without spices?” One of my readers requested of me way back in 2014. I love getting requests from you guys and a good chunk of my recipes are inspired by your suggestions but this particular one made me hesitate a little. Quite a challenge that was! I am a girl who loooooooves her spices and loves her food with lots of flavor and character, but nevertheless, I took this up. The result was pretty good, but still, I think spices would have brought out the flavors much better.

I always say there are more than a million ways to prepare one dish. That is why it is just not fair to your self to eat a meal prepared the same way for 70 years when you can enjoy it in many other ways. You get? One of the meals I totally love due to their versatility in the kitchen (besides potatoes and rice) is matoke. There are many ways you can prepare it one of them being my ginger matoke masala. Today’s recipe is very similar to this one I made in 2014, as per request of one of my readers.  So with inspiration from that #KRecipe form 2014, here is an upgrade of the same with layered rich flavors: My ginger and coconut milk matoke.

PREP TIME: 15 MIN      COOK TIME: 30 MINUTES       SERVES: 2

Ingredients:

15 matoke

1/2 a tablespoon of cumin

1/2 a teaspoon of turmeric

1 teaspoon of black pepper

1/2 a cup of coconut milk

1 red onion, finely diced

1 tomato, chopped

1/2 teaspoon of ginger

3 cloves of garlic, minced

1 tablespoon of tomato paste

1/4 cup of hot water

Vegetable oil for frying

Salt to taste

Method

Peel your matoke and slice them up and place them in a bowl with water. This prevents them from oxidizing and darkening. In a sufuria, add your  red onion, garlic , ginger and finely chopped green bell pepper. Let this cook until softened and fragrant. Be careful not to let the garlic burn as it will make the whole dish bitter.

Once those are cooked, add the tomatoes, salt, the spices and tomato paste and let this cook down for about 5 minutes. It is important to let the tomato paste especially to cook down so that the food does not have a metallic taste. Once they are cooked down well,  add your chopped matoke together with 1/2 a cup of hot water. Please please always add your water/stock a bit at a time to prevent runny soup. Kidogo kidogo! Add your water bit by bit and stop once you attain the soup thickness you love.

After the matoke is 3/4 way done, add the coconut milk and let it simmer in the milk until completely cooked through.  This allows the milk to be absorbed into the matoke itself.

Once done, garnish with your finely chopped onion chives (dhania will do as a garnish too :))) and serve.

You can almost never ever go wrong with coconut milk and matoke! The coconut milk flavor is always so well absorbed and that softens the starchiness of the matoke. The cumin and garlic are also prominent flavors that totally come through and turn an otherwise ordinary meal into an exquisite one!

The nuttiness of the coconut came out so well and was very prominent. A bit of spice lifted everything up and the use of fresh garlic and ginger tied everything together.

Try out this recipe and tell me how it goes. And if you can, please try out my other matoke recipes and tell me which one you like best. As for me, I just cannot choose! LOL!

To bomb recipes!

-K


Get your downloadable recipe here :))

download best african recipes_ Kaluhiskitchen.com recipes_kenyan food recipes


All content and images are copyright protected by
DMCA.com Protection Status
Do not copy in part or whole without giving due credit.

The post Ginger and Coconut Milk Matoke appeared first on Kaluhi's Kitchen.

Cinnamon Pancakes with Lime Tree Tomato Sauce

$
0
0

In our home, like most homes, we always have fresh fruit in the house. Considering we live in a country that a bounty of fresh fruit and vegetables, we take full advantage of that. My sister had brought home some tree tomato (tamarillo) after her visit to Naivasha. It is one of her favorite fruit and she buys them in such large quantities. My mom insisted that everyone have four after our meals so that they do not get spoilt. “Kila mtu achukue nne nne!!” (Everyone should have four!”) She would insist. Because we were soooo many, and we did not want them to get spoilt, I decided to incorporate them in my salads and in some of new recipes I was developing. These cinnamon pancakes with lime tree tomato sauce were then conceived! Ever wondered how a hug would look and taste like if it were food? Well, search no more! It would look and taste like my cinnamon pancakes with tree tomato sauce.

PREP TIME: 5 MIN      COOK TIME:  20 MIN     SERVES: 1

Cinnamon Pancakes Ingredients:

1 cup or flour

3/4 cup of mala (or buttermilk)

1/2 a teaspoon of baking powder

1/2 a teaspoon of baking soda

1/2 teaspoon of ginger

4 tablespoons of sugar

1/2 a teaspoon of nutmeg

1/2 a teaspoon of cinnamon

For the sauce:

4 Tree tomatoes (Tamarillo)

2 tablespoons of granulated sugar

1 teaspoon of lime zest

½ a lime, juiced

Method
Peel and dice your tree tomato. Place this in a small sufuria together with lime zest, lime juice and 2 tablespoons of granulated sugar. Allow to simmer until the fruit turns syrupy and changes from bright orange to red. It will change from this:

To this:

And finally to this deep, red thick sauce with uniform consistency.

Cooking down the sauce will take about 15 minutes. Do not rush the process as it is important for all the flavors to meld and the fruit to cook down. After it is done serve and allow to cool to room temperature.

Now for the pancakes :)). Beat the egg and the sugar for about 5 minutes or until it becomes frothy and becomes pale yellow.

Then in a separate bowl, mix all the dry ingredients (flour, nutmeg, cinnamon, baking soda, baking powder) then add this to the egg-sugar mix. I find the flavor of cinnamon a bit on the over powering side, that is why I added nutmeg (I loooove nutmeg) to temper the taste of the cinnamon.

Add your mala slowly while mixing everything together until just combined. Do not over-mix.

Mala is a Kenyan fermented milk drink with the same consistency as yogurt albeit sour. You may be wondering, why did I use mala instead of milk? Well, mala makes the pancakes super moist and super fluffy; two qualities which may be a bit dodgy to achieve with milk. We had this discussion on twitter and many of you agreed with me. Mala can be used in savory dishes like meat marinades and sweet ones like these cinnamon pancakes. Depending on the part of the world you are reading this from, you can substitute mala with Kefir, Amasi, Buttermilk or greek yoghurt as those have the same properties as our Kenyan Mala.

Lightly grease your frying pan, and ladle your batter on it once it is hot enough. Allow at least 2 minutes on each side, with your pan on medium high. This allows the inside to cook and the outside to have an appetizing golden brown color.

Then once they are done drizzle your lime tree tomato sauce and serve.

Can we first appreciate the beautiful color of this sweet zesty sauce? It has just four ingredients yet the flavors are so full! The rich tree tomato sauce beautifully complimented the fluffy, moist pancakes, whose cinnamon-nutmeg flavor really stood out! This would without doubt be a favorite at your brunch/ breakfast banquet! <3

After you try out these cinnamon pancakes, you have to (if you haven’t already!) try out my other pancake recipes: my pear and nutmeg pancakes, my mango ginger pancakes and by banana oat pancakes.

You can try making this sauce with mangoes, peaches, guavas or any other fruit that has low acidity and is sweet. And if you are feeling particularly naughty, splash a bit of rum/brandy while cooking the sauce and instantly elevate your flavors! I don’t know about you, but that is exactly what I am going to do next time I make these cinnamon pancakes!!

Keep it sweet as always! <3

-K


Get your downloadable recipe here :))

download best african recipes_ Kaluhiskitchen.com recipes_kenyan food recipes


All content and images are copyright protected by
DMCA.com Protection Status
Do not copy in part or whole without giving due credit.

The post Cinnamon Pancakes with Lime Tree Tomato Sauce appeared first on Kaluhi's Kitchen.

My Current Three Favorite Smooothies

$
0
0

I talk about food a lot (obviously! :DD). As someone who loves eating, food is often a topic of conversation. I was having a food conversation some days back with one lady and she happens to be raw vegan. I personally find that way of life very healthy but on the same token, quite challenging to live by 100%. One needs plenty of dedication! I was in awe of her! She made it seem so easy! She made it seem as though those juicy plums or that leafy cabbage could indeed solve all the world problems. I listened as she spoke on and on, once in a while getting distracted by a beautiful birthmark she had on her neck, and you could tell that she was neck deep into the raw vegan lifestyle. She then asked me which smoothies I loved. For a moment, I hesitated. I hesitated because I did not think my smoothies would live up to her standard. But I went ahead and told her taking comfort in the fact that we are different and like different things and that was ok!  To my surprise, she was actually really feeling my smoothies! That got me excited and actually saw that as a stamp of approval from the fruit queen herself! She was going to try them but of course switch some ingredients to be more inline with her lifestyle, but I will share them with you just as I like them :)). Here are my three favorite smoothies.

Kicheko  Smoothie 

Pronounced [Kee-cheh-koh] – Meaning laughter in Swahili

 <3 Food for the soul <3

Ingredients:

1/2 an avocado

1 small sweet banana

1/2 an apple

1 cheek of mango

3 broccoli florets

4 tablespoons of plain yogurt

Method: Pop everything in your blender and blitz it all together.

My kicheko smoothie is one smoothie I would call the perfect breakfast smoothie. Because of the banana and avocado, it is particularly filling. You can have it as your breakfast or together with your breakfast to be extra full. I think it would also be perfect as a post work out smoothie. I used sweet bananas since their smell and taste is not as assertive as regular bananas. Sometimes I feel adding regular bananas in a smoothie, even with other fruits, all you will taste is just the banana. Hence my choice of small bananas.If you like a stronger banana flavor, by all means, add more. I added my broccoli raw, but made sure to cut it up into really really small pieces so that it totally gets incorporated into the smoothie. Perfect way to sneak in this veggie for kids who may not like it but may benefit from it. The apple and the mango added some mild sweetness to this. You can of course change up the the fruit portions to suit your own preferences. With the bounty of health benefits the fruits used in my kicheko smoothie have your body will thank you!


Zawadi Smoothie 

Pronounced [Zah-Wah-Dee] – Meaning gift in Swahili

Gift of beautiful flavors. Gift of vibrant color. Gift of an amazing and refreshing fruitiness!

Ingredients:

6 mint leaves

Watermelon

2 Tree tomato, peeled

200g of raspberries

50 g of plain yoghurt

Method: Pop everything in your blender and blitz it all together.

Out of these three smoothies, I think my Zawadi Smoothie would be my ultimate best. Not only does it have an amazing color but it just has this taste that just takes you to another world! So fresh! So balanced! The combination of tree tomato, raspberries, melon and mint is one that will sweep you right off of your feet. Unlike the kicheko smoothie, this one is much lighter due to the water melon and also much sweeter. I purchased my raspberries from CarreFour at 200 bob a pack, mainly for the color (hehehe! no shame!), but also because of their amazing nutritional health benefits. The mint went for 20 bob a bunch. Tree tomato juice is also quite a popular juice here in Kenya and it is also a fantastic pick for your smoothie. Popularly known as ‘matunda damu’ (blood fruit), tree tomato has several health benefits as seen here. Nothing better than a healthy smoothie that is also so so delicious!


Sherekea Smoothie 

Pronounced [sheh-reh-keh-a]- meaning celebrate in swahili

This smoothie is a true burst of sunshine! A celebration of joyous colors and flavors! Glee and happiness in every seep!

Ingredients:

1 mango cheek

1/2 an apple

1 orange, peeled

9 mint leaves

1 carrot

1/4 teaspoon of ginger

8 tablespoons of plain yogurt

Method: Pop everything in your blender and blitz it all together.

My sherekea smoothie is one after my heart since it has my favorite fruit, mango! I wanted to use orange and yellow fruits since they are rich in beta-carotene, and would have loved to add a pawpaw too, but the one we had was spoilt *wipes tear*. I instead added carrots, which were slightly boiled prior so that they blended in well. I would describe this smoothie as a fantastic in-between snack. It is both delicious and filling and would make a fantastic snack. The ginger in this smoothie was particularly refreshing and greatly complimented the mango (remember when we had that same combination in this recipe too!). It would also be a great sweet smoothie for breakfast/brunch especially accompanied with savory items. Check out this mango smoothie bowl I made last year that will just as well serve you with deliciousness and lots of sunshine for your soul <3 but make sure you try out my sherekea smoothie first !! :))

***

Which of the three above smoothies do you think would taste the best to you? :)) What are your personal all time favorite smoothie fruit combinations? Are you more into veggie smoothies or fruit smoothies? What combinations are you curious to try out but are yet to? Let me know below?

XX

-Kaluhi


All content and images are copyright protected by
DMCA.com Protection Status
Do not copy in part or whole without giving due credit.

The post My Current Three Favorite Smooothies appeared first on Kaluhi's Kitchen.

Chicken and Mushroom Creamy Pasta

$
0
0

I went through the whole of last week with baited breath since I just could not wait to FINALLY watch Wonder Woman!! I even avoided watching trailers and snippets as I did not want my movie experience to be ruined. I love all Marvel movies, and I knew this one may become my favorite one of all time! I had not been to the movies in ages, and I had not seen my girlfriends for quite some time and I decided to combine the two. And it was the best decision I made. I needed that break; break from life and break from work, and it was worth every second! We laughed so much, talked about….. well, everything, bore our fears, hopes, hearts to each other (sounds dramatic! I know.. :D) and everything in between. There is absolutely no way I would be who I am without my girls!! After our wine and some samosas, we went ahead and watched our movie.  And no better movie to watch with them than one that celebrated the magnificence that a woman is!  Let me tell you guys, if you are yet to watch Wonder Woman, please do yourself a favor and go ahead and watch it! It  lives up to the hype!!

When I got back home, I wanted something delicious yet easy to make. With what I had in the fridge and in my pantry, this beauty was born! My creamy chicken meatball and mushroom pasta is a very simple dish (yay!), so easy to make (yay!!!!) and of course so delicious! If you love both pasta and chicken, and maybe mushrooms too, this one is for you!

PREP TIME: 10 MIN      COOK TIME: 30 MIN     SERVES:2

Ingredients

100 g of shell pasta

1 cup of minced chicken

12 button mushrooms

1/2 a teaspoon of lemon zest

1/2 a teaspoon of finely chopped rosemary

6 cloves of garlic, minced

1/2 teaspoon of royco

1/2 a teaspoon of black pepper

White onion finely chopped


Method

In a sauce pan, put your pasta to boil. Once it is done, remove from the heat,  drain the excess water. Run the pasta over some cold water then set aside. Running it through cold water will prevent the pasta from sticking together as we wait to proceed to the next step. Very important!

In another sauce pan, add your rosemary, garlic, onion and salt. I used white onion since they have a more subtle taste compared to red onion. Plus I did not want them to go bad as I had not used them in quite some time. Red onion would work just ok!

Once fragrant, add the minced chicken meatballs together with the royco, black pepper and the lemon zest. I initially wanted to use chicken breast, which I would have cut into strips, however what I had at that moment was just my minced chicken. I rolled them into balls with just some minced garlic and nothing else. We are making a speedy dinner, remember? :)) You can use both minced chicken or chicken breast. If you decide to go the minced chicken way, select them at your butcher and ask them to mince it for you. Same thing we did with this recipe.

Before adding the Royco and the black pepper, mix them together in a cup until they form a light paste them pour this into your pan. This will prevent lumps from forming and make sure it is evenly distributed. When I make my fast dinners, I always turn to my Royco since it is a spice blend and an easy ticket to delicious flavors. Mum laways had a can in her kitchen, and I do too!

Let this cook for about 5 minutes then add the cooking cream and the mushrooms. I bought my cooking cream from CarreFour, but it is available in all supermarkets in the dairy section.

 Let this stay on the heat for about 4 minutes for every flavor to meld and get coated in the creamy sauce!

How easy was that to make though?! A bit too easy! And I cannot even begin to describe how delicious it was. So meaty and so creamy and the light herby flavors really elevated everything!

You can never really go wrong with garlic and rosemary when you are making any chicken dish! Mushroom and chicken also pair really well. If you do not eat meat, you can make this dish with mushrooms only and you will still enjoy it just as much :))

Check out my other pasta dishes : goat meat penne pasta, broccoli and garlic penne pasta, minced beef macaroni (which was one of your favorite #KK 2015 dishes btw <3) and this red wine cheese pasta. After you give my chicken and mushroom pasta an go, be sure to try those out!

XX

-Kaluhi


Get your downloadable recipe here :))

download best african recipes_ Kaluhiskitchen.com recipes_kenyan food recipes


All content and images are copyright protected by
DMCA.com Protection Status
Do not copy in part or whole without giving due credit.

The post Chicken and Mushroom Creamy Pasta appeared first on Kaluhi's Kitchen.

Ice Cream & Cardamom French Toast

$
0
0

I usually treat myself to something nice when my day or week or month has gone especially well and I have exceeded all my goals. I celebrate and congratulate myself each time I achieve something dope! A monthly treat may be something like a new perfume (I have my eyes on Giorgio Armani – Si) ,a book I have been dying to get my hands on or a dress I have been eyeing for a long time. A treat for a day may be a gorgeous moist black forest slice or anything I am craving. Usually it is some ice cream. I am not a sweet tooth, so when I crave ice cream, it comes hard. One night, I treated myself to some ice cream. After few bites, I was off to bed and the next day, I decided to finish treating myself since sleep interrupted my session the previous night. Instead of just having ice cream again, I thought to myself ‘what would happen if I incorporated my favorite ice cream into a dish?’ Curious as to what would happen if breakfast and dessert were combined? Well, the most beautiful ice cream and lime zest French toast would be conceived! <3. Hope you fall in love with this one as much as I have!

PREP TIME: 3 MIN     COOK TIME: 10 MIN     SERVES: 1

Ingredients

2 slices of bread

1 large egg

2 scoops of vanilla ice cream

1 teaspoon of lime zest

1/2 teaspoon of freshly crushed cardamom

Method

Place your ice cream in a bowl and melt your ice cream for about 30 seconds in the microwave or 4 minutes over a a pot of simmering water. IT SHOULD NOT BOIL!!! Let it just melt and mix everything together. Ideally, it should not be warmer than room temperature. Set aside.

I used vanilla ice cream because it is my <3 favorite <3 and also because the flavors are very simple and would more or less be what you use while making french toast: a milky base and some vanilla extract. You can use other flavors, but the other additives may change the overall outcome and taste. Vanilla Ice cream is the best for this recipe. Lastly, whichever ice cream you use, ensure it is of good quality. Those ice creams that are grainy and feel like flour in your mouth will not do this recipe justice.

Beat the egg and add the cool but molted ice-cream to the egg. If the ice cream is hot and yiu add this directly to the egg, you will end up with scrambled eggs. And we do not want that. That is why it is important not to let the ice cream mixture boil.  Mix this until combined.

Add the cardamom and lime zest and mix these in too. When I say lime zest, I am referring to the grated rind of a lime (limau). You can use oranges, tangerines, grape fruit or lemon. Lemons would be particularly be amazing since their sharp tartness would beautifully balance out the sweetness of the ice cream.

Add your slices of bread and allow them to soak in the mixture for a few minutes. If you prefer just to coat your bread and not soak and have it absorb the mixture, you can go right ahead and dip in as opposed to soak it. We are all different and that’s totally fine :)) This mixture smelt SO DAMN GOOD and I had not even started cooking yet!!!

Proceed to cook your ice-cream on a non-stick pan until golden brown on each side. Did I say how good the entire house smelled when this was cooking?! Let me repeat: The house smelt like paradise!!

Garnish with a dollop of plain yogurt or sour cream and some fresh fruit to balance everything out. Serve with some warm milk or some hot tea or coffee.

I have never been so grateful for having  forgotten to have my ice cream and have it melt! Funny how the best of things can come out of the most annoying of situations :D. And my cardamom and lime ice cream french toast is one of those situations! So moist! So creamy! SO FRAGRANT! And so delicious!

The vanilla that is in the ice cream gives the french toast a warm aromatic taste and the creaminess adds a moist velvety texture to the french toast. The cardamom compliments those components while the zestiness of the lime tempers the sweetness. The dollop of plain yogurt was very much welcome and it balanced out the sweetness and the fresh grape introduced such beautiful freshness. Perfection! So perfect for brunch!

After you give my cardamon ice cream french toast a try, check out my other french toast recipes: amarula and cardamom french toast, coconut french toast with caramelized pineapple, and  pumpkin cardamom french toast.

To good food!

-K


Get your downloadable recipe here :))

download best african recipes_ Kaluhiskitchen.com recipes_kenyan food recipes


All content and images are copyright protected by
DMCA.com Protection Status
Do not copy in part or whole without giving due credit.

The post Ice Cream & Cardamom French Toast appeared first on Kaluhi's Kitchen.

Garlic Grilled Tilapia Fillet in Lime Coconut Milk Sauce

$
0
0

After a long day, I just had to make one more run and dash to City Market and buy some fish fillet. It was a pretty hot afternoon, and I just wanted to get home, but I knew what I prepare for dinner make would make the short trip worth while. I got to city market and was pleased to see that they had plenty of freshly filleted fish. I slowly weaved my way through the small market, quietly but very intensely surveying each stock. The sellers, ever eager to earn an extra coin, would try woo anyone that walks through in. “Sister wacha nikifungie fresh” (Sister let me pack some fresh ones for you)  “Mrembo kwani leo hununui kwangu?” (Are you not buying from me today?) “Brenda si leo nikufungie wings” (Let me pack some wings from you, Brenda.) My name is not Brenda by the way, they were literally guessing LOL! I finally settled on one vendor I passed just at the entrance and got myself a juicy cut of tilapia fillet. I rushed home, rested a little bit and embarked on making my dinner. I wanted something delicious, so I had to deliver on all the flavors. And let me tell you, I was not disappointed and totally blown away!! I made this again this past Sunday when we had guests over and it was a hit! And today, I share the recipe to my garlic grilled tilapia fillet with lime coconut milk sauce.

PREP TIME: 30 MIN     MAKE TIME: 20 MIN     SERVES:1

Ingredients:

200g Tilapia fillet

1 tablespoon of soy sauce

Pinch of salt

1/4 teaspoon of Kez Organics Habanero chili

7 cloves of garlic

1 cup of coconut milk

2 tablespoons of finely chopped coriander stalks

1/2 of white onion finely chopped

1/2 a teaspoon of lime zest

1/2 a lime, juiced

1/4 teaspoon of dried thyme


Method

Place your fish fillet in a bowl. To it add the soy sauce, 4 minced garlic, 1/2 of a juiced lime, some salt and the habanero chili (you can use regular chili but make sure you crush it so that all flavors sink in). Slather it all over and let it marinate for about 30 minutes to an hour. You can use lemons too. While marinating fish with a citrus fruit, keep the time not more than an hour. If you do, the acidity will break down the protein and your fish will literally turn to shreds.

Once the time has lapsed, proceed to fry your fillet on a non-stick pan until cooked through. This will take about 8 minutes. Once charred on both sides, slice and set aside.

For the coconut milk sauce which i LOOOOOOOOOOVE!!!! Place your onion, coriander stalks (by stalks I mean the stem of dhania, yaani ile mti soft ya green dania leaves hutokea..), chili, garlic and thyme in a pan. Coriander stalks are so under rated as a kitchen ingredient 🙁 but id you cook with them you will see the difference. Check out this thread I made about coriander stalks. I used white onion since they have a milder flavor but red onion would be ok too. Thyme goes so so well with fish as I said on twitter and this time was no exception. I used dried thyme, which I bought in the supermarket at about 150 bob a can. Everything is in our spice isles! Take your time as you walk through and explore different things. <3

Let it simmer on medium low heat until the onions have softened and the garlic is fragrant. Squeeze in your lime juice, zest & give it a mix then add your coconut milk. I have been a die-hard fan of Kara coconut milk but I recently found a brand I find better by Thai Pride. That is what I used and everything was so balanced out!

You can also use lemon for this recipe, but limes are best since they will give you the acidity you want but not too harshly and have a subtle sweetness which goes well with the coconut milk.

Let this simmer for about 10 minutes for everything to come together. The sauce would also go well with chicken. Place the sauce on your plate, place the fish over it, garnish with fresh coriander and serve. Feel free to lick your screen…

The fish was so tender, so juicy an the marinade sunk in so well. All this was so well complimented with the coconut milk sauce, whose thyme, garlic and lime flavors tied everything together. You can never go wrong with coconut milk and fish!!! Another thing I loved about this dish is that no spices were used, just lots of herbs and other fresh ingredients to really bring out the flavors! and it was ridiculously delicious!!

You can check out my other fish recipes here: my rosemary garlic fish fingers, my chili coconut milk tilapia masala, my tilapia peri peri . But first, let’s take a bite! #S.L.U.R.P

To more great food!

-Kaluhi


Get your downloadable recipe here :))

download best african recipes_ Kaluhiskitchen.com recipes_kenyan food recipes


All content and images are copyright protected by
DMCA.com Protection Status
Do not copy in part or whole without giving due credit.

The post Garlic Grilled Tilapia Fillet in Lime Coconut Milk Sauce appeared first on Kaluhi's Kitchen.

Kuku wa Kupaka

$
0
0

I get excited when my readers from outside Kenya get excited and curious about Kenyan food. I get even more giddy when they try the recipes out!! I got a call one late evening a fortnight ago from a New York Times editor curious to know how I make kuku wa kupaka. “There are many variations of the recipe, but how do you make yours special?” She asked. I explained to her exactly how I usually make mine and I thought it would also be dope if I shared the recipe with you guys. My kuku wa kupaka recipe (which is basically chicken cooked in a coconut sauce) is easy, delicious and regardless of your nationality, you will be able to try this out and enjoy it as well. <3

PREP TIME: 10 MIN          COOK TIME: 25 MIN      SERVES:2

Ingredients

400g of chicken breast

1 cup of coconut milk

1 tablespoon of soy sauce

8 cloves of garlic, minced

1 teaspoon of rosemary

1/2 a teaspoon of chili flakes

1 white onion, finely chopped

1/2 a teaspoon of minced ginger

1 tomato

1/2 a teaspoon of tomato paste

1/4 teaspoon of turmeric

1/4 teaspoon of paprika

1/2 a teaspoon of black pepper

Salt to taste

Vegetable oil for frying

Fresh dhania (coriander) for garnish

Method

First, marinate your chicken breast. Place the breast in a bowl and add 4 cloves of minced garlic, rosemary, soy sauce and chili flakes and let this sit for about an hour but preferably overnight. Remember, the longer you marinate, the deeper and stronger the flavors.

There after, put to boil with a little bit of water or chicken stock. Once almost done, set aside. It will finish cooking through in the coconut sauce so worry not :))

For the coconut sauce: add your white onion (red onion would be perfectly ok!), coriander stalks, minced ginger and the remaining garlic. Allow that to cook until the onions are softened and garlic is fragrant. Coriander stalks (i.e the stem to which dhania leaves emerge from) add a ton of flavor! Do not throw those out. They transform everything they are incorporated to.

Add your tomato and tomato paste along with some salt, my turmeric, paprika and black pepper. This should simmer for about 5-7 minutes. For some people, they prefer not to add tomatoes and/or tomato paste to their kuku wa kupaka, which is totally ok. But I like mine richer and saucier that is why I add both. You can try both and settle on the one you like best. Next, add the coconut milk and mixed it in and let it reduce  for about 7 minutes so that all the flavors come together.

Remember that almost cooked chicken? We are gonna add it to the sauce now. Allow it to simmer on low heat for an additional 5 minutes for all flavors to sink in occasionally rubbing the sauce over the chicken.

Once done, garnish and serve with your favorite starch. Saucy! Meaty! Coconut-y! PERFECT!!

You could never go wrong with a coconut and chicken combination. And I feel regardless of whether you are Kenyan or not, this Kuku wa Kupaka recipe can be attempted by anyone and everyone! You deserve to eat fantastic food! Let this be top on your list <3

I paired my kuku wa kupaka with veg pilau as goat/beef pilau would take away from the meaty of the dish and make it too meaty. Veg pilau, which I made with peas, beautifully brought out the kuku wa kupaka flavors and was a match made in heaven. This saucy dish would also go so well with ugali, rice, chapati and any other starch.

XX

-K


Get your downloadable recipe here :))

download best african recipes_ Kaluhiskitchen.com recipes_kenyan food recipes


All content and images are copyright protected by
DMCA.com Protection Status
Do not copy in part or whole without giving due credit.

The post Kuku wa Kupaka appeared first on Kaluhi's Kitchen.


Coconut Milk Chili Bean Stew

$
0
0

I have been doing a back to basics series on my Instagram Stories for a couple of months now. I have not done one in quite a long time though (sorry guys :((((, life got in the way. ). Some of the recipe request I got were too detailed to be done as a back to basics so I will instead post them as blog posts; and my coconut milk chili bean stew is one of them. One of my followers requested for a bean stew, thought there is one I posted in 2015, I decided to make one that is richer and in my opinion of fuller flavor. What would a Kenyan food blog be without a coconut milk bean stew be after all?! 😉

With warming flavors of chili and garlic, this one soooo perfect for July-August when it is much cooler in Kenya. And I promise, it is so easy to make too <3

PREP TIME: 15 MIN     COOK TIME: 40 MIN    SERVES:7

Ingredients

2 cups of beans (wairimu)

6 cloves of garlic

1 red onion, diced

1 green bell pepper, finely chopped

1 tomato, minced

2 carrots, cubed

1 bird’s eye chili, finely chopped

1/2 tablespoon of whole cumin seeds

400g of coconut milk

1 tablespoon of tomato paste

1/2 teaspoon of turmeric

2 tablespoons of Royco

Finely chopped coriander


Method

Wash your beans and let them soak for about 6 hours or overnight. The soaking will greatly shorten the time it will take for them to boil. After they have soaked to your desire, put them to boil together with the cumin seeds. The flavor of the cumin is always so well taken up by the beans and for me it is a must use! I bought my cumin seeds form Tuskys Kenyatta Avenue at 70 bob a pack and they have lasted me over a year! Once your beans are done, set them aside.

In a sufuria, add your onion, green hoho and garlic and let this cook in your oil for about 3 minutes. Be careful not to burn your garlic as it will make the entire dish bitter.

Add the tomatoes, chili, spices tomato paste and let this simmer on medium low heat for about 5-7 minutes until everything comes together. You can always adjust the chili quantity according to your preference.

Before adding the spices, especially for a stew, I usually mix them in a bowl with a little bit of water so that they mix evenly and do not clump and form balls in the stew. It was so fun to get those clumps of royco in our food while in boarding school :DD but now we know better, so we do better. There after, add your boiled beans together with 1/4 cup of water (please do not add an ocean of water!!).

 After 4 minutes, add the coconut milk and the carrots and mix everything in. I add the carrots during the final phase of cooking so that they retain a bit of crunch. Allow this to cook for about 15-20 minutes on low heat so that everything comes together and the flavors marry.

Do not rush the process <3. Once this is done, garnish with fresh coriander and serve.

Forget cuddling with bae, all you need to keep warm and cozy these cold nights is my coconut milk chili bean stew. Nothing else will make your senses come alive as much as this stew will.

The coconut milk is so fragrant and besides adding a ton of flavor to the stew, it added fantastic thickness to the stew. You get mild pops of cumin and you eat and the warming flavor of the garlic which gives way to the mild heat of the chili. So rich! So saucy! So delicious!

Serve this with some chapati, some wali wa nazi, or whichever starch you fancy! <3

Keep it K!

<3


Get your downloadable recipe here :))

download best african recipes_ Kaluhiskitchen.com recipes_kenyan food recipes


All content and images are copyright protected by
DMCA.com Protection Status
Do not copy in part or whole without giving due credit.

The post Coconut Milk Chili Bean Stew appeared first on Kaluhi's Kitchen.

Garlic & Mustard Chicken Omellete

$
0
0

I love discovering fantastic Kenyan brands that always deliver on quality, flavor and really bring something new to the market. Last year I attended the first ever Nairobi Food Market where all these products were paraded in all their glory! Thy were so many, and I wanted to have them all, but my wallet dictated otherwise. I settled on only my favorites for the day which were, African Kaya Sweet Chili Sauce (which my eldest sister LOVED too and stole from me went home with it), Need Gelato and a strawberry whiskey jam by Jars Of Goodness (which my youngest sister stole from me left for school with). Since that food market, I have always loved all Jars of Goodness products and make sure I have something form them in my fridge. Check them out here. I had some sundried tomato mustard from them and decided to play around with it and came up with the best ever omellete!

Brunch is made for delicious food and fun company <3! And among the savory dishes I love to have most is my garlic and mustard chicken omellete!

PREP TIME: 7 MIN          COOK TIME: 10 MIN        SERVES: 1

Ingredients

2 eggs

1/2 a cup of finely chopped left over chicken

1 white onion, diced

2 cloves of garlic, minced

1/4 teaspoon of chili flakes and add the onion, garlic and

1 teaspoon of rosemary, finely chopped

1/4 teaspoon of Jars of Goodness Sun dried Tomato Mustard

1 tablespoon of grated hoho (of finely chopped dania stems)

3 tablespoons of milk


Method

Take your left over chicken and cut it up into small shreds. The smaller you cut your chicken, the better it will be for the omellete. Huge chunks will also make it a bit difficult for you to roll so keep it small.

 Set aside. In a pan, add your vegetable oil and add the onion garlic and the chili flakes. I used Kez Organic Chili flakes (another AMAZING!! Kenyan product), but is you do not have some readily, regular chillies will be just ok. Let this cook until it is fragrant.

***

You can also make your own chili flakes right at home by sun-drying your fresh chillies until they loose all water content. The time taken will vary depending on the weather, but it will obviously take a shorter time when it is super hot like Jan-Feb-Mar. Once your chillies are dried up, either blitz them in a food processor of crush them in a kinu and there you have your chili flakes! So easy! I like these because their flavor is more concentrated and a little goes a long long way!

***

Add the chicken and your rosemary then let this cook and further brown. This will take about 5 minutes since it is already cooked. Because the chicken was already salted and seasoned (this is the recipe I used for this left over chicken) , I did not add more salt or spices as it would be overpowering. But id the chicken you will be using will not have any seasoning, like mcfrys chicken, please make sure you season it a little bit at this stage. Add your sundried tomato mustard and give this about 3 more minutes on the heat then set aside. Besides cooking with it, I think the sundried tomato mustard would make an excellent marinate ingredient for chicken and fish as well as a nice one for a nyama choma wet rub. It is very potent and a little goes a long long way!

In a small bowl, crack your eggs and add your grated hoho (green bell pepper) , a dash of salt and your milk. I used ginger and some dhania stems in this post and the outcome was amazing! Do not shy away from mixing things up too and changing this recipe to suit your taste <3

Whisk this until pale yellow and frothy. Pour this onto your pan and let it slowly cook on low heat. Do not rush the process!!!!! Before the egg completely sets, sprinkle your chicken strips over the surface so that they can stick onto the surface as the egg cooks. I wish I had cheese which I would have grated onto the chicken for extra flavor though!!

Once it have reached your preferred level of moistness/wetness, roll your omellette and  serve.

If there is something you HAVE TO make this weekend, It has to be this meaty omellete. If you have some left over chicken in your fridge, you have no excuse really!!! You can however use any other leftover meat you have and it will be just fine!!

This would make a perfect dish for the savory dishes for a nice filling brunch! Other brunch dishes for my banquet I would serve this with are my  garlic potato wedges, sweet chili wings, triple d drumsticks and for some sweetness, an oat smoothie bowl and my amarula crepes with macerated strawberries. I would invite my friends over and we would eat till we cant walk. Literally!

To good food!

-Kaluhi


Get your downloadable recipe here :))

download best african recipes_ Kaluhiskitchen.com recipes_kenyan food recipes


All content and images are copyright protected by
DMCA.com Protection Status
Do not copy in part or whole without giving due credit.

The post Garlic & Mustard Chicken Omellete appeared first on Kaluhi's Kitchen.

Blogniversary: My Four Little Things

$
0
0

Wow!!! Three years behind me and the road ahead seems even more promising and exciting!. Who would have imagined that a silly idea of starting a blog on July 27th would have grown stronger with time? I certainly did not! But it has been without doubt one of the best decisions I have made in my entire life! Has it been easy? Hell naw! But has it been worth it? Heck yea!!

Looking back on my three years, I am nothing but grateful for each one of you for enriching my journey, critiquing me, encouraging me, laughing with me and of course, making BOMB food with me. As I start my fourth year today (OMG how fast has time flown by!!), here are four little things about my journey, random ones about my self and anything else that I have learnt and have carried me through.

Four things (good and bad) I have learnt about myself over the past three years:
I second guess myself a lot 🙁
You know when you think of doing something, you know very very very well that you can do it, but somehow talk yourself out of doing it? That’s me! I do not know which demon has made a permanent home on my shoulder whispering into my ear that I cannot do what I want to do. I get so scared! But I decided deal with that by doing exactly what I fear doing. I mean, what’s the worst that could happen? This involves a lot of mirror pep talks to get myself out of that funk, and when I do, I shock myself with the might and power I wield. Let me tell you, those mirror motivational speeches you give your self work!! So as I start my fourth year, Here’s to gassing myself up more! Reminding myself more of my power, my strengths and abilities instead of downplaying them. (How dare I???) Here’s to greatness!!

I feel guilty while resting
I can’t possibly be the only one who struggles with this! It is one of the very very bad things I picked from highschool; where if you actually rested during break-times, you were seen as lazy and rebellious. It was almost an unwritten rule that you had to be seen studying 24/7 except only when you were asleep, at mass or eating. Funny how seemingly innocent things drilled into your mind over 4 years can affect you years later….That toxicity of believing rest as a sign of laziness is something I am slowly getting over.  Rest is so necessary, especially as a creative when those blocks come at you hard! I will do my long hours and have my late nights; squeeze in a million activities in my day as efficiently as I can, but when it comes to resting tome, I let go and completely unwind. Resting is not laziness, it is *explentive* necessary!

Quiet assertion >>> Violent aggresion
As an entrepreneur,  I have found that quiet assertion gets one further and leaves a lasting impression compared to violent aggression. Yes, there are times when you have to be mkali sana , but most times, a little assertion goes a long long way. It is much easier to get a lot done by firmly but warmly getting your message across rather than aggressively and coldly putting your point across. I have learnt when to use force and when not to. You can always own the situation and control the narrative without being overly aggressive. Quiet assertion has always been better than aggression when you want to get things done well.

I love that my success so far is a stepping stone for those coming after me

I am where I am because of those who got into food blogging long before I did and paved the way for me. They are African Kaya, Pendo la Mama and Leo Tunapika?. Because of them, I am here. And because I am here, I too hope that each barrier I break and every possibility I turn into a reality will pave way for those coming after me. There is room for all of us to prosper, so if you want to get in, DO IT! If you need, help, ask me! I will not shut you down. If you haven’t, please read this post about Food blogging and how to get started.

Four places I hope to travel to in my fourth year

Just to be clear, my MAIN motivation for going to these places is to experience the amazing food scene (no shame in the greed game!! *snort*) and everything else that influences it.

  1. Cape Town: Food capital of Africa! I am ready to taste the finest the continent has to offer. I am ready to sink in a boatfull of your wines! I am ready to learn, to savor how fearlessly you combine flavors! I. AM. READY . FOR. CAPETOWN!!
  2. New York: Mighty concrete jungle with restaurants more that I could count with influences from all over the world. I want to eat New York with a shovel big spoon!! I want to delve deep into the restaurant scene  and really see how amazingly other people are modernizing their native cuisines.
  3.  Marrakesh: Mainly for their bold and fearless use of spices, this Morrocan city has it’s hold on me! I want to taste the everything they have as prepared by the locals. Plus have major photo shoots in their beautiful towns because a travel trip is not complete without taking 1,287,356 pictures a day, right?
  4. Kyoto: This is where you really get to experience Japanese food at it’s best! I have always been fascinated by Japan since I started studying Japanese in Uni. Their food is so different from ours and that peaked my curiosity even more. Top on my list when I get there: Natto

Four feelings that power me:
Love
Surely my work would have no substance if I did not love what I did! Deep deep love for what I do! Nearly all inspiration for my recipes come from people I love,  and made for people I love. I always hope that each time you prepare one of my, you feel the love too! Coz plenty of it goes in there! <3

Fear
This is the one negative emotion that drives me to excellence. I fear average. I fear not being fulfilled by what I do. I fear of regretting that I never did my best. Fear of ordinary. Fear of forgettable. I never ever want to look back and see that at one point I was not my very best. So I do put in my very best every single day!

Pride

You know that glowing feeling you get when you share what you did that’s feel is beautiful? I feel so so proud when I share my best work! I feel proud when my country is noticed on the global scene as a result of my work! I feel proud about owning and building something that will be spoken of for generations to come! And that keeps me motivated in putting in my best and always placing my best foot forward. It is not about being the best, but about being my best!

Vulnerability
I own my mistakes and I am not ashamed of them. No one is perfect . And I feel by owning them, and even openly speaking about them, is how I grow and let you guys know where I went wrong so that you too shouldn’t make the same mistakes.  Remember this post about my worst food fails :D?

Four things I hope to achieve in the coming year:
I don’t know LOL! I have plenty going on so let me just go with the flow…
* My own spice range maybe?
* A kitchen ware and dinner ware line maybe?
* My own show on Food Network Maybe?
* #KK Sauces and dips maybe?

I do not know 😀 . Let us just take each day as it comes and let us see how the rest of the year all unravels <3. Which ever way(s) I go, you guys will love it and I would be honored to have you on my new exciting path! <3 <3 <3

*ROLLS UP SLEEVES*

Four things I hope for my darling readers:
<3 That you will find your life purpose and relentlessly follow your reams. That you find a way to make a living our of your God given gifts. That you live life full of uncontainable zest. That you are kind to everyone you meet. Believe that you are unstoppable (coz you are) and the world is indeed your oyster!

<3 That you will try out a good juicy perfectly seared medium rare steak at least once each month as a treat!

<3 That you will deliberately seek to add value to the lives of those around you, be it through your work, through your words or through your actions. Make it deliberate to be a good human being.

<3 That you will find absolute peace and happiness in everything you do!

To exciting times ahead!

-Kaluhi

The post Blogniversary: My Four Little Things appeared first on Kaluhi's Kitchen.

Thyme Broccoli Soup

$
0
0

Nairobi evenings can be bitterly cold this time of year. All I ever think about at the close of each day is getting home, having a blisteringly hot shower, slipping into some warm socks and having a hot cup of tea with my favorite biscuits (of course after some supper :))) As I raced towards my matatu stage, I glanced down at the goodies hawkers were selling and momentarily stopping to purchase some things, as usual! After bagging an amazing faux leather coat and cute doll shoes, I couldn’t let myself head home without some veggies! “Madam kuja uchague fresh!!” (Madam come and select fresh ones!!”); one of the lady hawkers exclaimed to me as she stacked her broccoli heads one over the other. I stopped, slowly selected my four broccoli as the droves of people pushed against me on the streets. As I paid, she told me to try make soup with them; that it would be delicious and that I would enjoy it. I thanked her for the veggies and for the idea as that is exactly what I was going to do- make a hearty delicious soup with my broccoli.

My favorite soup yet has got to be this thyme chili broccoli soup! So light and so delicious you will need 700 bowls before you are completely full! So perfect for chilly Nairobi this August! Mtapenda! <3

PREP TIME: 10 MIN        COOK TIME: 20 MIN     SERVES: 1

Ingredients

1 head of broccoli

½ a teaspoon of thyme

¼ teaspoon of chili flakes

1 teaspoon of finely chopped rosemary

1 red onion

5 cloves of garlic

Salt to taste

Heavy cream for garnish (optional)

Method
In a pan, add your red onion, garlic, thyme and rosemary to cook until fragrant. This helps really develop the flavors and help everything come together as opposed to simply mashing everything together uncooked. Very important step! I used dried thyme which I purchased form our everyday supermarket at 120 bot a can. Besides soup, you can use it in veg and meat stews, dry fries, in marinades…literally everywhere! It is my current favorite ingredient.

After the oniona have softened, add the broccoli florets and let then cook in the herbs for about 3-5 minutes add some water or vegetable stock (remember when we made vegetable stock here?) then let this boil until the florets are **just** soft.

Drain the water into a cup for later use and let the vegetables cool for about 5 minutes. This water, otherwise known as stock has a ton of flavor, and using it in the soup will capture and retain all that flavor as opposed to using just water.

Place the veggies in your blender and blitz while pouring the stock bit by bit until you reach the level of consistency you prefer. I like my soup a bit on the thicker side so a bit of stock was ok. Some people may prefer to use milk too and that is still fine if that is what you like. Just make sure you balance the flavors out.

Once done, ladle this onto a bowl and garnish with some heavy cream (totally optional. Bought my heavy cream from CarreFour but it is available in any well stocked supermarket as well.), some remaining broccoli florets then sprinkle some chili flakes. You could warm your soup a little bit if need be if  it’s not as warm as you’d like just before serving.

Slurp away!

So light, so warming ans very very filling! I particularly loved the scoops that had broccoli florets as they provided such a pleasant textural contrast. The chili and the garlic brought in the warming aspects and the overall freshness of the broccoli made this one soup you will crave each day of this cold season!

You can check out my other soup recipes: my butternut and toasted pumpkin seed soup, my tomato and ginger soup and my carrot and grilled   soup. But before you try those three out, you MUST try out my thyme broccoli soup! <3

Keep warm! <3

-K


Get your downloadable recipe here :))

download best african recipes_ Kaluhiskitchen.com recipes_kenyan food recipes


All content and images are copyright protected by
DMCA.com Protection Status
Do not copy in part or whole without giving due credit.

The post Thyme Broccoli Soup appeared first on Kaluhi's Kitchen.

Chili Oregano Kamande

$
0
0

I have always loved kamande. In my opinion, they are low key more lit than ndengu, but because they are slightly more expensive than ndengu they have become a once in a while thing for me. But when I do prepare them, I eat them every single day of the week until they run out.  I grew to love them even more when I used to be in the 8-5 grind. The place I used to work before I took on Food Blogging full time used to give us lunch! Such a blessing that was. On Wednesday, kamande was on the list and served with roti and okra. I lived for this day!! Literally started counting down to lunch time the moment I sat on my desk at 8 a.m. LOL! And I was always first on the queue! No shame 😀

As a celebration of the meal I used to enjoy most at my former work place, I gave kamande some #K treatment. I hope that you too enjoy my chili oregano kamande.

PREP TIME: 20 MIN       COOK TIME: 20 MIN     SERVES:2

Ingredients

1 cup of Kamande

1/2 a teaspoon of chili flakes

1 teaspoon of garam masala

1/2 a teaspoon of dried oregano

1 teaspoon of black pepper

5 cloves of garlic

1 red onion, diced

2 tomatoes, grated

1 tablespoon of tomato paste

Salt to taste

Vegetable oil for frying

Method

In a container, place your kamande (lentils) to soak overnight. Once done. Allow them to boil until softened then set aside.

In a sufuria, add your diced onion with the minced garlic and the chili and oregano then allow this to cook until softened and fragrant. I bought my oregano form carrefour at 120 bob a can and you can get it too at any well-stocked supermarket. Besides kamande, you can use your oregano in githeri, ndengu, meat stews, potato stews, egg curry etc. It is not a herb you will buy and never use again. It goes well with nearly everything.

If you do not have chili flakes, fresh chili or cayenne pepper will work just fine! Also, check out this post where I showed you how easy it is to make your own chili flakes.

Then, add the tomatoes and tomato paste, black pepper and garam masala (which is also so bomb with ndengu!!) and let this simmer for about 3 minutes. Then add 1/4 cup of hot water and let this simmer for about 7 minutes so that all the flavors meld and the sauce thickens. Always add 1/4 cup at a time and stop adding more water once you reach the level of thickness you love.

There after, add your pre-cooked kamande and mix them in.

Allow them to simmer on low heat for about 10-15 minutes for the mchuzi to thicken. Once everything has come together, serve! <3

As temperatures plummet, why not cosy up to the best stews you can ever have? And the stews you will find here are definitely the best of the best. If you love Kamande, you will love this chili and oregano kamande even more!! The chili , coupled with the garlic, warms you up. The oregano elevated their overall flavor and the garam masala compliments their subltle earthiness.

Are you ready to have the best kamande you will ever have? I bet you are!

xx

-Kaluhi


Get your downloadable recipe here :))

download best african recipes_ Kaluhiskitchen.com recipes_kenyan food recipes


All content and images are copyright protected by
DMCA.com Protection Status
Do not copy in part or whole without giving due credit.

The post Chili Oregano Kamande appeared first on Kaluhi's Kitchen.

Viewing all 286 articles
Browse latest View live